Content .. 1022 1023 1024 1025 ..
Nissan Pathfinder. Instruction - part 1024
SE-94
< REMOVAL AND INSTALLATION >
SECOND ROW SEATS
Removal and Installation
INFOID:0000000009727779
LH SEAT
Removal
CAUTION:
• Before removal and installation, use shop cloths to protect parts from damage.
• During removal and installation, an assistant is required to protect against injury or damage.
1. Remove the rear kicking plate (LH). Refer to
INT-22, "KICKING PLATE : Removal and Installation - Rear
.
2. Remove the headrests (LH/RH).
3. Slide the seat to the full rearward position.
4. Remove the front slide finishers (LH/RH).
a. Pull up on the front edge to release pawls.
b. Then slide forward to remove from seat track.
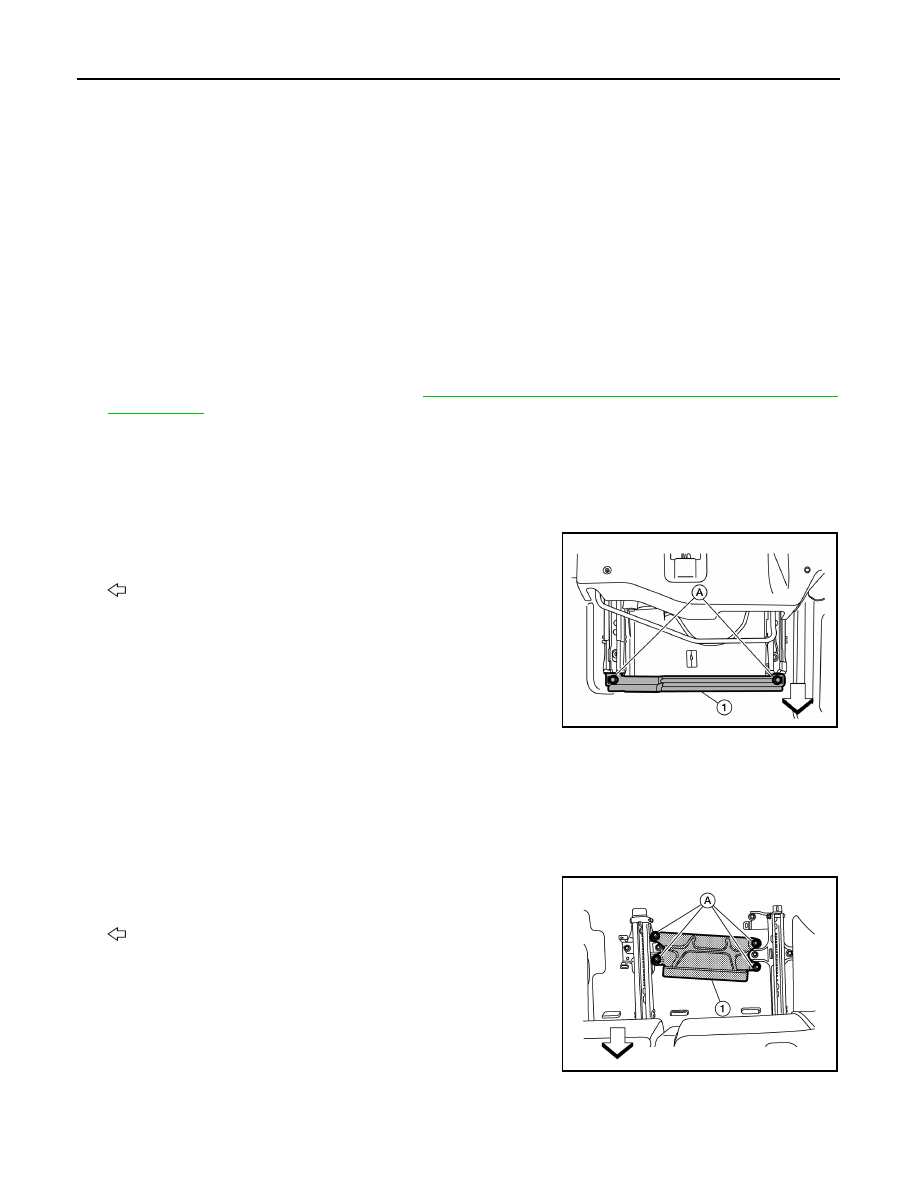
5. Place the front cross brace (1) from Seat Fixture Kit [SST: — (J-
51030)] over the track alignment holes, then insert the two LH
threaded bolts (A) through the brace into the track and tighten.
: Front
6. Disconnect the harness connector (if equipped), then release from seat frame assembly.
7. Remove the seat front bolts.
8. Slide the seat to the full forward position.
9. Remove the rear slide finishers (LH/RH).
a. Pull up on the rear edge to release pawls.
b. Then slide forward to remove from seat track.
10. Place the rear cross brace (1) from Seat Fixture Kit [SST: — (J-
51030)] over the track alignment holes, then insert the four LH
threaded bolts (A) through the brace into the track and tighten.
: Front
11. Remove the seat rear bolts.
12. Fold the seatback in the flat position, then remove the seat from the vehicle.
19. EZ entry cable
20. Support strut
21. Inner finisher (LH)
22. Outer finisher (LH)
23. Seat harness
24. Seat cushion release cable
25. Seat slide release cable
26. Seat belt buckle
27. Rear finisher
28. Trim stiffener
29. Seatback board
30. Tether anchor finisher
31. EPP upper panel
32. Support finisher
33. Seatback pad
34. Seatback trim
35. Headrest holder (locked)
36. Headrest holder (free)
37. Headrest
A.
Seat cushion pivot bolt
ALJIA1106ZZ
AWJIA0954ZZ