LEXUS GX 460 (2019 year). Manual - part 14
216
4-3. Operating the lights and wipers
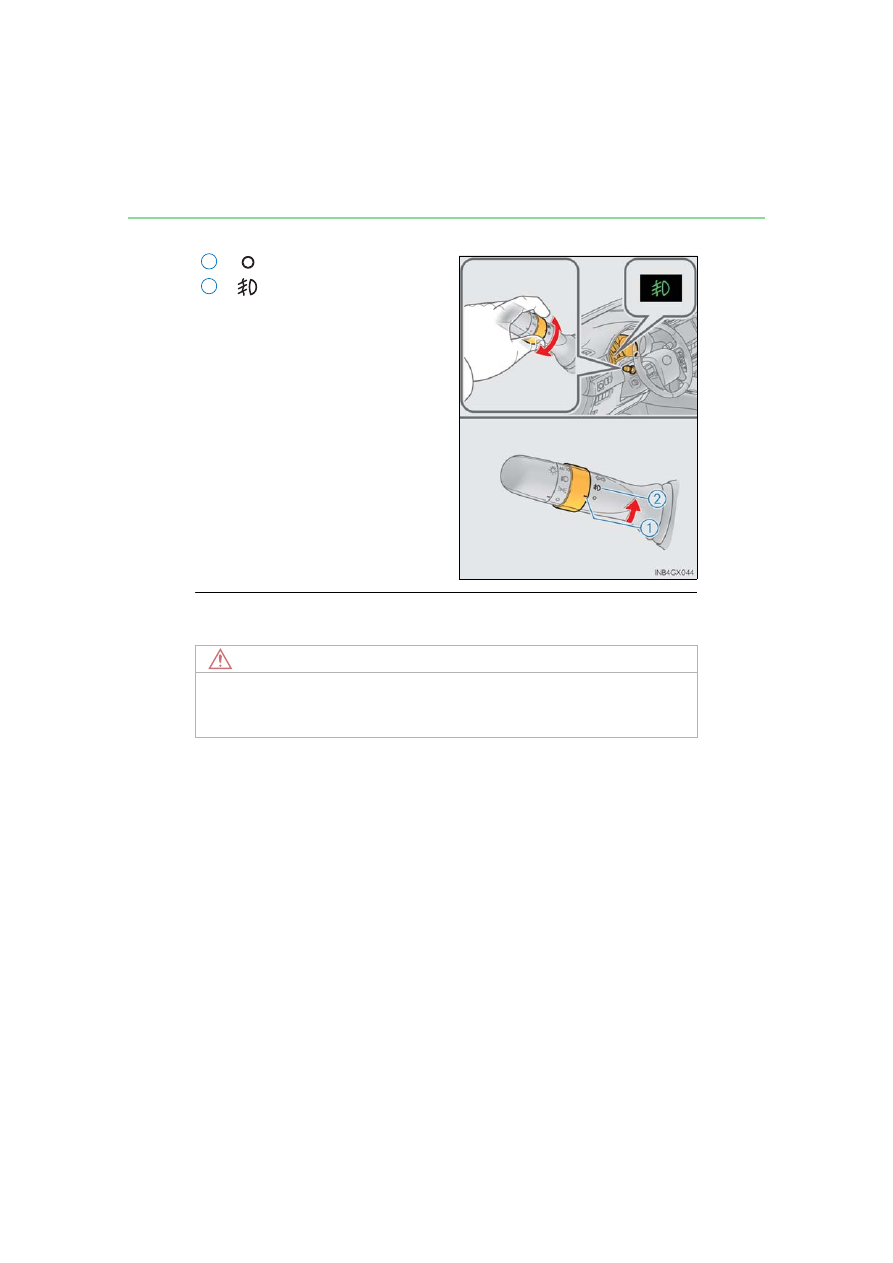
Type B
Turns the fog light off
Turns the fog light on
■
Fog lights can be used when
The headlights are on in low beam.
1
2
NOTICE
■
To prevent battery discharge
Do not leave the lights on longer than necessary when the engine is not running.