Lexus ES300 (1997 year). Service manual - part 86


  Index      Lexus     Lexus ES300 - service and repair manual 1997 year


Search            


Content   ..  84  85  86  87   ..


Lexus ES300 (1997 year). Service manual - part 86


AUTOMATIC TRANSAXLE

OVERDRIVE UNIT

-

AX-71

2.

REMOVE OIL SEAL RINGS

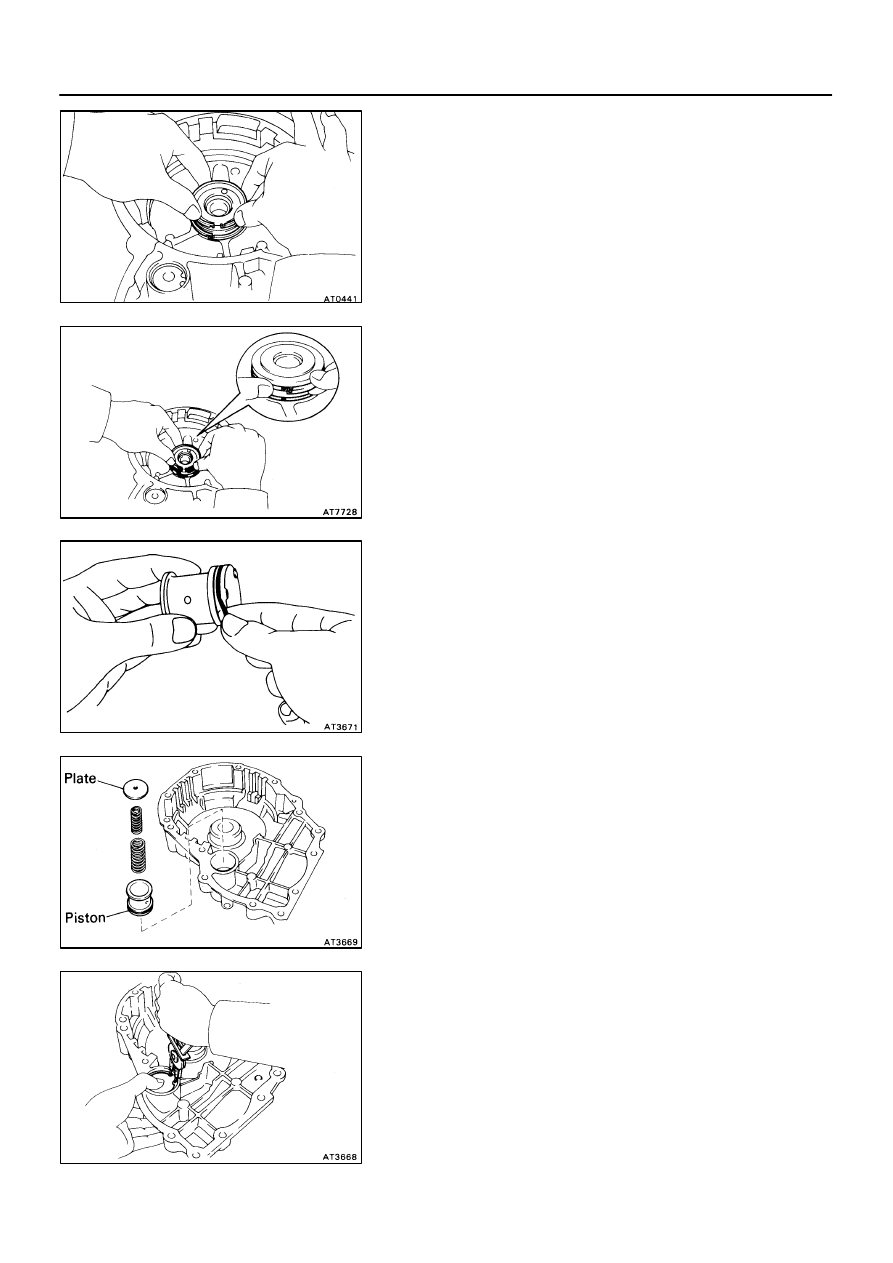
OVERDRIVE CASE ASSEMBLY

1.

INSTALL OIL SEAL RINGS ON OVERDRIVE CASE
Install the 2 oil seal rings to the overdrive case groove,
then snug them down by squeezing their ends together.
HINT: After installing the oil seal rings, check that they
move smoothly.

2.

INSTALL C0 ACCUMULATOR PISTON TO OVER-
DRIVE CASE

(a)

Install a new O-ring to the accumulator piston.

(b)

Coat the O-ring with ATF.

(c)

Install the accumulator piston, 2 springs and retaining
plate.

(d)

Using snap ring pliers, install the snap ring.

AX042-02

AUTOMATIC TRANSAXLE

OVERDRIVE UNIT

-

AX-72

OVERDRIVE BRAKE ASSEMBLY

1.

INSTALL PISTON INTO DRUM

(a)

Install new O-rings to the piston.
Coat the new O-rings with ATF.

(b)

Press the piston into the drum, being careful not to dam-
age the O-rings.

2.

INSTALL FLANGE, DISCS AND PLATES
Install the flange, discs and plates.
Install in order:
P=Plate D=Disc
Flange-D-P-D-P-D-P

3.

POSITION PISTON RETURN SPRING

AX043-05

AUTOMATIC TRANSAXLE

OVERDRIVE UNIT

-

AX-73

4.

INSTALL SNAP RING INTO CASE
Be sure the end gap of the snap ring is not aligned with
one of cutouts.

5.

INSTALL OVERDRIVE PLANETARY GEAR ONTO OV-
ERDRIVE DIRECT CLUTCH
While turning the overdrive planetary gear clockwise,
install it onto the overdrive direct clutch.

HINT: If the overdrive planetary gear is properly installed
onto the direct clutch, the counter drive gear height from
the overdrive case will be about 24 mm (0.94 in.).

AUTOMATIC TRANSAXLE

VALVE BODY

-

AX-74

VALVE BODY

COMPONENTS

VALVE BODY DISASSEMBLY

NOTICE: When disassembling the valve body, be careful

not to damage or deform the plate which overhangs the

valve body.

1.

REMOVE SOLENOIDS

(a)

Remove No.1 and No.2 solenoids with the retainer.

NOTICE: When removing the solenoid, do not use a screw-

driver, etc. to pry up the solenoid.

(b)

Remove the O-ring from each solenoid.

(c)

Remove the No.3 solenoid.

(d)

Remove the O-ring from the solenoid.

AX044-02

AX0TW-01


Content   ..  84  85  86  87   ..