Jeep Compass (2019 year). Manual - part 4


  Index      Jeep     Jeep Compass - service manual 2019 year in english


Search            copyright infringement  


Content   ..  2  3  4  5   ..


Jeep Compass (2019 year). Manual - part 4


WARNING!

• Persons who are unable to feel pain to the skin

because of advanced age, chronic illness, diabetes,
spinal cord injury, medication, alcohol use, exhaus-
tion, or other physical conditions must exercise care
when using the steering wheel heater. It may cause
burns even at low temperatures, especially if used
for long periods.

• Do not place anything on the steering wheel that

insulates against heat, such as a blanket or steering
wheel covers of any type and material. This may
cause the steering wheel heater to overheat.

MIRRORS

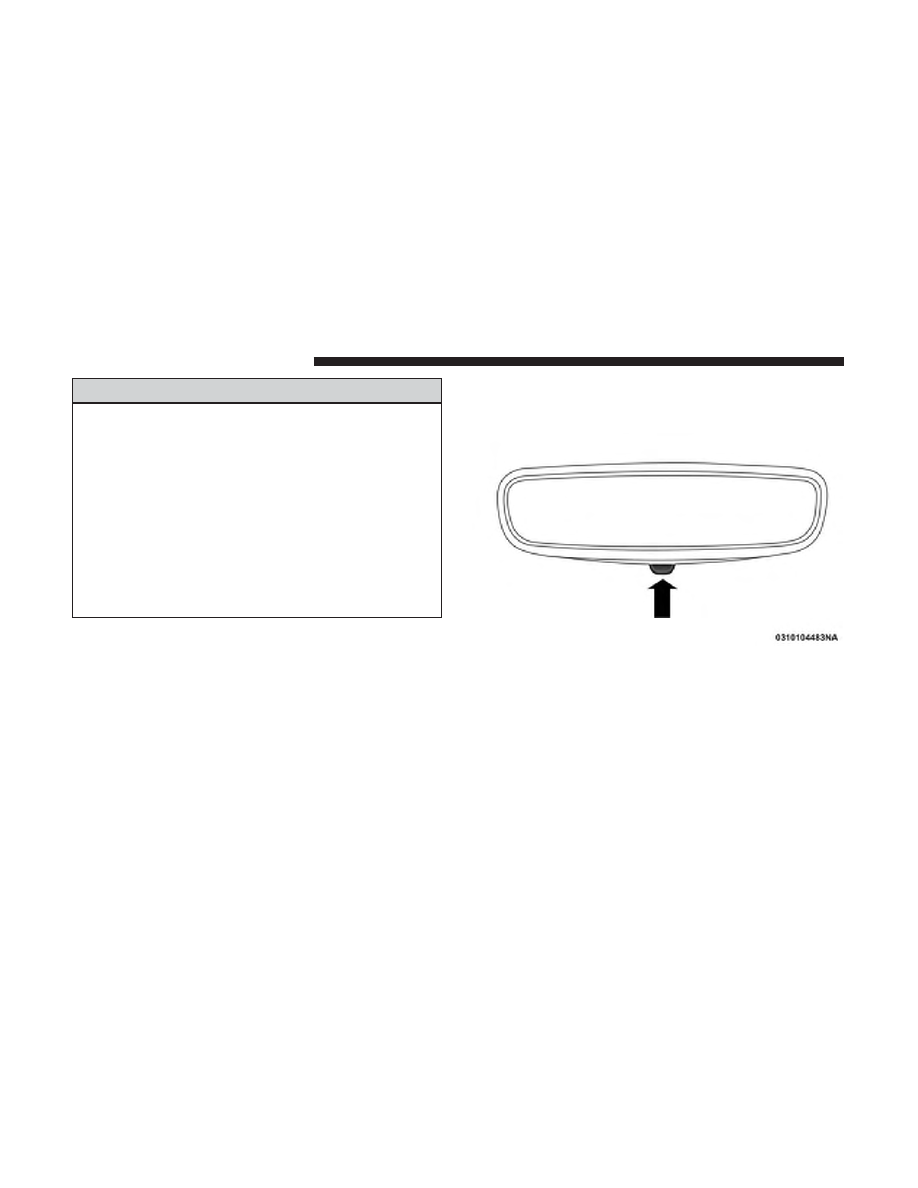
Inside Day/Night Mirror — If Equipped

This is a single ball joint mirror that fixes to the windshield
button with a counter clockwise rotation. No tools are
needed for mounting. The mirror head can be adjusted left
and right, or tilted up and down for various drivers. The
mirror should be adjusted to center on the view through
the rear window.

Headlight glare from vehicles behind you can be reduced
by moving the small control under the mirror to the night

position (toward the rear of the vehicle). The mirror should
be adjusted while set in the day position (toward the
windshield).

Electrochromic Mirror — If Equipped

This is a single ball joint mirror that fixes to the windshield
button with a counter clockwise rotation. No tools are
needed for mounting. The mirror head can be adjusted left
and right, or tilted up and down for various drivers. The
mirror should be adjusted to center on the view through
the rear window.

Adjusting Rearview Mirror

52

GETTING TO KNOW YOUR VEHICLE

This mirror automatically adjusts for headlight glare from
vehicles behind you.

NOTE:
• The Electrochromic Mirror feature is disabled when the

vehicle is in REVERSE to improve rear view viewing.

• The Electrochromic Mirror feature can be turned on or

off using the button located on the mirror.

CAUTION!

To avoid damage to the mirror during cleaning, never
spray any cleaning solution directly onto the mirror.
Apply the solution onto a clean cloth and wipe the
mirror clean.

Outside Mirrors

To receive maximum benefit, adjust the outside mirror(s) to
center on the adjacent lane of traffic and a slight overlap of
the view obtained from the inside mirror.

NOTE:

The passenger side convex outside mirror will give

a much wider view to the rear, and especially of the lane
next to your vehicle.

WARNING!

Vehicles and other objects seen in the passenger side
convex mirror will look smaller and farther away than
they really are. Relying too much on your passenger
side convex mirror could cause you to collide with
another vehicle or other object. Use your inside mirror
when judging the size or distance of a vehicle seen in
the passenger side convex mirror.

Automatic Dimming Button

3

GETTING TO KNOW YOUR VEHICLE

53

Power Adjustment Mirrors

The power mirror switch is located on the driver’s door
panel.

To adjust an exterior power mirror, select the right or left
side using the mirror selector switch, then push the mirror
adjustment switch in the desired direction indicated by the
direction arrows.

NOTE:
• To adjust the power mirrors, the ignition must be in the

ON/RUN position.

• Once the mirror is adjusted, rotate the control to the

neutral position to avoid accidental movements.

Power Mirror Switch

1 — Power Folding Mirror Switch
2 — Mirror Selector Switch
3 — Mirror Adjustment Switch

54

GETTING TO KNOW YOUR VEHICLE

Folding Mirrors

The exterior mirrors are hinged to allow the mirror to pivot
forward or rearward to help avoid damage. The mirror has
three detent positions: full forward, normal and full rear-
ward.

Power Folding Mirror — If Equipped

The switch for the power folding mirrors is located in the
power mirror switch.

Push the switch once and the mirrors will fold in, pushing
the switch a second time will return the mirrors to the
normal driving position.

Resetting The Power Folding Outside Mirrors

You may need to reset the power folding mirrors if the
following occurs:
• The mirrors are accidentally blocked while folding.
• The mirrors are accidentally manually folded/unfolded.
• The mirrors come out of the unfolded position.
• The mirrors shake and vibrate at normal driving speeds.
To reset the power folding mirrors: Fold and unfold them
by pushing the button (this may require multiple button
pushes). This resets them to their normal position.

Puddle Lamps — If Equipped

Located under the exterior mirrors is a small lamp that
illuminates the ground when the doors are unlocked with
the key fob or when the doors to the vehicle are open.

Heated Mirrors — If Equipped

These mirrors are heated to melt frost or ice. This
feature will be activated whenever you turn on the

rear window defroster (if equipped).

Refer to “Climate Controls” in this section for further
information.

Folding Exterior Mirror

3

GETTING TO KNOW YOUR VEHICLE

55

Illuminated Vanity Mirrors

An illuminated vanity mirror is located on each sun visor.
To use the mirror, rotate the sun visor down and swing the
mirror cover upward. The lights will turn on automatically.
Closing the mirror cover will turn off the light.

Sun Visor “Slide-On-Rod” Feature — If Equipped

The sun visor “Slide-On-Rod” feature allows for additional
flexibility in positioning the sun visor to block out the sun.

1. Fold down the sun visor.

2. Unclip the visor from the center clip.

3. Pivot the sun visor toward the side window.

4. Extend the sun visor blade for additional sun blockage.

NOTE:

The sun visor blade can also be extended while the

sun visor is against the windshield for additional sun
blockage through the front of the vehicle.

Illuminated Vanity Mirror Cover

56

GETTING TO KNOW YOUR VEHICLE

EXTERIOR LIGHTS

Multifunction Lever

The multifunction lever controls the operation of the turn
signals, headlight beam selection and passing lights. The
multifunction lever is located on the left side of the steering
column.

Headlight Switch

The headlight switch is located on the left side of the
instrument panel. This switch controls the operation of the
headlights, parking lights, automatic headlights — if
equipped, instrument panel lights, instrument panel light
dimming, interior lights and fog lights — if equipped.

Rotate the headlight switch clockwise to the first detent for
parking light and instrument panel light operation. Rotate
the headlight switch to the second detent for headlight,
parking light and instrument panel light operation.

Multifunction Lever

Headlight Switch

3

GETTING TO KNOW YOUR VEHICLE

57

Daytime Running Lights (DRL) — If Equipped

The Daytime Running Lights will turn on when the engine
is started and remain on unless the headlamps are turned
on or the ignition is turned OFF.

NOTE:

If allowed by law in the country in which the

vehicle was purchased the Daytime Running Lights can be
turned on and off using the Uconnect System, refer to
“Uconnect Settings” in “Multimedia” for further informa-
tion.

High/Low Beam Switch

Push the multifunction lever toward the instrument panel
to switch the headlights to high beams. Pulling the multi-
function lever back toward the steering wheel will return
the lights to low beams.

Automatic High Beam Headlamp Control — If
Equipped

The Automatic High Beam Headlamp Control system
provides increased forward lighting at night by automat-
ing high beam control through the use of a digital camera
mounted on the inside rearview mirror. This camera de-
tects vehicle specific light and automatically switches from
high beams to low beams until the approaching vehicle is
out of view.

NOTE:
• The Automatic High Beam Headlamp Control can be

turned on or off using the Uconnect System. Refer to
“Uconnect Settings” in “Multimedia” for further infor-
mation.

• Broken, muddy, or obstructed headlights and taillights

of vehicles in the field of view will cause headlights to
remain on longer (closer to the vehicle). Also, dirt, film,
and other obstructions on the windshield or camera lens
will cause the system to function improperly.

• To opt out of the Advanced Auto High-Beam Sensitivity

Control (default) and enter Reduced High-Beam Sensi-
tivity Control (not recommended), toggle highbeam
lever 6 full on/off cycles within 10 seconds of ignition
ON. System will return to default setting upon ignition
off.

Flash-To-Pass

You can signal another vehicle with your headlights by
lightly pulling the multifunction lever toward you. This
will cause the high beam headlights to turn on, and remain
on, until the lever is released.

58

GETTING TO KNOW YOUR VEHICLE

Automatic Headlights — If Equipped

This system automatically turns the headlights on or off
according to ambient light levels. To turn the system on,
rotate the headlight switch clockwise to the last detent for
automatic headlight operation. When the system is on, the
headlight time delay feature is also on. This means the
headlights will stay on for up to 90 seconds after you place
the ignition into the OFF position. To turn the automatic
system off, move the headlight switch out of the AUTO
position.

NOTE:

The engine must be running before the headlights

will come on in the automatic mode.

Headlight Time Delay

This feature provides the safety of headlight illumination
for up to 90 seconds (programmable) when leaving your
vehicle in an unlit area.

To activate the delay feature, place the ignition in the OFF
position while the headlights are still on. Then, turn off the
headlights within 45 seconds. The delay interval begins
when the headlight switch is turned off.

If you turn the headlights or parking lights on, or place the
ignition in ACC or RUN, the system will cancel the delay.

If you turn the headlights off before the ignition, they will
turn off in the normal manner.

NOTE:
• The lights must be turned off within 45 seconds of

placing the ignition in the OFF position to activate this
feature. If the headlight switch is in the AUTO position
prior to turning the ignition OFF, there is no need to turn
the headlight switch to off to activate Headlight Delay.

• The headlight delay time is programmable using the

Uconnect System, refer to “Uconnect Settings” in “Mul-
timedia” for further information.

Lights-On Reminder

If the headlights or parking lights are on after the ignition
is in the OFF position, a chime will sound to alert the driver
when the driver’s door is opened.

3

GETTING TO KNOW YOUR VEHICLE

59

Fog Lights — If Equipped

The front fog light switch is built into the headlight switch.

To activate the front fog lights, turn on the parking lights or
the low beam headlights and push the headlight switch. To
turn off the front fog lights, either push the headlight
switch a second time or turn off the headlight switch.

An indicator light in the instrument cluster illuminates
when the fog lights are turned on.

NOTE:

The fog lights will operate with the low beam

headlights or parking lights on. However, selecting the
high beam headlights will turn off the fog lights.

Turn Signals

Move the multifunction lever up or down and the arrows
on each side of the instrument cluster display flash to show
proper operation of the front and rear turn signal lights.

NOTE:
• If either light remains on and does not flash, or there is

a very fast flash rate, check for a defective outside light
bulb. If an indicator fails to light when the lever is
moved, it would suggest that the indicator bulb is
defective.

• A “Turn Signal On” message will appear in the instru-

ment cluster display and a continuous chime will sound
if the vehicle is driven more than 1 mile (1.6 km) with
either turn signal on.

• When the Daytime Running Lights are on and a turn

signal is activated, the Daytime Running Lamp will turn
off on the side of the vehicle in which the turn signal is
flashing. The Daytime Running Lamp will turn back on
when the turn signal is turned off.

Fog Light Switch

60

GETTING TO KNOW YOUR VEHICLE

Lane Change Assist

Tap the lever up or down once, without moving beyond
the detent, and the turn signal (right or left) will flash five
times then automatically turn off.

Battery Saver Feature

To protect the battery, the interior lights will turn off
automatically 15 minutes after the ignition switch is moved
to the OFF/LOCK position. This will occur if the interior
lights were switched on manually or are on because a door
is open.

INTERIOR LIGHTS

Interior Courtesy Lights

The interior lights come on when a door is opened. The
light switches in the overhead console are for reading
lamps.

To protect the battery, the interior lights will turn off
automatically 15 minutes after the ignition is moved to the
OFF/LOCK position. This will occur if the interior lights
were switched on manually or are on because a door is
open. This includes the glove compartment light and the
cargo area light. To restore interior light operation, either
place the ignition in the ON/RUN position or cycle the
light switch.

Overhead Light Switches

3

GETTING TO KNOW YOUR VEHICLE

61

Instrument Panel Dimmer Control

The instrument panel dimmer control is part of the head-
light switch and is located on the driver’s side of the
instrument panel.

Rotating the instrument panel dimmer control upward will
increase the brightness of the instrument panel lights,
ONLY

when the parking lights or headlights are turned on.

Ambient Light Control — If Equipped

Rotate the ambient dimmer control upward or downward
to increase or decrease the brightness of the ambient light
located in the overhead console, door handle lights, under
I/P lights, door map pocket lights, and cubby bin lights.

Instrument Panel Dimmer

Ambient Light/Door Handle Light Dimmer

62

GETTING TO KNOW YOUR VEHICLE

WINDSHIELD WIPERS AND WASHERS

The windshield wiper/washer controls are located on the
windshield wiper/washer lever on the right side of the
steering column. The front wipers are operated by rotating
a switch, located on the end of the lever. For information on
the rear wiper/washer, refer to “Rear Window Wiper/
Washer” in this section.

Windshield Wiper Operation

Rotate the end of the lever to one of the first two detent
positions for intermittent settings. The first intermittent
wiper interval is 10 seconds. The second intermittent wipe
interval is based on vehicle speed. Rotate to the third
detent for low wiper operation and the fourth detent for
high wiper operation.

Windshield Wiper/Washer Lever

Windshield Wiper Operation

3

GETTING TO KNOW YOUR VEHICLE

63

CAUTION!

• Always remove any buildup of snow that prevents

the windshield wiper blades from returning to the
“park” position. If the windshield wiper switch is
turned off, and the blades cannot return to the “park”
position, damage to the wiper motor may occur.

• Failure to follow these cautions can cause damage to

the heating elements:

• Use care when washing the inside of the rear

window. Do not use abrasive window cleaners on
the interior surface of the window. Use a soft cloth
and a mild washing solution, wiping parallel to the
heating elements. Labels can be peeled off after
soaking with warm water.

• Do not use scrapers, sharp instruments, or abrasive

window cleaners on the interior surface of the
window.

• Keep all objects a safe distance from the window.

Windshield Washer Operation

To use the washer, pull the lever toward you and hold
while spray is desired. If the lever is pulled while in the
intermittent setting, the wipers will turn on and operate for
several wipe cycles after the lever is released, and then
resume the intermittent interval previously selected.

If the lever is pulled while the wipers are in the off position,
the wipers will operate for several wipe cycles, then turn
off.

NOTE:

As a protective measure, the pump will stop if the

switch is held for more than 20 to 30 seconds. Once the
lever is released the pump will resume normal operation.

WARNING!

Sudden loss of visibility through the windshield could
lead to a collision. You might not see other vehicles or
other obstacles. To avoid sudden icing of the wind-
shield during freezing weather, warm the windshield
with the defroster before and during windshield
washer use.

64

GETTING TO KNOW YOUR VEHICLE

Mist

Push the lever upward to the MIST position and release for
a single wiping cycle.

NOTE:

The mist feature does not activate the washer

pump; therefore, no washer fluid will be sprayed on the
windshield. The wash function must be used in order to
spray the windshield with washer fluid.

Rain Sensing Wipers — If Equipped

This feature senses rain or snow fall on the windshield and
automatically activates the wipers for the driver. The
feature is especially useful for road splash or overspray
from the windshield washers of the vehicle ahead. Rotate
the end of the multifunction lever to one of two settings to
activate this feature.

The sensitivity of the system can be adjusted with the
multifunction lever. Wiper delay position one is the least
sensitive, and wiper delay position two is the most sensi-
tive. Place the wiper switch in the O (off) position when not
using the system.

NOTE:
• The Rain Sensing feature will not operate when the

wiper switch is in the low or high-speed position.

• The Rain Sensing feature may not function properly

when ice, or dried salt water is present on the wind-
shield.

• Use of Rain-X or products containing wax or silicone

may reduce Rain Sensing performance.

• The Rain Sensing feature can be turned on and off using

the Uconnect System, refer to “Uconnect Settings” in
“Multimedia” for further information.

The Rain Sensing system has protection features for the
wiper blades and arms, and will not operate under the
following conditions:
• Change In Ignition Position — If the vehicle is in Rain

Sensing mode and the ignition is cycled from OFF to
ON, the auto wiper will be suppressed until vehicle
speed is greater than 3 mph (5 km/h), or the wiper
switch is moved out of and back into the Intermittent
wipe position.

3

GETTING TO KNOW YOUR VEHICLE

65

• Transmission In NEUTRAL Position — The Rain Sens-

ing system will not operate if the NEUTRAL gear is
selected at speeds of 3 mph (5 km/h) or less unless the
wiper switch is moved or the gear selector is moved out
of NEUTRAL.

Remote Start Mode Inhibit

— On vehicles equipped with

Remote Starting system, Rain Sensing wipers are not
operational when the vehicle is in the remote start mode.
Once the operator is in the vehicle and has placed the
ignition switch in the ON/RUN position, Rain Sensing
wiper operation can resume, if it has been selected, and no
other inhibit conditions (mentioned previously) exist.

Rear Window Wiper/Washer

The rear wiper/washer controls are located on the wind-
shield wiper/washer lever on the right side of the steering
column. The rear wiper/washer is operated by rotating a
switch, located at the middle of the lever.

The rear wiper/washer controls are located on the wind-
shield wiper/washer lever on the right side of the steering
column. The rear wiper has different operation modes:
• Intermittent mode

• In synchronous mode (at half speed of the front window

wiper) when the front window wiper is operating.

• Continuous mode
• Vehicle in REVERSE: If the front wiper is active and the

REVERSE gear is selected, the wiper will turn on for one
wipe.

Rotate the center portion of the lever upward to the
first detent for intermittent operation and to the

second detent for continuous rear wiper operation.

To use the washer, push the lever forward and
hold while spray is desired. If the lever is pushed
while the wiper is in the off position, the wiper
will operate for several wipe cycles, then turn off.

If the lever is pushed while in the intermittent setting, the
wiper will turn on and operate for several wipe cycles after
the end of the lever is released, and then resume the
intermittent interval previously selected.

NOTE:

As a protective measure, the pump will stop if the

switch is held for more than 20 to 30 seconds. Once the
lever is released the pump will resume normal operation.

66

GETTING TO KNOW YOUR VEHICLE

Windshield Wiper De-Icer — If Equipped

Your vehicle may be equipped with a Windshield Wiper
De-Icer feature that may be activated under the following
conditions:
• Activation By Front Defrost — The Windshield Wiper

De-Icer shall be activated automatically in the case of a
cold weather manual start with full front defrost, and
when the ambient temperature is below 33° F (0.6° C).

• Activation By Rear Defrost — The Windshield Wiper

De-Icer shall be activated automatically when the rear
defrost is turned on and when the ambient temperature
is below 33° F (0.6° C).

• Activation By Remote Start Operation (If Equipped) 

When remote start is active and the outside ambient
temperature is less than 33° F (0.6° C), the Windshield
Wiper De-Icer shall be enabled. On exiting remote start
resume previous operation except, if the Windshield
Wiper De-Icer timer and operation shall continue.

CLIMATE CONTROLS

The Climate Control System allows you to regulate the
temperature, air flow, and direction of air circulating
throughout the vehicle. The controls are located on the
touchscreen (if equipped) and on the instrument panel
below the radio.

Climate Controls Without A Touchscreen Overview

The controls for the heating and air conditioning system in
this vehicle can consist of a series of outer rotary dials,
inner push knobs, and/or a touchscreen. These comfort
controls can be set to obtain desired interior conditions.

Manual Climate Controls

3

GETTING TO KNOW YOUR VEHICLE

67


Content   ..  2  3  4  5   ..