Isuzu N-Series. Service manual - part 89


  Index      Isuzu     Isuzu N-Series - service and repair manual


Search            


Content   ..  87  88  89  90   ..


Isuzu N-Series. Service manual - part 89


2-62 CAB AND FRAME

Removal

1. Disconnect the battery ground cable.
2. Sun visor/holder/grommet (Standard cab)

• Remove the 2 mounting screws to remove the

sun visor.

• Pull the sun visor holder while rotating it 45

°.

• Pry the sun visor grommet with a bladed screw-

driver.

3. Room lamp/mirror (Standard cab)

• Pry the room lamp lens with a bladed screw-

driver, and remove the 2 mounting screws of
room mirror to disconnect the connector.

4. Header shelf (High cab, wide cab except limited

model)

• Refer to “Header Shelf” in this Section.

5. Assist grip

• Open the covers at 2 positions and remove the

mounting screws.

6. Coat hanger

• Turn it 45

° for removal.

7. Fluorescent (Option equipment)

• Refer to “Fluorescent Working with Room

Lamp” in Repair Manual for electrical equip-
ment.

8. Roof ventilator grille (High cab/wide cap; option

equipment)

• Refer to “Roof Ventilator” in this Section.

9. Front grip/front pillar trim cover

• Refer to “Front Pillar Trim Cover”  in this Sec-

tion.

10. Rear upper trim cover

• Refer to “Rear Side Trim Cover” in this Section.

11. Clip

• Standard cab; Top: 3 positions, Rear: 2 posi-

tions

• High cab, wide cab; Top: 3 positions, Front: 4

positions (High cab), 5 positions (Wide cab),
Rear 3 positions

12. Rear retainer/clip (High cab, wide cab)

• Remove the clip to remove the retainer.

13. Body side finisher (upper)

• Pull only the upper side from panel flange.

14. Head lining
15. Insulator

Installation

For installation, reverse the removal procedure.

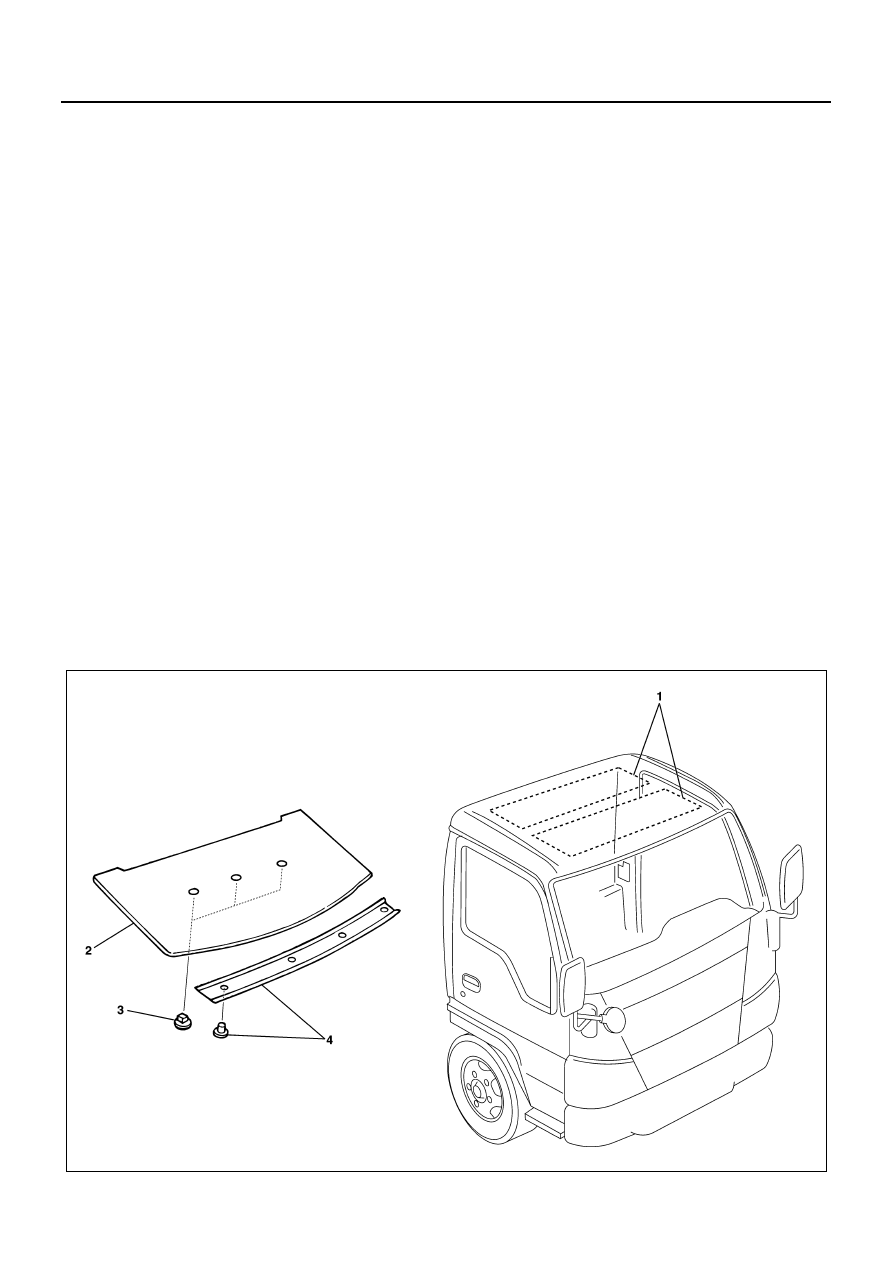
Head Lining (B Pack Model)

Component

N2A0102E

CAB AND FRAME 2-63

Removal

1. Retainer/clip

• Remove the clip to remove the retainer.

2. Clip

3. Head lining
4. Insulator

Installation

For installation, reverse the removal procedure.

Head Lining (Crew Cab Model)

Removal

1. Roof reinforcement

• Remove the 3 left fixing bolts and 3 right fixing

bolts.

2. Retainer

• Remove the 5 front clips and 5 back clips.

3. Head lining

• Remove the 5 front clips and 5 back clips.

4. Insulator

Installation

For installation, reverse the removal procedure.

1. When installing the insulator, be sure to use a new

two-sided adhesive tape.

2. Install the head lining (2) by nipping it with the front

and back retainers (1) and the central reinforce-
ment (3).

Legend

1. Insulator

3. Clip

2. Head lining

4. Retainer/clip

Legend

1. Roof reinforcement

3. Head lining

2. Retainer

4. Insulator

N2A0103E

N2A0104E

2-64 CAB AND FRAME

Roof Ventilator

Removal

1. Roof ventilator grille (1)

• Remove the one mounting screw (3) and pull

out the clips (2) at 4 positions.

2. Roof ventilator mounting nut

• Remove the nuts at 4 positions.

3. Roof ventilator assembly

• Align the main unit with the inlet side and re-

move it from the stud. Turn it 90

° and pull it out.

Installation

For installation, reverse the removal procedure.

N2A0105E

N2A0106E

N2A0107E

CAB AND FRAME 2-65

SEAT BELT

Tongue Side Seat Belt (Single Cab Model)

Component

Removal

1. Seat belt lower anchor bolt
2. Rear pillar lower trim cover
3. Through anchor cover
4. Seat belt upper anchor bolt
5. Retractor fixing bolt

• Remove the bolt and pull out the upper bracket

of the retractor from the panel.

Installation

For installation, reverse the removal procedure taking
the following points into consideration.

1. Tighten the seat belt upper anchor bolt to the spec-

ified torque.

Tighten:
Anchor bolt to 44 N

⋅m (4.5 kg⋅m/32.5 lb⋅ft)

Legend

1. Seat belt upper anchor bolt

5. Bracket

2. Tongue side seat belt assembly

6. Clip

3. Seat belt lower anchor bolt

7. Rear piller lower trim cover

4. Retractor bolt

8. Through anchor cover

N2A0237E


Content   ..  87  88  89  90   ..