Isuzu N-Series. Service manual - part 75
2-6 CAB AND FRAME
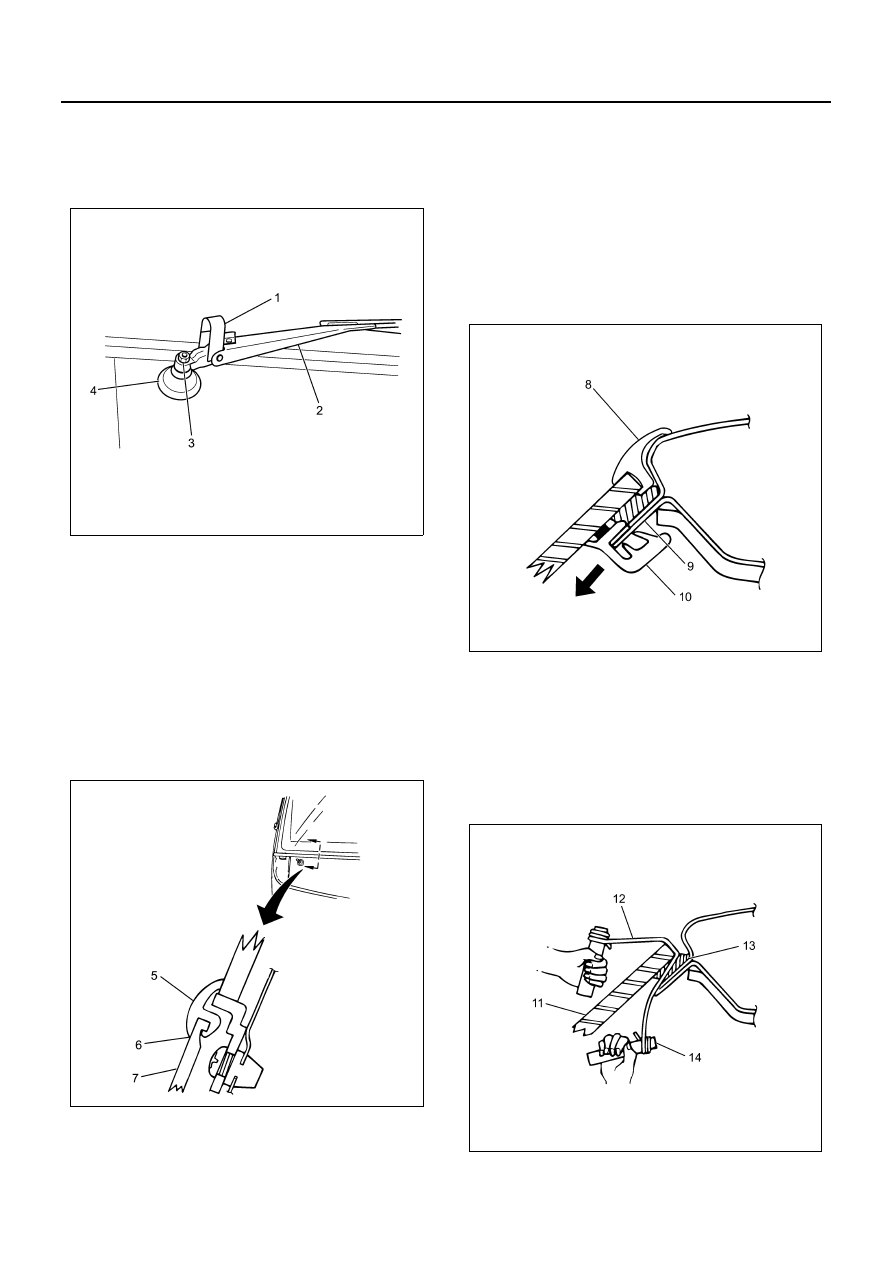
Removal
1. Front wiper arm (2)
• Open the cover (1) and remove the fixing nut
(3).
2. Clearance lamp
• Refer to “Lighting System”.
3. Outside mirror stay cap/front panel side/sub cover
4. Outside mirror assembly/outside mirror attach-
ment/molding
• Refer to “Outside Mirror Assembly” in this Sec-
tion.
5. Ornament grille upper molding (5)
• Remove the lower part (6) of upper molding
from ornament grille (7) with a bladed screw-
driver.
6. Front window molding (8)
• Remove it according to the same procedure as
step 3. Don’t reuse it.
Caution:
If the painted surface is scratched, this causes rust.
7. Room mirror stopper rubber
8. Front pillar grip/trim cover
• Refer to “Front Side Trim Cover” in Interior &
Exterior Trim Section.
9. Front window finisher (10)
• Pull it from body flange.
• Don’t reuse it.
10. Front window glass (11)
• Pass the piano wire (12) of
φ0.5 mm or so to the
room inside through the adhesive part (13) of
front window glass. Bind both ends of this piano
wire on the wooden piece (14) etc., and cut the
adhering part in the whole periphery of the
glass moving it back and forth inside and out-
side the room. Remove the glass.
N2A0013E
N2A0014E
N2A0015E
N2A0016E