Isuzu engine 4j series. Service manual - part 45


  Index      Isuzu     Isuzu engine 4j series - manual


Search            


Content   ..  43  44  45  46   ..


Isuzu engine 4j series. Service manual - part 45


6A1 – 48  4JB1/4JB1T/4JB1TC/4JG2 - ENGINE
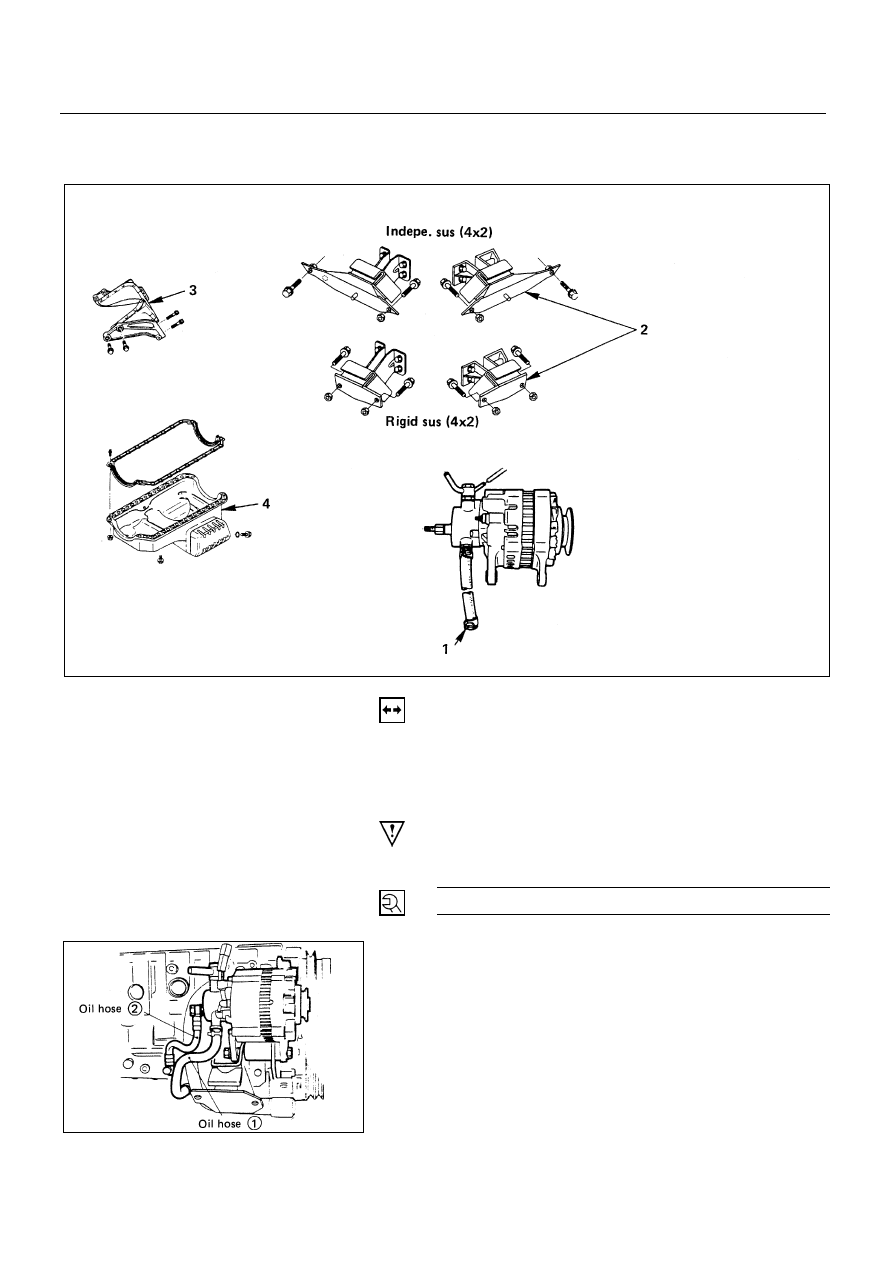
OIL PAN

REMOVAL

Preparation:

Disconnect battery ground cable.

Lift up car.

Drain engine oil.

NOTE

Install drain plug with new gasket.

N∙m(kg∙m/lb∙ft)


44 (4.5/33)


1. Vacuum Pump Oil Hose

Remove oil hose 

!

 from oil pan.

6A1-48-1.tif

6A1-48-2.tif

Removal steps

1.  Vacuum pump oil hose
2.  Engine mount bolts
3.  Stiffener and space rubber
4.  Oil pan Assembly

Installation steps

To install, follow the removal
steps in the reverse order

.

4JB1/4JB1T/4JB1TC/4JG2 – ENGINE  6A1 – 49

2. Engine Mount Bolts

Remove the engine mount bolts right & left side.

3. Stiffener & Space Rubber

Remove the exhaust pipe bracket.

Remove the stiffener from of the oil pan left & right
side.

Take out space rubber.

4. Oil Pan Assembly

Raising the engine about 50mm.

Remove the oil pan from cylinder block.

6A1-49-1.tif

6A1-49-2.tif

6A1 – 50  4JB1/4JB1T/4JB1TC/4JG2 - ENGINE

INSTALLATION

4. Oil Pan Assembly

Apply the recommended liquid gasket or its equivalent
to the No.5 bearing cap arches, the grooves, and the
timing gear case arches at the positions shown in the
illustration.

Fit the gasket rear lipped portion into the No.5 groove.

Be absolutely sure that the lipped portion in fitted
snugly in to the groove.

Install the oil pan to the cylinder body.

Tighten the oil pan bolts to the specified torque.

Oil Pan Bolt Torque

N∙m (kg∙m/lb∙ft)


19 (1.9/14)


3. Stiffener and Space Rubber

Install the space rubber.

Install the stiffener left side and right side tighten bolt
to the specified torque.

Engine body Side

N∙m (kg∙m/lb∙ft)


37 (3.8/27)


Clutch Housing Side

N∙m (kg∙m/lb∙ft)


78 (8.0/58)


Install exhaust pipe bracket.

2. Engine Mount Bolts

Install the mount bolts and tighten to the specified
torque.

Mount Bolt Torque

N∙m (kg∙m/lb∙ft)


40 (4.1/30)


Install the oil hose to oil pan.

1. Vacuum Pump Oil Hose

Pour engine oil

Connect battery ground cable.

Start the engine and check coolant leakage.

6A1-50-1.tif

6A1-50-2.tif

4JB1/4JB1T/4JB1TC/4JG2 – ENGINE  6A1 – 51

OIL PUMP ASSEMBLY

REMOVAL

Preparation:

Disconnect battery ground cable.

Lift up car.

Drain engine oil.

NOTE

Install drain plug with new washer.

N∙m(kg∙m/lb∙ft)


44 (4.5/33)


1. Vacuum Pump Oil Hose

Remove the oil hose 

!

 from oil pan.

6A1-51-2.tif

6A1-51-1.tif

Removal steps

1.  Vacuum pump oil hose
2.  Engine mount bolts
3.  Stiffener and space rubber
4.  Oil pan Assembly
5.  Oil pump Assembly

Installation steps

To install, follow the removal
steps in the reverse order.


Content   ..  43  44  45  46   ..