Honda Civic Hybrid (2015 year). Manual - part 19
288
Main
tenan
ce
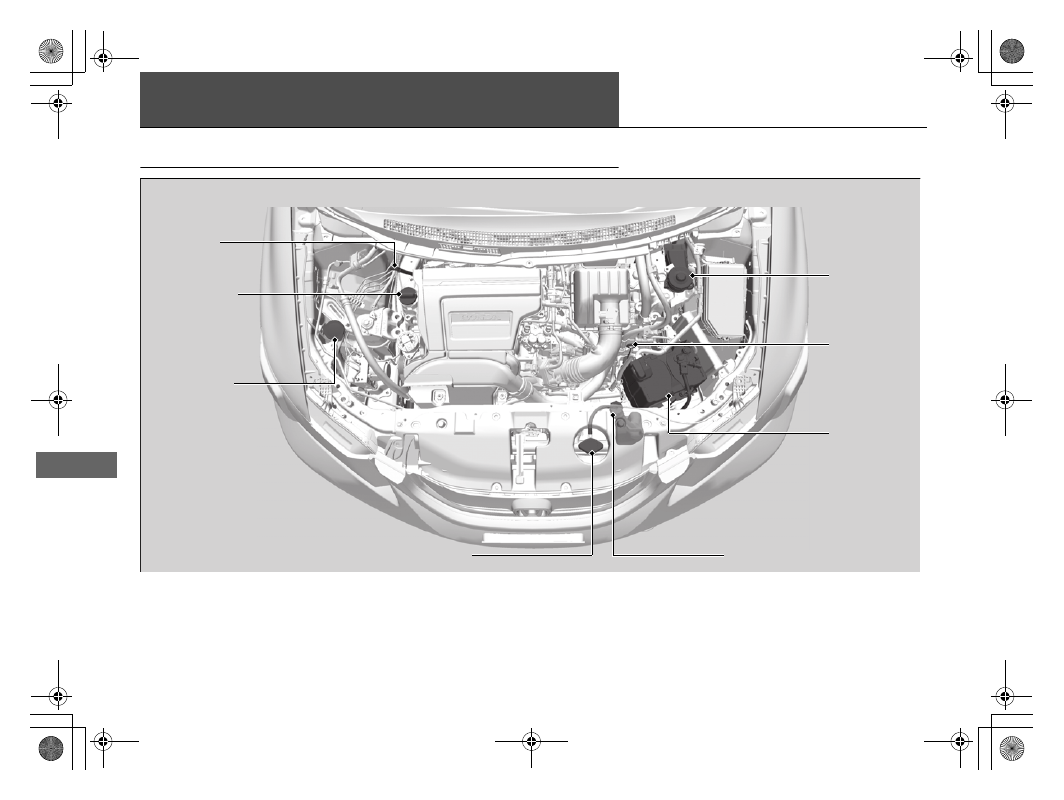
Maintenance Under the Hood
Maintenance Items Under the Hood
Brake Fluid
(Black Cap)
Washer Fluid
(Blue Cap)
Engine Oil
Dipstick
(Orange)
Radiator Cap
Engine Oil Fill
Cap
Continuously
Variable
Transmission
Fluid Dipstick
(Yellow)
Engine Coolant Reserve Tank
12 Volt Battery