Honda Accord Coupe L4 (2011 year). Manual - part 15
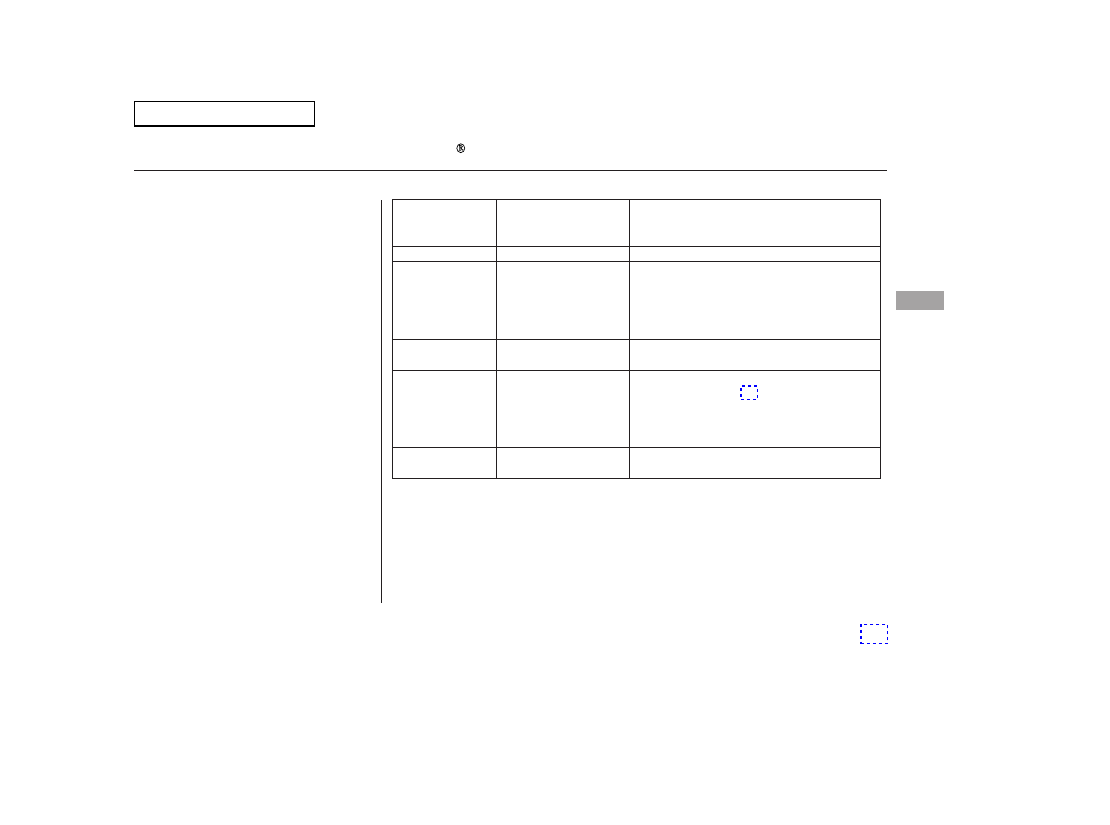
If you see an error message in the
center display while playing an iPod,
find the solution in the chart to the
right. If you cannot clear the error
message, take your vehicle to your
dealer.
Solution
Error Message
Cause
There is a problem with the USB adapter unit.
Disconnect the device. Then, turn the audio
system off, and turn it on again. Do not
reconnect the device that caused the error.
Appears when the iPod is empty. Store some
files in the iPod.
Appears when an unsupported iPod is
connected. See page 214 for specification
information on iPods. If it appears when a
supported iPod is connected, update the iPod
software to the newer version.
Appears when the system does not
acknowledge the iPod. Reconnect the iPod.
USB ROM Error
Appears when an
incompatible device is
connected.
No files in iPod
Use of unsupported
iPod
Recognition failure of
iPod
iPod Error Messages (Models with navigation system)
Fe
a
tu
re
s
USB ERROR
BAD USB
DEVICE
PLEASE CHECK
OWNERS
MANUAL
iPod NO SONG
UNSUPPORTED
VER.
CONNECT RETRY
Main Menu