Ford E-350 (2012 year). Manual - part 64


  Index      Ford     Ford E-350 - service manual 2012 year in english


Search            


Content   ..  62  63  64  65   ..


Ford E-350 (2012 year). Manual - part 64


OPENING THE HOOD

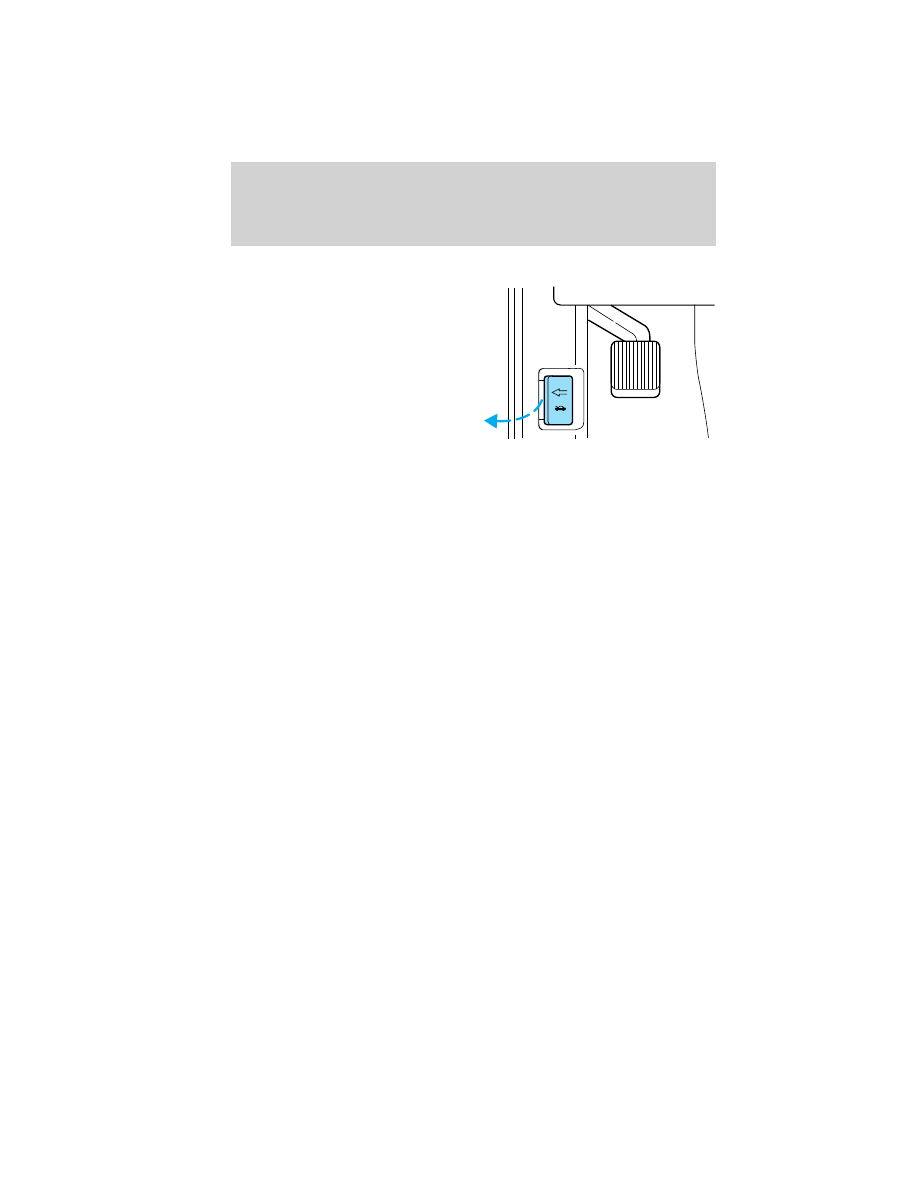
1. Inside the vehicle, pull the hood
release handle located under the
bottom left corner of the instrument
panel.

2. Go to the front of the vehicle and push the auxiliary latch, located in
the center top of the grille, to the left to release the hood.

3. Lift the hood and secure it with the prop rod.

HOOD

Maintenance and Specifications

258

IDENTIFYING COMPONENTS IN THE ENGINE COMPARTMENT

1. Battery

2. Windshield washer fluid reservoir

3. Engine oil filler cap

4. Automatic transmission fluid dipstick
5. Air filter assembly
6. Engine oil dipstick
7. Power steering fluid reservoir
8. Brake fluid reservoir
9. Engine coolant reservoir
10. Power distribution box

WINDSHIELD WASHER FLUID

Add fluid to fill the reservoir if the
level is low. In very cold weather, do
not fill the reservoir completely.

Only use a washer fluid that meets
Ford specifications. Do not use any
special washer fluid such as
windshield water repellent type fluid
or bug wash. They may cause
squeaking, chatter noise, streaking and smearing. Refer to Maintenance
product specifications and capacities 
in this chapter.
State or local regulations on volatile organic compounds may restrict the
use of methanol, a common windshield washer antifreeze additive.

1

2

3

4

5

6

7

8

9

10

Maintenance and Specifications

259

Washer fluids containing non-methanol antifreeze agents should be used
only if they provide cold weather protection without damaging the
vehicle’s paint finish, wiper blades or washer system.

WARNING: If you operate your vehicle in temperatures below
40°F (5°C), use washer fluid with antifreeze protection. Failure

to use washer fluid with antifreeze protection in cold weather could
result in impaired windshield vision and increase the risk of injury or
accident.

CHANGING THE WIPER BLADES

1. Pull the wiper arm away from the
vehicle. Turn the blade at an angle
from the wiper arm. Press the lock
tab to release the blade and pull the
wiper blade down toward the
windshield to remove it from the
arm.

2. Attach the new wiper to the
wiper arm and press it into place
until a click is heard.

Replace wiper blades at least once per year for optimum performance.
Poor wiper quality can be improved by cleaning the wiper blades and the
windshield. Refer to Windows and wiper blades in the Cleaning
chapter.
To prolong the life of the wiper blades, it is highly recommended to
scrape off the ice on the windshield before turning on the wipers. The
layer of ice has many sharp edges and can damage the micro edge of the
wiper rubber element.

ENGINE OIL

Checking the engine oil
Refer to the scheduled maintenance information for the appropriate
intervals for checking the engine oil.
1. Make sure the vehicle is on level ground.
2. Turn the engine off and wait 15 minutes for the oil to drain into the
oil pan.
3. Set the parking brake and ensure the gearshift is securely latched in P
(Park).

Maintenance and Specifications

260

4. Open the hood. Protect yourself from engine heat.

5. Locate and carefully remove the
engine oil level dipstick.

6. Wipe the dipstick clean. Insert the dipstick fully, then remove it again.
• If the oil level is between the lower and upper holes or between

the MIN and MAX marks (depending on application), the oil
level is acceptable. DO NOT ADD OIL.

• If the oil level is below the lower hole or the MIN mark, add enough

oil to raise the level within the lower and upper holes or within the
MIN-MAX range.

• Oil levels above the upper hole or the MAX mark may cause engine

damage. Some oil must be removed from the engine by an authorized
dealer.

7. Put the dipstick back in and ensure it is fully seated.

Adding engine oil

1. Check the engine oil. For instructions, refer to Checking the engine
oil 
in this chapter.

2. If the engine oil level is not within the normal range, add only certified
engine oil of the recommended viscosity. Remove the engine oil filler cap
and use a funnel to pour the engine oil into the opening.

3. Recheck the engine oil level. Make sure the oil level is not above the
normal operating range on the engine oil level dipstick.

4. Install the dipstick and ensure it is fully seated.

5. Fully install the engine oil filler cap by turning the filler cap clockwise
1/4 of a turn until three clicks are heard or until the cap is fully seated.

To avoid possible oil loss, DO NOT operate the vehicle with the
engine oil level dipstick and/or the engine oil filler cap removed.

Maintenance and Specifications

261


Content   ..  62  63  64  65   ..