Ford C-MAX Hybrid / Energi (2016 year). Manual - part 15


  Index      Ford     Ford C-MAX Hybrid / Energi - service manual 2016 year in english


Search            


Content   ..  13  14  15  16   ..


Ford C-MAX Hybrid / Energi (2016 year). Manual - part 15


Setting the Liftgate Open Height

1.

Open the liftgate.

2. Stop the liftgate movement by pressing

the control button on the liftgate when
it reaches the desired height.

Note: Once the liftgate has stopped
moving, you can also manually move it to
the desired height.

3. Press and hold the liftgate control

button on the liftgate until you hear a
tone, indicating programming is
complete.

Note:  You can only use the liftgate control
button to program the height.

Note:  You cannot program the height if the
liftgate position is too low.

The new open liftgate height is recalled
when the power liftgate is opened.  To
change the programmed height, repeat the
above procedure.  Once you open the
power liftgate, you can manually move it
to a different height.

Note: The system recalls the new
programmed height until you reprogram it,
even if you disconnect the battery.

When operating the power liftgate after
you have programmed a lower height than
fully open, you can fully open the liftgate
by manually pushing it upward to the
maximum open position.

Obstacle Detection

When Closing

The system stops when it detects an
obstacle. A tone sounds and the system
reverses to open. Once you remove the
obstacle, you can power close the liftgate.

Note: Entering your vehicle while the
liftgate is closing can cause your vehicle to
bounce and activate obstacle detection. To
prevent this, let the power liftgate close
completely before you enter your vehicle.
Before driving off, check the instrument
cluster for a liftgate or door ajar message or
warning indicator. Failure to do this could
result in unintentionally leaving the liftgate
open while driving.

When Opening

The system stops when it detects an
obstacle and a tone sounds. Once you
remove the obstacle, you can continue to
operate the liftgate.
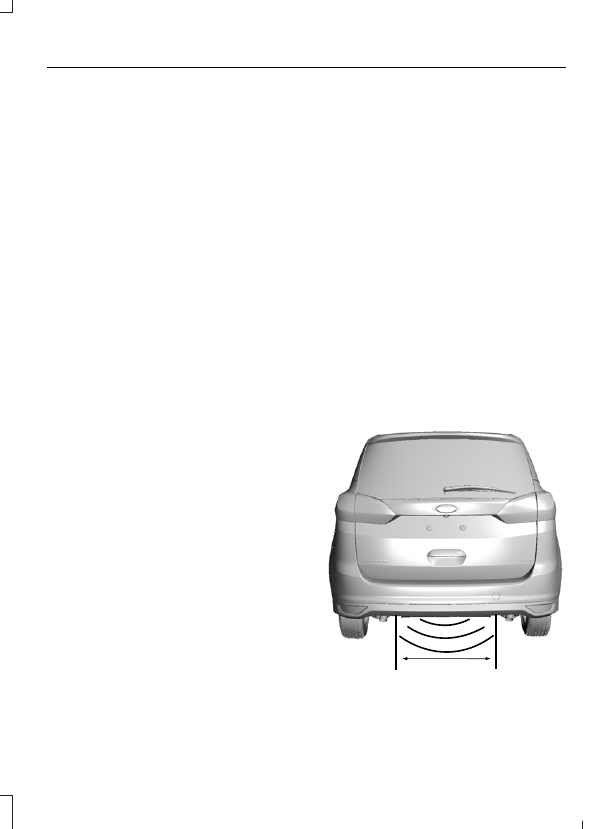
Hands-Free Feature

 (If Equipped)

Make sure you have an intelligent access
transmitter within 3 ft (1 m) of the liftgate.

E174120

1.

Move your foot under and away from
the rear bumper detection area in a
single-kick motion. Do not move your
foot sideways or the sensors may not
detect the motion.

2. The liftgate powers open or close.

Note: Allow the power system to open the
liftgate. Manually pushing or pulling the
liftgate may activate the system’s obstacle
detection feature and stop the power
operation or reverse its direction. Manually
interfering with the liftgate motion may also
replicate a gas strut failure.

Note:  Splashing water may cause the
hands-free liftgate to open.  Keep the
intelligent access key away from the rear
bumper detection area when washing your
vehicle.

PASSIVE ANTI-THEFT
SYSTEM

SecuriLock®

The system helps prevent your vehicle
from starting unless you use a coded key
programmed to your vehicle. Using the
wrong key may prevent your vehicle from
starting. A message may appear in the
information display.

If you are unable to start your vehicle with
a correctly coded key, a malfunction has
happened. A message may appear in the
information display.

Note: The system is not compatible with
non-Ford aftermarket remote start systems.
Use of these systems may result in vehicle
starting problems and a loss of security
protection.

Note: Metallic objects, electronic devices
or a second coded key on the same key
chain may cause vehicle starting issues if
they are too close to the key when starting
your vehicle. Prevent these objects from
touching the coded key while starting the
engine. Switch the ignition off, move all
objects on the key chain away from the
coded key and restart your vehicle if a
problem occurs.

Note: Do not leave a duplicate coded key
in your vehicle. Always take your keys and
lock all doors when leaving your vehicle.

Automatic Arming

Your vehicle arms immediately after you
switch the ignition off.

Automatic Disarming

Switching the ignition on with a coded key
disarms your vehicle.

Replacement Keys

Note: Your vehicle comes equipped with
two integrated keyhead transmitters or two
intelligent access keys.

The integrated keyhead transmitter
functions as a programmed ignition key
that operates all the locks and starts your
vehicle, as well as a remote control.

The intelligent access key functions as a
programmed key that operates the driver
door lock and activates the intelligent
access with push button start system, as
well as a remote control.

If your programmed transmitters or
standard SecuriLock coded keys
(integrated keyhead transmitters only) are
lost or stolen and you do not have an extra
coded key, you will need to have your
vehicle towed to an authorized dealer. You
need to erase the key codes from your
vehicle and program new coded keys.

Store an extra programmed key away from
your vehicle in a safe place to help prevent
any inconveniences. See your authorized
dealer to purchase additional spare or
replacement keys.

Programming a Spare Integrated
Keyhead Transmitter

Note: You can program a maximum of eight
coded keys to your vehicle. All eight can be
integrated keyhead transmitters.

You can program your own integrated
keyhead transmitter or standard
SecuriLock coded keys to your vehicle. This
procedure will program both the vehicle
immobilizer keycode and the remote entry
portion of the remote control to your
vehicle

Only use integrated keyhead transmitters
or standard SecuriLock keys.

You must have two previously
programmed coded keys and the new
unprogrammed key readily accessible. See
your authorized dealer to have the spare
key programmed if two previously
programmed coded keys are not available.

Read and understand the entire procedure
before you begin.

1.

Insert the first previously programmed
coded key into the ignition.

2. Switch the ignition from off to on. Keep

the ignition on for at least three
seconds, but no more than 10 seconds.

3. Switch the ignition off and remove the

first coded key from the ignition.

4. After three seconds but within 10

seconds of switching the ignition off,
insert the second previously coded key
into the ignition.

5. Switch the ignition from off to on. Keep

the ignition on for at least three
seconds, but no more than 10 seconds.

6. Switch the ignition off and remove the

second previously programmed coded
key from the ignition.

7.

After three seconds but within 10
seconds of switching the ignition off
and removing the previously
programmed coded key, insert the new
unprogrammed key into the ignition.

8. Switch the ignition from off to on. Keep

the ignition on for at least six seconds.

9. Remove the newly programmed coded

key from the ignition.

If the key has been successfully
programmed it will start your vehicle and
operate the remote entry system (if the
new key is an integrated keyhead
transmitter).

If programming was not successful, wait
10 seconds and repeat Steps 1 through 8.
If you are still unsuccessful, take your
vehicle to your authorized dealer.

Programming a Spare Intelligent
Access Key

See your authorized dealer to have
additional keys programmed to your
vehicle.

ANTI-THEFT ALARM

 (If Equipped)

The system warns you of an unauthorized
entry to your vehicle. It triggers if any door,
the luggage compartment or the hood
opens without using the key or remote
control.

The direction indicators flash and the horn
sounds if unauthorized entry is attempted
while the alarm is armed.

Take all remote controls to an authorized
dealer if there is any potential alarm
problem with your vehicle.

Arming the Alarm

The alarm is ready to arm when there is
not a key in the ignition. Electronically lock
the vehicle to arm the alarm.

Disarming the Alarm

Disarm the alarm by any of the following
actions:

Unlock the doors or luggage
compartment with the remote control
or keyless entry keypad.

Switch the ignition on or start the
vehicle.

Use a key in the driver’s door to unlock
the vehicle, then switch the ignition on
within 12 seconds.

Note: Pressing the panic button on the
remote control will stop the horn and signal
indicators, but will not disarm the system.


Content   ..  13  14  15  16   ..