Citroen C5 Dag (2010 year). Manual - part 21
301
04
1
2
3
4
1
2
3
4
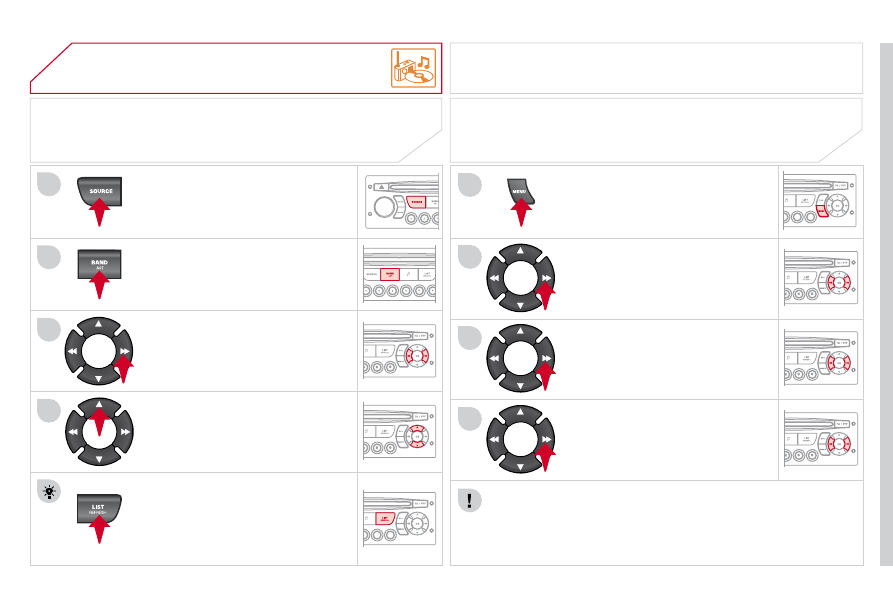
AUDIO
Press the SOURCE button several
times in succession and select the
radio.
Press the BAND AST button to select
a waveband: FM1, FM2, FMast, AM.
Briefl y press one of the buttons to
carry out an automatic search of the
radio stations.
Press one of the buttons to carry
out a manual search of the radio
stations.
Press the LIST REFRESH button to
display the list of stations received
locally (30 stations maximum).
To update this list, press for more
than two seconds.
The external environment (hills, buildings, tunnels, basement car parks, ...)
may block reception, including in RDS mode. This is a normal effect of the
way in which radio waves are transmitted and does not indicate any failure
of the audio equipment.
RDS
RADIO
SELECTING A STATION
Select AUDIO FUNCTIONS then
press OK.
Press the MENU button.
Select ACTIVATE RDS then press
OK. RDS appears on the screen.
Select the FM WAVEBAND
PREFERENCES function then press
OK.
The RDS, if displayed, enables you to continue listening to the
same station by automatic retuning to alternative fequencies.
However, in certain conditions, coverage of an RDS station may
not be assured throughout the country as radio stations do not
cover 100 % of the territory. This explains the loss of reception of
the station during a journey.