Citroen C1 (2016 year). Manual - part 7


  Index      Citroen     Citroen C1 - service manual 2016 year in english


Search            


Content   ..  5  6  7  8   ..


Citroen C1 (2016 year). Manual - part 7


95

4

Driving

C1_en_Chap04_conduite_ed01-2016

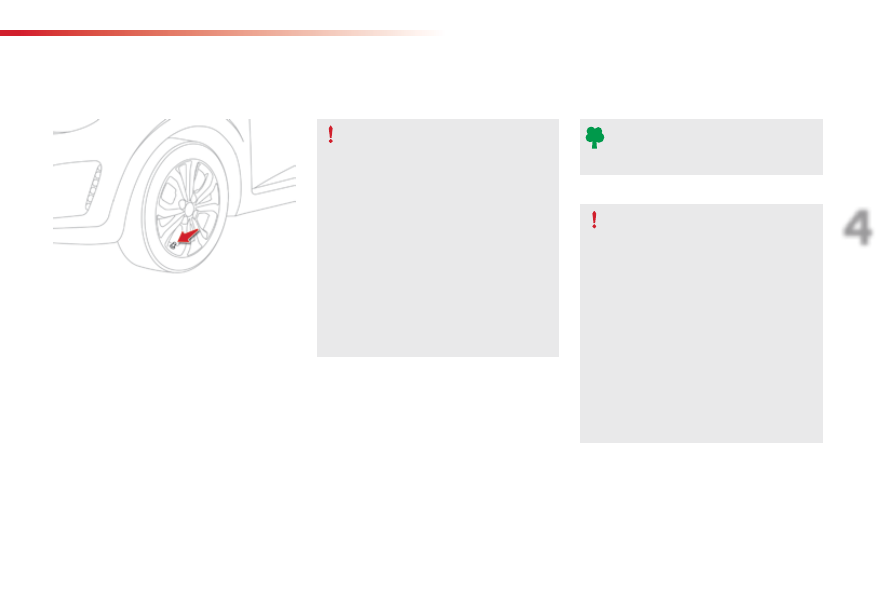
Under-inflation detection

The system monitors the pressures in the four 
tyres, once the vehicle is moving.
It compares the information given by the four 
wheel speed sensors with reference values, 
which must be reinitialised every time the 
tyre pressures are adjusted or a wheel 
changed

.

The system triggers an alert as soon as it 
detects a drop in the inflation pressure of one 
or more tyres.

The under-inflation detection system 
does not replace the need for vigilance 
on the part of the driver.
This system does not avoid the need to 
check the tyre pressures (including the 
spare wheel) every month as well as 
before a long journey.
Driving with under-inflated tyres impairs 
road holding, extends braking distances 
and causes premature tyre wear, 
particularly under arduous condition 
(high loading, high speed, long journey).

System which automatically checks the pressures of the tyres while driving.

The inflation pressures defined for 
your vehicle can be found on the tyre 
pressure label.
For more information on the 
identification markings, refer to the 
corresponding section.
Tyre pressures should be checked 
when the tyres are "cold" (vehicle 
stopped for 1 hour or after a journey of 
less than 6 miles (10 km) at moderate 
speeds).
Otherwise (when hot), add 0.3 bar to 
the pressures shown on the label.

Driving with under-inflated tyres 
increases fuel consumption.

96

Driving

C1_en_Chap04_conduite_ed01-2016

Under-inflation alert

This is given by fixed illumination of 
this warning lamp, accompanied by 
an audible signal.

F

  Reduce speed immediately, avoid 

excessive steering movements and sudden 
braking.

F  Stop the vehicle as soon as it is safe to 

do so.

The loss of pressure detected does not 
always cause visible bulging of the tyre. 
Do not satisfy yourself with just a visual 
check.

F

  If you have a compressor (such as the one 

in the temporary puncture repair kit) check 
the pressures of the four tyres when cold.


If it is not possible to carry out this check 
straight away, drive carefully at reduced 
speed.

or
F  In the event of a puncture, use the 

temporary puncture repair kit or the spare 
wheel (depending on equipment).

The alert is maintained until the system 
is reinitialised.

Reinitialisation

Before reinitialising the system, ensure 
that the pressures of the four tyres are 
correct for the use of the vehicle and in 
line with the recommendations on the 
tyre pressure label.
The under-inflation alert can only be 
relied on if the reinitialisation of the 
system has done with the pressures in 
the four tyres correctly adjusted.
The under-inflation detection system 
does not give a warning if a pressure is 
incorrect at the time of reinitialisation.

It is necessary to reinitialise the system every 
time one or more tyre pressures are adjusted, 
and after changing one or more wheels.
A label attached to the middle pillar, driver's 
side, gives a reminder of this.

97

4

Driving

C1_en_Chap04_conduite_ed01-2016

The under-inflation alert can only be 
considered reliable if reinitialisation of 
the system is done with the the four tyre 
pressures correctly set.

Snow chains

The system does not have to be 
reinitialised after fitting or removing 
snow chains.

Operating fault

The flashing and then fixed illumination 
of the under-inflation warning lamp 
indicates a fault with the system.

In this case, under-inflation monitoring of the 
tyres is no longer assured.
Have the system checked by a CITROËN 
dealer or a qualified workshop.

Before doing anything to the system, 
the pressures of the four tyres must be 
checked and the system reinitialised.

Reinitialisation of the system is done with the 
ignition on

 (ignition switch in the "ON" position 

or "ON

" mode) and the vehicle stationary.

F

  Open the glove box.

F

  Press the reinitialisation button.

The new pressure settings registered 
are considered to be reference values by 
the system.

F

  This warning lamp flashes 

3 times in the instrument panel 
when the reinitialisation is done.

F

  Wait a few minutes before switching off the 

ignition (ignition switch in the "ACC"  
or "LOCK" position, or "OFF

" mode).

98

Lighting and visibility

C1_en_Chap05_eclairage-visibilite_ed01-2016

Exterior lighting control stalk

Main lighting

The various front and rear lamps of the vehicle 
are designed to adapt the driver's visibility 
progressively according to the ambient light 
level and weather:
-  sidelamps, to be seen,
-  dipped beam headlamps to see without 

dazzling other drivers,

-  main beam headlamps to see clearly when 

the road is clear.

Additional lighting

Other lamps are provided to meet the 
requirements of particular driving conditions:
-  a rear foglamp,
-  daytime running lamps to be more visible 

during the day.

In some weather conditions (e.g. low 
temperature or humidity), the presence 
of misting on the internal surface of the 
glass of the headlamps and rear lamps 
is normal; it disappears after the lamps 
have been on for a few minutes.

Travelling abroad

If using your vehicle in a country that 
drives on the other side of the road, the 
headlamps must be adjusted to avoid 
dazzling on-coming drivers.
Contact a CITROËN dealer or a 
qualified workshop.

99

5

Lighting and visibility

C1_en_Chap05_eclairage-visibilite_ed01-2016

Model without AUTO lighting

Model with AUTO lighting

Selection ring for main lighting 
mode

Turn the ring to position the symbol required 
facing the mark.

Lighting off / Daytime running lamps.

Sidelamps only.

Dipped or main beam headlamps.

Automatic illumination of 
headlamps.

Dipping the headlamps

With dipped beam on, push the control stalk 
away from you to change to main beam. Pull 
the stalk toward you change back to dipped 
beam.

In the lighting off and sidelamps modes, the 
driver can switch on the main beam headlamps 
temporarily ("headlamp flash") by maintaining a 
pull on the stalk.

Displays

Illumination of the corresponding indicator lamp 
in the instrument panel confirms the lighting 
switched on.

100

Lighting and visibility

C1_en_Chap05_eclairage-visibilite_ed01-2016

Foglamp selection ring

The foglamp operates with the dipped and main 
beam headlamps.

F

  Turn the ring forward and release to switch 

on the rear foglamp.

When the lighting is switched off automatically 
(with AUTO model) or when the dipped beam 
headlamps are switched off manually, the 
foglamp and the sidelamps will remain on.
F

  Turn the ring rearward and release to 

switch off all the lamps.

Rear foglamp.

In good or rainy weather, both day 
and night, use of the rear foglamp is 
prohibited. In these situations, the 
power of its beam may dazzle other 
drivers. It should only be used in fog or 
snow.
In these weather conditions, it is your 
responsibility to switch on the foglamp 
and dipped beam headlamps manually 
as the sunshine sensor may detect 
sufficient light.
Do not forget to switch off the rear 
foglamp when it is no longer needed.

Switching off the lamps when 
the ignition is switched off

On switching off the ignition, all of the 
lamps turn off immediately, except for 
dipped beam if guide-me-home lighting 
is activated.

Switching on the lamps 
after the ignition is 
switched off

To reactivate the lighting control, rotate 
the ring to the "0" position - lamps off, 
then to the desired position.
On opening the driver's door a 
continuous audible signal warns the 
driver that the lighting is on.

101

5

Lighting and visibility

C1_en_Chap05_eclairage-visibilite_ed01-2016

Automatic illumination of 
headlamps

Switching on

F

  Turn the ring to the "AUTO" position.

Using a sunshine sensor, if a low level of 
ambient light level is detected, the sidelamps 
and dipped beam headlamps come on 
automatically, without any action by the driver.
When the ambient light returns to a sufficient 
level or the wipers are switched off, the lighting 
is switched off automatically.
The sensor is located at the base of the 
windscreen.

Switching off

F

  Turn the ring to another position.

In foggy weather or in snow, the 
sunshine sensor may detect sufficient 
light. The lighting will not come on 
automatically.
Do not cover the sunshine sensor, the 
associated functions will no longer be 
controlled.

102

Lighting and visibility

C1_en_Chap05_eclairage-visibilite_ed01-2016

Manual guide-me-home 
lighting*

Temporarily keeping the dipped beam 
headlamps on after the vehicle's ignition has 
been switched off makes the exit of the vehicle's 
occupants easier when the light is poor.

Switching on

F

  Place the lighting control stalk in the 

"lighting off" or "AUTO" position.

F

  With the ignition off, "flash" the headlamps 

using the lighting control stalk.

The lighting comes on for about 30 seconds.

Switching off

The manual guide-me-home lighting switches 
off immediately if you.
-  flash the headlamps again,
-  place the lighting control stalk in another 

position,

-  switch the ignition on.

* Depending on version.

103

5

Lighting and visibility

C1_en_Chap05_eclairage-visibilite_ed01-2016

Headlamp beam 

height adjustment

To avoid causing a nuisance to other road 
users, the height of the headlamp beams 
should be adjusted according to the load in the 
vehicle.
0.

  Driver only.

0.5.

 Driver + front passenger.

1.5.

 4 people.

3.

  4 people + maximum authorised load.

3.5.

 Driver + maximum authorised load.

The initial setting is position "0".

Direction indicators

F

  Left: lower the lighting stalk passing the 

point of resistance.

F

  Right: raise the lighting stalk passing the 

point of resistance.

Three flashes of the direction 

indicators

F

  Press briefly upwards or downwards, 

without going beyond the point of 
resistance; the direction indicators will 
flash 3 times.

104

Lighting and visibility

C1_en_Chap05_eclairage-visibilite_ed01-2016

Wiper control stalk

Manual controls

The wipers are controlled directly by the driver.

Windscreen wipers

Wiping speed control stalk: raise or lower the 
stalk to the desired position.

Single wipe.

Park.

Intermittent wipe.

Normal wipe (moderate rain).

Fast wipe (heavy rain).

Do not operate the wipers on a dry 
windscreen. Under extremely hot or 
cold conditions, ensure that the wiper 
blades are not stuck to the windscreen 
before operating the wipers.

In wintry conditions, remove snow, ice 
or frost present on the windscreen, 
around the wiper arms and blades and 
the windscreen seal, before operating 
the wipers.

For a single wipe of the windscreen, raise and 
release the control stalk.

105

5

Lighting and visibility

C1_en_Chap05_eclairage-visibilite_ed01-2016

Rear wiper

Rear screenwash

Wiper off, turn the control stalk towards you to 
operate the rear screenwash, accompanied by 
several sweeps of the rear wiper.

Windscreen wash

Turn the ring to this position for a 
steady wipe.

Pushing the stalk away from you operates the 
wash during wiping.

Pull the wiper stalk towards you. 
The windscreen wash, then the windscreen 
wipers, operate for a pre-determined time.

Do not use the front or rear screenwash 
when the screenwash reservoir is 
empty. You risk damaging the pump.

106

Safety

C1_en_Chap06_securite_ed01-2016

Horn

Audible warning to alert other road users to an 
imminent danger.

When manoeuvring the vehicle, 
take care not to operate the horn 
unintentionally.

F

  Press one of the steering wheel spokes.

F

  Press the central part of the steering 

wheel.

Hazard warning lamps

Visual warning with of all the direction 
indicators flashing to alert other road users to a 
vehicle breakdown, towing or accident.
F

  Press this button, all of the direction 

indicators flash.

They can operate with the ignition off.

107

6

Safety

C1_en_Chap06_securite_ed01-2016

Electronic Stability Control (ESC) incorporating 
the following systems:
-  anti-lock braking system (ABS) and the 

electronic brake force distribution (EBFD),

-  emergency braking assistance,
-  traction control (TRC),
-  dynamic stability control (DSC).

Electronic stability control (ESC)

Definitions

Anti-lock braking system (ABS) 
and electronic brake force 
distribution (EBFD)

These systems improve the stability and 
manoeuvrability of your vehicle when braking 
and contribute towards better control in 
corners, in particular on poor or slippery road 
surfaces.
The ABS prevents wheel lock in the event of 
emergency braking.
The electronic brake force distribution system 
manages the braking pressure wheel by wheel.

Emergency braking assistance

In an emergency, this system enables you to 
reach the optimum braking pressure more 
quickly and therefore reduce the stopping 
distance.
It is triggered according to the speed at which 
the brake pedal is pressed. This is felt by a 
reduction in the resistance of the pedal and an 
increase in the effectiveness of the braking.

Traction control (TRC)

This system optimises traction in order to limit 
wheel slip by acting on the brakes of the driving 
wheels and on the engine. It also improves 
the directional stability of the vehicle on 
acceleration.

Dynamic stability control (DSC)

If there is a difference between the path 
followed by the vehicle and that required by the 
driver, this system monitors each wheel and 
automatically acts on the brake of one or more 
wheels and on the engine to return the vehicle 
to the required path, within the limits of the laws 
of physics.

108

Safety

C1_en_Chap06_securite_ed01-2016

Illumination of this warning lamp, 
accompanied by an audible signal, 
indicates that there is a fault with the 
electronic brake force distribution 
(EBFD), which could cause loss of 
control of the vehicle when braking.

Operation

Illumination of this warning lamp, 
accompanied by an audible signal, 
indicates that there is a fault with 
the ABS system, which could cause 
loss of control of the vehicle when 
braking.

Anti-lock braking system (ABS) 
and electronic brake force 
distribution (EBFD)

When changing wheels (tyres and rims), 
make sure that these are approved for 
your vehicle.
Normal operation of the ABS may make 
itself felt by slight vibration of the brake 
pedal.

In emergency braking, press 
very firmly without releasing 
the pressure.

You must

 stop as soon as it is safe to do so.

Contact a CITROËN dealer or a qualified 
workshop as soon as possible.

Dynamic stability control (DSC) 
and traction control (TRC)

Activation

These systems are activated automatically 
each time the vehicle is started.
As soon as they detect a problem of grip or 
trajectory, these systems act on the operation if 
the engine and brakes.

Activation of the DSC system is 
signalled by the flashing of this 
indicator lamp in the instrument panel, 
accompanied by an audible signal.

Activation of the TRC system is 
signalled by the flashing of this 
indicator lamp in the instrument panel.

Drive carefully at reduced speed, and contact a 
CITROËN dealer or a qualified workshop.

109

6

Safety

C1_en_Chap06_securite_ed01-2016

The TRC and DSC systems offer 
increased safety in normal driving, but 
should not encourage the driver to take 
extra risks or drive at high speed.
The correct operation of these 
systems depends on observation of 
the manufacturer's recommendations 
regarding the wheels (tyres and rims), 
the braking components, the electronic 
components and the assembly and 
repair procedures used by CITROËN 
dealers.
After an impact, have the system 
checked by a CITROËN dealer or a 
qualified workshop.

Deactivation

In exceptional conditions (starting a vehicle 
which is bogged down, stuck in snow, on soft 
ground...), it may be advisable to deactivate the 
DSC and TRC systems, so that the wheels can 
spin freely and regain grip.

Operating fault

However, it is recommended that these 
systems be reactivated as soon as possible.

F

  Press this button briefly.

This warning lamp comes on: the 
TRC system no longer acts on the 
operation of the engine.

Reactivation

The TRC and DSC control systems are 
reactivated automatically every time the engine 
is started.

F

  Press the button again to 

reactivate it manually.

Illumination of this warning lamp, 
accompanied by an audible signal, 
indicates a fault with the system.

Drive carefully at reduced speed and contact 
a CITROËN dealer or a qualified workshop to 
have the system checked.

Deactivation of the TRC system only

Deactivation of the TRC and DSC systems

F  Vehicle stationary, press this 

button for at least than 3 seconds.

These warning lamps come 
on: the TRC and DSC 
systems no longer act on 
the operation of the engine.

When the TRC system only is deactivated, it is 
reactivated as the vehicle's speed increases.

When both the TRC and DSC systems are 
deactivated, they do not reactivate themselves 
even if the speed of the vehicle increases.

110

Safety

C1_en_Chap06_securite_ed01-2016

Active City Brake

Active City Brake is a driving assistance system 
that aims to avoid a frontal collision or reduce 
the speed of an impact if the driver does not 
react or reacts too late (brake application too 
late).

This system is designed to improve 
driving safety.
It remains the driver's responsibility to 
continuously monitor the state of the 
traffic and to assess the distances and 
relative speeds of other vehicles.
Active City Brake can in no 
circumstances replace the need for 
vigilance on the part of the driver.

Never look at the laser sensor through 
an optical instrument (magnifying glass, 
microscope...) at a distance of less than 
10 centimetres: risk of eye injury.

Automatic braking occurs later than if 
done by the driver, so as to intervene 
only when there is a high risk of 
collision.

Principle

Using a laser sensor and a camera located at 
the top of the windscreen, this system detects 
a vehicle running in the same direction or 
stationary ahead of your vehicle.
When necessary, the vehicle's braking system 
is operated automatically to reduce the speed 
of impact or to help avoid a collision with the 
vehicle ahead.

Conditions for activation

Active City Brake only operates if the following 
conditions are met:
●  the engine is running,
●  the vehicle is in a forward gear,
●  to trigger the pre-collision alert:

-  the speed is between 9 and 87 mph 

(15 and 140 km/h),

-  the difference in speed between your 

vehicle and the one ahead is more than 
about 9 mph (15 km/h),

●  for braking assistance:

-  the speed is between about 18 and 

50 mph (30 and 80 km/h),

-  the difference in speed between your 

vehicle and the one ahead is more than 
about 18 mph (30 km/h),

●  for automatic pre-collision braking:

-  the speed is between about 6 and 

50 mph (10 and 80 km/h),

-  the difference in speed between your 

vehicle and the one ahead is more than 
about 6 mph (10 km/h),

●  the braking assistance systems (ABS, 

EBFD, EBA) are not faulty,

●  the trajectory control systems (TRC, DSC) 

are not deactivated or faulty,

●  the vehicle is not in a tight corner,
●  the system has not been triggered during 

the previous 10 seconds.


Content   ..  5  6  7  8   ..