Lincoln Mark LT (2008 year). Instruction - part 7


  Index      Lincoln     Lincoln Mark LT (2008 year) - instruction in english


Search            copyright infringement  


Content      ..     5      6      7      8     ..


Lincoln Mark LT (2008 year). Instruction - part 7


Climate control features

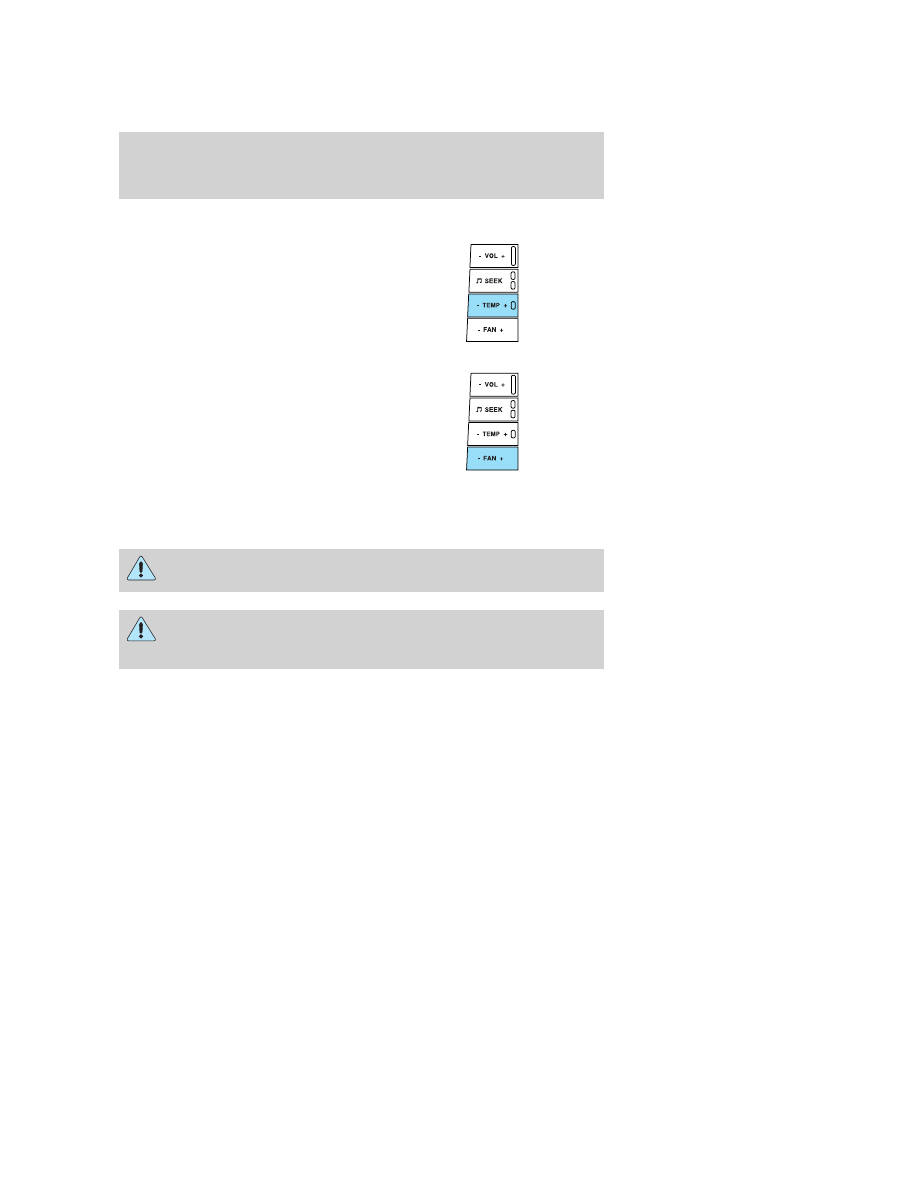
Press TEMP + or - to adjust
temperature.

Press FAN + or - to adjust fan
speed.

MOON ROOF (IF EQUIPPED)

The moon roof control is located on the overhead console.

Do not let children play with the moon roof or leave children
unattended in the vehicle. They may seriously hurt themselves.

When closing the moon roof, you should verify that it is free of
obstructions and ensure that children and/or pets are not in the

proximity of the moon roof opening.

Note: The moon roof will open to the “comfort” position first before
opening all the way. The “comfort” position helps to alleviate rumbling
wind noise which may happen in the vehicle with the roof fully opened.

2008 Mark LT (mlt)
Owners Guide (post-2002-fmt)
USA 
(fus)

Driver Controls

97

-------------------------------------------------------------------------------------------------------------------------------------------------------------

To open the moon roof: The moon
roof is equipped with a one-touch
open feature. Press and release the
rear portion of the moon roof
control. The moon roof will open to
the “comfort” position. Press and
release the control again to fully
open. To stop the one-touch open
feature press the control again.

To close the moon roof: The
moon roof is equipped with an
automatic, one-touch, express closing feature. Press and release the front
portion of the control. To stop motion at any time during the one-touch
closing, press the control again.

To vent the moon roof: Press and hold the front portion of the control.
The moon roof must be in the closed position in order to move it
into the vent position. 
To close, press and hold the rear portion of the
control until the glass panel stops moving.

The moon roof has a built-in sliding shade that can be instructionly opened
or closed when the glass panel is shut. To close the shade, pull it toward
the front of the vehicle.

HOMELINK

姞 WIRELESS CONTROL SYSTEM

The HomeLink

威 Wireless Control

System, located on the driver’s visor,
provides a convenient way to
replace up to three hand-held
transmitters with a single built-in
device. This feature will learn the
radio frequency codes of most
transmitters to operate garage
doors, entry gate operators, security systems, entry door locks, and
home or office lighting.

When programming your HomeLink

威 Wireless Control System to

a garage door or gate, be sure that people and objects are out of

the way to prevent potential injury or damage.

2008 Mark LT (mlt)
Owners Guide (post-2002-fmt)
USA 
(fus)

Driver Controls

98

-------------------------------------------------------------------------------------------------------------------------------------------------------------

Do not use the HomeLink

威 Wireless Control System with any garage

door opener that lacks safety stop and reverse features as required by
U.S. federal safety standards (this includes any garage door opener
model manufactured before April 1, 1982). A garage door which cannot
detect an object, signaling the door to stop and reverse, does not meet
current U.S. federal safety standards. For more information, contact
HomeLink

威 at: www.homelink.com or 1–800–355–3515.

Retain the original transmitter for use in other vehicles as well as for
future programming procedures (i.e. new HomeLink

威 equipped vehicle

purchase). It is also suggested that upon the sale of the vehicle, the
programmed Homelink

威 buttons be erased for security purposes, refer to

Programming in this section.

Programming

Do not program HomeLink

威 with the vehicle parked in the garage.

Note: Your vehicle may require the ignition switch to be turned to the
ACC position for programming and/or operation of the HomeLink

威. It is

also recommended that a new battery be placed in the hand-held
transmitter of the device being programmed to HomeLink

威 for quicker

training and accurate transmission of the radio-frequency signal.

1. Position the end of your
hand-held transmitter 1–3 inches
(2–8 cm) away from the HomeLink

button you wish to program (located
on your visor) while keeping the
indicator light in view.

2. Simultaneously press and hold
both the chosen HomeLink

威 and

hand-held transmitter buttons until the HomeLink

威 indicator light

changes from a slow to a rapidly blinking light. Now you may release
both the HomeLink

威 and hand-held transmitter buttons.

Note: Some entry gates and garage door openers may require you to
replace Step 2 with procedures noted in the Gate Operator and
Canadian Programming 
in this section for Canadian residents.

3. Firmly press, hold for five seconds and release the programmed
HomeLink

威 button up to two separate times to activate the door. If the

door does not activate, press and hold the just-trained HomeLink

button and observe the indicator light.

2008 Mark LT (mlt)
Owners Guide (post-2002-fmt)
USA 
(fus)

Driver Controls

99

-------------------------------------------------------------------------------------------------------------------------------------------------------------

• If the indicator light stays on constantly, programming is complete
and your device should activate when the HomeLink

威 button is pressed

and released.

• If the indicator light blinks rapidly for two seconds and then turns
to a constant light continue with “Programming” Steps 4 through
to complete programming of a rolling code equipped device (most
commonly a garage door opener).

4. At the garage door opener receiver (motor-head unit) in the garage,
locate the “learn” or “smart” button (usually near where the hanging
antenna wire is attached to the unit).

5. Firmly press and release the “learn” or “smart” button. (The name and
color of the button may vary by manufacturer.)

Note: There are 30 seconds in which to initiate Step 6.

6. Return to the vehicle and firmly press, hold for two seconds and
release 
the programmed HomeLink

威 button. Repeat the

press/hold/release sequence again and, depending on the brand of the
garage door opener (or other rolling code equipped device), repeat this
sequence a third time to complete the programming.

HomeLink

威 should now activate your rolling code equipped device. To

program additional HomeLink

威 buttons begin with Step 1 in this section.

For questions or comments, please contact HomeLink

威 at

www.homelink.com or 1–800–355–3515.

Gate Operator & Canadian Programming

During programming, your
hand-held transmitter may
automatically stop transmitting —
not allowing enough time for
HomeLink

威 to accept the signal

from the hand-held transmitter.

After completing Step 1 outlined in
the Programming section, replace
Step 2 with the following:

Note: If programming a garage door opener or gate operator, it is
advised to unplug the device during the “cycling” process to prevent
overheating.

2008 Mark LT (mlt)
Owners Guide (post-2002-fmt)
USA 
(fus)

Driver Controls

100

-------------------------------------------------------------------------------------------------------------------------------------------------------------

• Continue to press and hold the HomeLink威 button (note Step 2 in the

Programming section) while you press and release —

every two

seconds (“cycle”) your hand-held transmitter until the frequency
signal has been accepted by the HomeLink

威. The indicator light will

flash slowly and then rapidly after HomeLink

威 accepts the radio

frequency signal.

• Proceed with Step 3 in the Programming section.

Operating the HomeLink

姞 Wireless Control System

To operate, simply press and release
the appropriate HomeLink

威 button.

Activation will now occur for the
trained product (garage door, gate
operator, security system, entry
door lock, or home or office lighting
etc.). For convenience, the
hand-held transmitter of the device
may also be used at any time. In the event that there are still
programming difficulties, contact HomeLink

威 at www.homelink.com or

1–800–355–3515.

Erasing HomeLink

姞 buttons

To erase the three programmed
buttons (individual buttons cannot
be erased):
• Press and hold the two outer

HomeLink

威 buttons until the

indicator light begins to
flash-after 20 seconds. Release
both buttons. Do not hold for
longer that 30 seconds.

HomeLink

威 is now in the train (or

learning) mode and can be programmed at any time beginning with Step
1 in the Programming section.

Reprogramming a single HomeLink

姞 button

To program a device to HomeLink

威 using a HomeLink威 button previously

trained, follow these steps:

1. Press and hold the desired HomeLink

威 button. Do NOT release the

button.

2008 Mark LT (mlt)
Owners Guide (post-2002-fmt)
USA 
(fus)

Driver Controls

101

-------------------------------------------------------------------------------------------------------------------------------------------------------------

2. The indicator light will begin to flash after 20 seconds. Without
releasing the HomeLink

威 button, follow Step 1 in theProgramming

section.

For questions or comments, contact HomeLink

威 at www.homelink.com

or 1–800–355–3515.

MESSAGE CENTER

With the ignition in the ON position,
the message center, located on your
instrument cluster, displays
important vehicle information
through a constant monitor of
vehicle systems. 
You may select
display features on the message center for a display of status preceded
by a brief indicator chime. The system will also notify you of potential
vehicle problems with a display of system warnings followed by a long
indicator chime. If equipped with an outside temperature display, it will
display in the instrument cluster all the time, except when a warning
message is present.

Selectable features

Reset

Press this control to select and reset
functions shown in the INFO menu
and SETUP menu.

Info menu

This control displays the following
control displays:
• Odometer/Compass
• Trip odometer/Odometer/Compass
• Distance to Empty
• Average Fuel Economy
• Trip Elapsed Drive Time

2008 Mark LT (mlt)
Owners Guide (post-2002-fmt)
USA 
(fus)

Driver Controls

102

-------------------------------------------------------------------------------------------------------------------------------------------------------------

Odometer/Trip odometer

Refer to Gauges in the Instrument Cluster chapter.

Compass display

The compass reading may be affected when you drive near large
buildings, bridges, power lines and powerful broadcast antenna. Magnetic
or metallic objects placed in, on or near the vehicle may also affect
compass accuracy.

Usually, when something affects the compass readings, the compass will
correct itself after a few days of operating your vehicle in normal
conditions. If the compass still appears to be inaccurate, a instruction
calibration may be necessary. Refer to Compass zone/calibration
adjustment.

Most geographic areas (zones) have a magnetic north compass point that
varies slightly from the northerly direction on maps. This variation is four
degrees between adjacent zones and will become noticeable as the
vehicle crosses multiple zones. A correct zone setting will eliminate this
error. Refer to Compass zone/calibration adjustment.

Compass zone/calibration adjustment

1. Determine your magnetic zone by
referring to the zone map.

2. Turn ignition to the ON position.

3. Start the engine.

4. From Info menu, select the
Compass/Odometer function. (Do
not select Trip, DTE, or AFE. The
top of the message center must be
blank).

5. Press and hold the SETUP and
RESET controls until the message
center display changes to show the
current zone setting (XX).

1

2

3

4

5

6

7 8 9 1011

12

13

14

15

2008 Mark LT (mlt)
Owners Guide (post-2002-fmt)
USA 
(fus)

Driver Controls

103

-------------------------------------------------------------------------------------------------------------------------------------------------------------

6. Press the RESET, then press
SETUP control repeatedly until the
correct zone setting for your
geographic location is displayed on
the message center. The range of
zone values are from 01 to 15 and “wraps” back to 01.

7. To exit the zone setting mode,
and to “lock in” your change, press
and release the RESET control.

Perform compass calibration in an open area free from steel structures
and high voltage lines. For optimum calibration, turn off all electrical
accessories (heater/air conditioning, wipers, etc.) and make sure all
vehicle doors are shut.

8. Press the RESET control to start
the compass calibration function.

9. Slowly drive the vehicle in a
circle (less than 3 mph [5 km/h])
until the CIRCLE SLOWLY TO
CALIBRATE display changes to CALIBRATION COMPLETED. It will take
up to five circles to complete calibration.

10. The compass is now calibrated.

Average fuel economy (AFE)

Select this function from the INFO
menu to display your average fuel
economy in miles/gallon or
liters/100 km.

If you calculate your average fuel
economy by dividing gallons of fuel
used by 100 miles traveled (kilometers traveled by liters used), your
figure may be different than displayed for the following reasons:
• Your vehicle was not perfectly level during fill-up
• Differences in the automatic shut-off points on the fuel pumps at

service stations

2008 Mark LT (mlt)
Owners Guide (post-2002-fmt)
USA 
(fus)

Driver Controls

104

-------------------------------------------------------------------------------------------------------------------------------------------------------------

• Variations in top-off procedure from one fill-up to another
• Rounding of the displayed values to the nearest 0.1 gallon (liter)
1. Drive the vehicle at least 5 miles (8 km) with the speed control
system engaged to display a stabilized average.

2. Record the highway fuel economy for future reference.

It is important to press the RESET control after setting the speed
control to get accurate highway fuel economy readings.

Distance to empty (DTE)

Selecting this function from the
INFO menu estimates approximately
how far you can drive with the fuel
remaining in your tank under
normal driving conditions.
Remember to turn the ignition off
when refueling to allow this feature to correctly detect the added fuel.

The DTE function will display LOW FUEL LEVEL and sound a tone for
one second when you have approximately 50 miles (80 km) to empty. If
you RESET this warning message, this display and tone will return
within 10 minutes.

DTE is calculated using a running average fuel economy, which is based
on your recent driving history of 500 miles (800 km). This value is not
the same as the average fuel economy display. The running average fuel
economy is reinitialized to a factory default value if the battery is
disconnected.

Trip elapsed drive time

Select this function from the INFO
menu to display a timer.

To operate the Trip Elapsed Drive
Time perform the following:

1. Press and release RESET in order
to start the timer.

2. Press and release RESET to pause the timer.

3. Press and hold RESET for 2 seconds in order to reset the timer.

2008 Mark LT (mlt)
Owners Guide (post-2002-fmt)
USA 
(fus)

Driver Controls

105

-------------------------------------------------------------------------------------------------------------------------------------------------------------

Setup menu

Press this control for the following
displays:
• System Check
• Units (English/Metric)
• Autolock
• Autolamp Delay
• Language
System check

Selecting this function from the
SETUP menu causes the message
center to cycle through each of the
systems being monitored. For each
of the monitored systems, the
message center will indicate either an OK message or a warning message
for three seconds.

Pressing the RESET control cycles the message center through each of
the systems being monitored.

The sequence of the system check report and how it appears in the
message center is as follows:

1. FUEL LEVEL

2. ENGINE TEMP

3. OIL PRESSURE

4. BRAKE FLUID LEVEL

5. CHARGING SYSTEM

Units (English/Metric)

1. Select this function from the
SETUP menu for the current units
to be displayed.

2. Press the RESET control to
change from English to Metric.

Autolocks

This feature automatically locks all vehicle doors when the vehicle is
shifted into any gear, putting the vehicle in motion.

2008 Mark LT (mlt)
Owners Guide (post-2002-fmt)
USA 
(fus)

Driver Controls

106

-------------------------------------------------------------------------------------------------------------------------------------------------------------

1. To disable/enable the autolock
feature, select this function from the
SETUP control for the current
display mode.

2. Press the RESET control to turn
the autolocks ON or off.

Autolamp delay

This feature keeps your headlights on for up to three minutes after the
ignition is switched off.

1. To disable/enable the autolamp
delay feature, select this function
from the SETUP control for the
current display mode.

2. Press the RESET control to select
the new Autolamp delay values of >0, >10, >20, >30, >60, >90, >120 or
>180.

Language

1. Select this function from the
SETUP menu for the current
language to be displayed.

2. Pressing the RESET control
cycles the message center through
each of the language choices.

3. Press and hold the RESET
control to set the language choice.

System warnings

System warnings alert you to possible problems or malfunctions in your
vehicle’s operating systems.

In the event of a multiple warning situation, the message center will
cycle the display to show all warnings by displaying each one for 4
seconds.

2008 Mark LT (mlt)
Owners Guide (post-2002-fmt)
USA 
(fus)

Driver Controls

107

-------------------------------------------------------------------------------------------------------------------------------------------------------------

The message center will display the last selected feature if there are no
more warning messages. This allows you to use the full functionality of
the message center after you acknowledge the warning by pressing the
RESET control and clearing the warning message.

Warning messages that have been reset are divided into two categories:
• They will reappear on the display ten minutes from the reset.
• They will not reappear until an ignition off-ON cycle has been

completed.

This acts as a reminder that these warning conditions still exist within
the vehicle.

Warning display

Status

Door ajar

Warning can be reset

Low fuel level

Warning returns after 10 minutes

Check charging system

Check traction control™

Low brake fluid level

Low oil pressure

Check engine temperature

Reduced engine power

Stop engine safely

Check fuel cap

Warning returns after the ignition key
is turned from off to ON.

Transmission malfunction

Low tire pressure

Tire pressure monitor fault

Tire pressure sensor fault

Engine failsafe mode

DOOR AJAR. Displayed when a door is not completely closed.

TRANSMISSION MALFUNCTION. Displayed when the transmission is
not operating properly. If the warning stays on or continues to come on,
contact your authorized dealer as soon as possible.

CHECK ENGINE TEMPERATURE. Displayed when the engine
coolant is overheating. Stop the vehicle as soon as safely possible, turn
off the engine and let it cool. Check the coolant and coolant level. Refer
to Engine coolant in the Maintenance and Specifications chapter. If
the warning stays on or continues to come on, contact your authorized
dealer as soon as possible.

2008 Mark LT (mlt)
Owners Guide (post-2002-fmt)
USA 
(fus)

Driver Controls

108

-------------------------------------------------------------------------------------------------------------------------------------------------------------

Never remove the coolant reservoir cap while the engine is
running or hot.

REDUCED ENGINE POWER. Displayed when the engine is
overheating. Stop the vehicle as soon as safely possible, turn off the
engine. If the warning stays on or continues to come on, contact your
authorized dealer as soon as possible.

STOP ENGINE SAFELY. Displayed when the engine is overheating.
Stop the vehicle as soon as safely possible, turn off the engine. If the
warning stays on or continues to come on, contact your authorized
dealer as soon as possible.

LOW FUEL LEVEL. Displays “DISTANCE TO EMPTY XXX Miles” as an
early reminder of a low fuel condition.

CHECK CHARGING SYSTEM. Displayed when the electrical system is
not maintaining proper voltage. If you are operating electrical accessories
when the engine is idling at a low speed, turn off as many of the
electrical loads as soon as possible. If the warning stays on or comes on
when the engine is operating at normal speeds, have the electrical
system checked as soon as possible.

CHECK TRACTION CONTROL™. Displayed when the Traction
Control™ system is not operating properly. If this message is displayed
on the message center the Traction Control™ system will be partially
operable. If this warning stays on, contact your authorized dealer for
service as soon as possible. For further information, refer to Traction
control™ 
in the Driving chapter.

LOW BRAKE FLUID LEVEL. Indicates the brake fluid level is low and
the brake system should be inspected immediately. Refer to Brake fluid
in the Maintenance and Specifications chapter.

LOW OIL PRESSURE. Displayed when the engine oil pressure is low. If
this warning message is displayed, check the level of the engine oil.
Refer to Engine oil in the Maintenance and Specifications chapter for
information about adding engine oil. If the oil level is OK and this
warning persists, shut down the engine immediately and contact your
authorized dealer for service.

CHECK FUEL CAP. Displayed when the fuel filler cap is not properly
installed. Check the fuel filler cap for proper installation. Refer to Fuel
filler cap 
in the Maintenance and Specifications chapter.

LOW TIRE PRESSURE. Displayed when one or more tires on your
vehicle have low tire pressure. Refer to Inflating Your Tires in the
Tires, Wheels and Loading chapter.

2008 Mark LT (mlt)
Owners Guide (post-2002-fmt)
USA 
(fus)

Driver Controls

109

-------------------------------------------------------------------------------------------------------------------------------------------------------------

TIRE PRESSURE MONITOR FAULT. Displayed when the Tire
Pressure Monitoring System is malfunctioning. If the warning stays on or
continues to come on, have the system inspected by your authorized
dealer.

TIRE PRESSURE SENSOR FAULT. Displayed when a tire pressure
sensor is malfunctioning, or your spare tire is in use. For more
information on how the system operates under these conditions, refer to
Understanding Your Tire Pressure Monitoring System (TPMS) in the
Tires, Wheels and Loading chapter. If the warning stays on or
continues to come on, have the system inspected by your authorized
dealer.

ENGINE FAILSAFE MODE. Displayed when the engine has defaulted
to a ’limp-home’ operation. If the warning stays on or continues to come
on, contact your authorized dealer as soon as possible.

DATA ERR. These messages indicate improper operation of the vehicle
network communication between electronic modules.
• Fuel computer
• Charging system
• Autolamp delay
• Auto locks
• Brake fluid
• Compass
• Outside temperature
• Engine sensor
Contact your authorized dealer as soon as possible if these messages
occur on a regular basis.

POSITIVE RETENTION FLOOR MAT

Do not install additional floor mats on top of the factory installed
floor mats as they may interfere with the accelerator or the

brake pedals.

2008 Mark LT (mlt)
Owners Guide (post-2002-fmt)
USA 
(fus)

Driver Controls

110

-------------------------------------------------------------------------------------------------------------------------------------------------------------

Position the floor mat so that the
eyelet is over the pointed end of the
retention post. Make sure that the
mat does not interfere with the
operation of the accelerator or the
brake pedal. To remove the floor
mat, reverse the installation
procedure.

TAILGATE LOCK

Your vehicle may be equipped with a
tailgate lock designed to help
prevent theft of the tailgate.
• Insert ignition key and turn to the

right to engage lock.

• Turn ignition key to the left to

unlock.

Tailgate removal

Your tailgate is removable to allow more room for loading.

Note: If equipped with a Reverse Camera System (RCS), do steps 1
through 3 before removing the tailgate.

1. Before removal of the tailgate,
locate and disconnect the tailgate
in-line connector under the pickup
box on the right-hand side of the
vehicle near the spare tire

2. Install a protective cap (located
in the glove box) onto the vehicle
in-line RCS connector.

2008 Mark LT (mlt)
Owners Guide (post-2002-fmt)
USA 
(fus)

Driver Controls

111

-------------------------------------------------------------------------------------------------------------------------------------------------------------

3. Partially lower tailgate and carefully feed tailgate harness up through
the truck box and the bumper. Secure the tailgate harness onto the
vehicle box.

4. Lower the tailgate.

5. Use a screwdriver to pry the
spring clip (on each connector) past
the head of the support screw.
Disconnect cable.

6. Disconnect the other cable.

7. Lift tailgate to a 45-degree angle
from horizontal.

8. Lift right side off of its hinge.

9. Lift tailgate to a 80-degree angle from horizontal.

10. Remove tailgate from left side hinge by sliding tailgate to the right.

To install, follow the removal procedures in reverse order.

BEDRAILS (IF EQUIPPED)
• This bedrail is for appearance use only.

To help prevent injury, do not use bedrail to retain cargo.

• Retain cargo with the pickup tiedown hooks.

BED EXTENDER (IF EQUIPPED)

Your vehicle may be equipped with a bed extender designed to extend
the pickup box for larger loads.

To extend the bed extender:

1. Lower tailgate.

2. Pull the lever on each side of the
bed extender to release it from the
pickup box.

3. Lift the bed extender over onto
the tailgate.

2008 Mark LT (mlt)
Owners Guide (post-2002-fmt)
USA 
(fus)

Driver Controls

112

-------------------------------------------------------------------------------------------------------------------------------------------------------------


Content      ..     5      6      7      8     ..