Dodge Durango (2019 year). Instruction - part 15
Frequently Asked Questions About Installing Child Restraints With LATCH
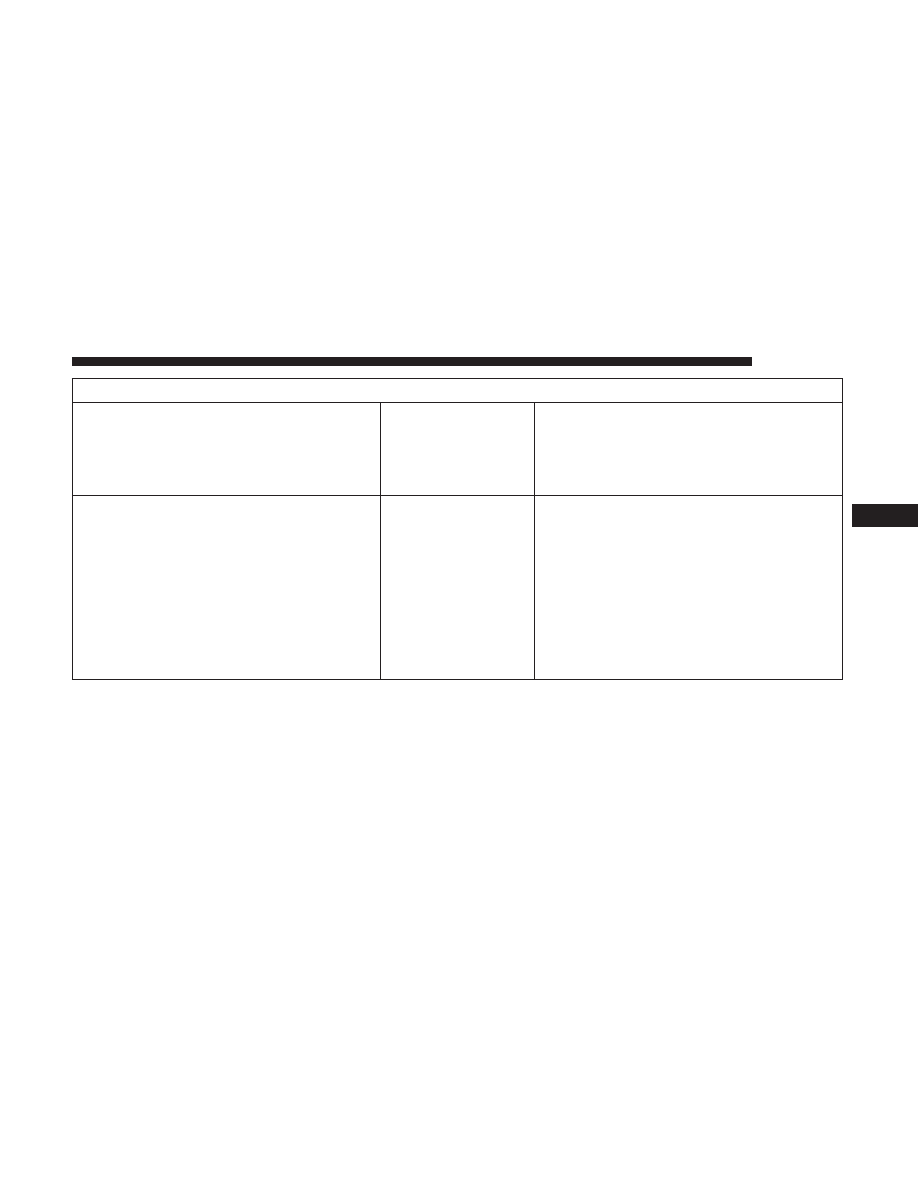
Can the rear-facing child restraint touch the
back of the front passenger seat?
Yes
The child seat may touch the back of the
front passenger seat if the child restraint
manufacturer also allows contact. See your
child restraint owner’s instruction for more in-
formation.
Can the rear head restraints be removed?
Yes — 5 Passenger
No — 6 Passenger
Yes — 7 Passenger
5 Passenger: Only the head restraint in the
center position may be removed if it inter-
feres with the installation of the child re-
straint.
7 Passenger: Only the head restraint in the
center position may be removed in the sec-
ond row if it interferes with the installation
of the child restraint.
Refer to “Head Restraints” in “Getting To
Know Your Vehicle” for further information.
5
SAFETY
237