Seat Alhambra. Instruction - part 18
-------------------------------------------------------------------------------------------------------------------------------------------------------------
Checking and refilling levels
Checking the coolant level and top-
ping up
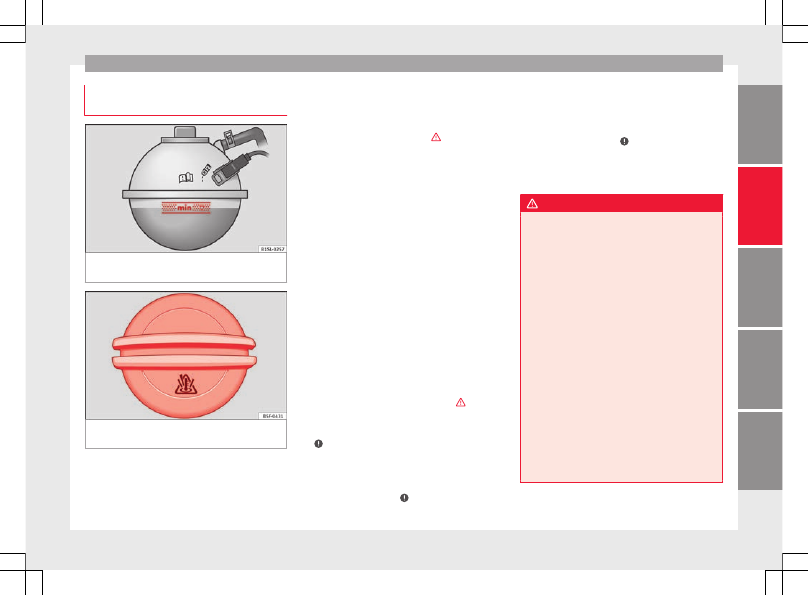
Fig. 244
In the engine compartment: Marking
on coolant expansion tank
Fig. 245
In the engine compartment: coolant
expansion tank cap
If the coolant level is low, the coolant warn-
ing indicator will light.
Preparations
●
Park the vehicle on even, flat and firm
ground.
●
Allow the engine to cool
●
Open the bonnet
●
The coolant expansion tank is easily recog-
nisable because of the symbol on the cap
.
Checking the engine coolant level
●
When the engine is cold, check the coolant
level using the side marking on the expan-
sion tank
●
If the level is below the “MIN” mark, top up
with coolant. When the engine is hot it may
be slightly above the marked area.
Topping up the engine coolant level
●
Always protect your face, hands and arms
from hot coolant and steam using a large,
thick cloth over the coolant expansion tank
cap.
●
Remove the cap very carefully
●
Only refill using
new engine coolant ac-
cording to SEAT specifications (
›››
●
The engine coolant level should be be-
tween the marks on the coolant expansion
tank
.
Do not exceed the top level
of the marked area
●
Screw on the cap tightly.
●
If, in the event of an emergency, you have
no coolant that is compliant to the required
specifications (
), do not use an-
other type of additive. Instead, top up with
distilled water only
. Then re-establish
the correct proportion of the mixture with the
correct additive as soon as possible
.
WARNING
Hot vapours and coolant can cause serious
burns.
●
Never open the coolant expansion tank if
steam or coolant is coming from the engine
compartment. Wait until you cannot see or
hear any steam or coolant escaping.
●
Always wait until the engine has complete-
ly cooled before very carefully opening the
expansion tank cap. Contact with hot ele-
ments of the engine can cause skin burns.
●
When the engine is warm or hot, the cool-
ing system is pressurised. Do not unscrew
the cap on the expansion tank when the en-
gine is hot. Otherwise, coolant may spray out
under pressure causing burns and serious in-
jury.
–
Carefully and slowly unscrew the cap an-
ti-clockwise, gently pressing down on it.
–
Always protect your face, hands and arms
from hot coolant and steam using a large,
thick cloth.
»
277