Seat Alhambra. Instruction - part 7


  Index      Seat     Seat Alhambra. Instruction


Search            copyright infringement  


Content      ..     5      6      7      8     ..


Seat Alhambra. Instruction - part 7


-------------------------------------------------------------------------------------------------------------------------------------------------------------

General instrument panel

To continue setting, press 

0.0 / SET

››› 

Fig. 118


7

. Hold button down to

scroll through the numbers quickly.

Press button 

 again to end the clock

setting.

Rev counter (with the engine running, in
thousands of revolutions per minute).
Together with the gear-change indicator,
the rev counter offers you the possibility
of using the engine of your vehicle at a
suitable speed. The start of the red area

››› 

Fig. 118

 indicates the maximum en-

gine speed working at operating temper-
ature. However, it is advisable to change
up a gear or move the selector lever to 

D

(or lift your foot off the accelerator) before
the needle reaches the red zone 

››› 

We

recommend that you avoid high revs and
that you follow the recommendations on
the gear-change indicator. Consult the
additional information in 

››› 

page 196

.

Engine coolant temperature display 

››› 

page 274

.

Displays on the screen 

››› 

page 101

.

Fuel reserve display 

››› 

page 261

.

Speedometer.
Reset knob for trip recorder (

trip

).

2

3

4

5

6

7

Press button 

0.0 / SET

 to reset to zero.

WARNING

Any distraction may lead to an accident, with
the risk of injury.

Do not operate the instrument panel con-

trols when driving.

CAUTION

To prevent damage to the engine, the rev
counter needle should only remain in the red
zone for a short period of time.

For the sake of the environment

Changing up a gear in time reduces fuel con-
sumption and noise.

Indications on the display

A variety of information can be viewed on the
instrument panel display 

››› 

Fig. 118


4

, de-

pending on the vehicle equipment:

Warning and information text.

Mileage.

Time.

Outside temperature.

Compass.

Selector lever positions 

››› 

page 192

.

Recommended gear (instruction gearbox)

››› 

page 192

.

Multifunction display (MFD) and menus for

different setting options 

››› 

page 26

.

Service interval display 

››› 

page 103

.

Second speed display (menu 

Configura-

tion

››› 

page 26

.

Start-Stop operation indicator 

››› 

page 102

.

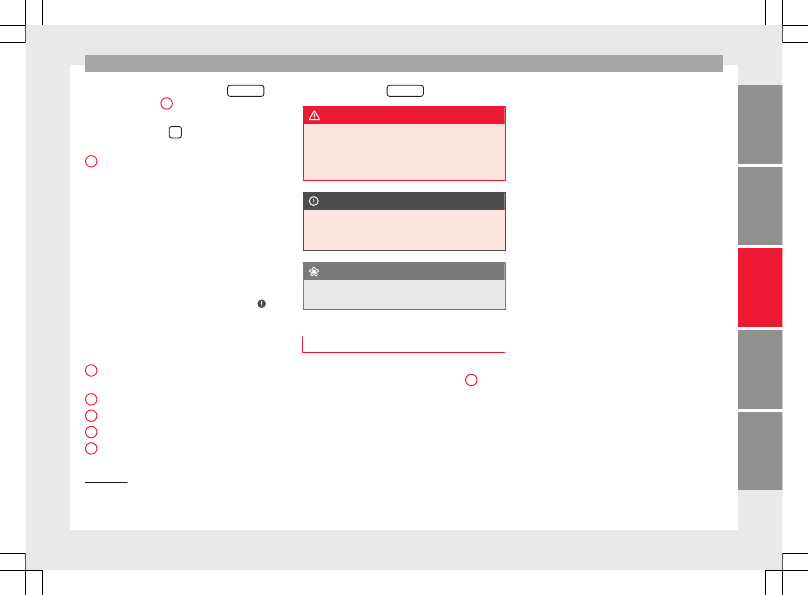
Warning and information texts
The system runs a check on certain compo-
nents and functions when the ignition is
switched on and while the vehicle is moving.
Faults in the operation are displayed on the
screen using red and yellow symbols and
messages on the instrument panel display
(

››› 

page 105

) and, in some cases, with audi-

ble warnings. The display may vary according
to the type of instrument panel fitted.

»

1)

Depending on the vehicle equipment, it is also

possible to set the time using the 

settings

 menu

on the instrument panel display 

››› 

page 30

.

101

Tec

hnic

al

 d

at

a

Adv

ic

e

Oper

ation

Emer

genc

ie

s

Saf

ety

-------------------------------------------------------------------------------------------------------------------------------------------------------------

-------------------------------------------------------------------------------------------------------------------------------------------------------------

Operation

Priority 1 warning (red symbols)

Symbol flashing or lit; partly combined with audible
warnings.


Stop the vehicle! It is dangerous 

››› 

 in Control and

warning lamps on page 105

 !

Check the function that is faulty and repair it. If necessa-
ry, request assistance from specialised personnel.

Priority 2 warning (yellow symbols)

Symbol flashing or lit; partly combined with audible
warnings.
A function fault, or fluids which are below the correct
levels may cause damage to the vehicle 

››› 

 in Control

and warning lamps on page 105

 !

Check the faulty operation as soon as possible. If neces-
sary, request assistance from specialised personnel.

Informative text

Information relating to different vehicle processes.

Mileage
The odometer registers the total distance
travelled by the car.

The odometer (

trip

) shows the distance

travelled since the last odometer reset. The
last digit of the trip recorder indicates distan-
ces of 100 metres or one tenths of a mile.

Outside temperature display
When the outside temperature is below +4°C
(+39°F), the symbol “ice crystal” (warning of
risk of freezing) is also displayed next to the

temperature. At first this symbol flashes and
then it remains lit until the outside tempera-
ture rises above +6°C (+43°F) 

››› 

.

When the vehicle is at a standstill, with the
auxiliary heating on (

››› 

page 177

), or when

travelling at very low speeds, the tempera-
ture displayed may be higher than the true
outside temperature, as a result of the heat
produced by the engine.

The temperatures measured range from
-40°C to +50°C (-40°F to +122°F).

Compass
With the ignition on and the navigation sys-
tem on, the cardinal point corresponding to
the vehicle's direction of travel is displayed
on the instrument panel 

››› 

page 103

.

Selector lever positions
The range of engaged gears of the selector
lever is shown on the side of the lever, and
on the instrument panel display. In positions
D and S, and with the Tiptronic, the corre-
sponding gear is also displayed.

Recommended gear (instruction gearbox)
The recommended gear in order to save fuel
is displayed on the instrument panel while
you are driving 

››› 

page 192

.

Second speed display (mph or km/h)
In addition to the speedometer, the speed
can also be displayed in a different unit of
measurement (in miles or in km per hour). To
change the units, in the 

Settings

 menu, se-

lect the option 

Second speed

››› 

page 26

.

Vehicles without menu display on the instru-
ment panel

Switch on the engine.

Press button 

 three times. The odometer

display flashes on the instrument panel dis-
play.

Press button 

0.0 / SET

 once. “mph”

or “km/h” is displayed briefly instead of the
odometer.

This activates the second speed display. To

switch it off, repeat the procedure.

This option cannot be deactivated in models
destined for countries in which the second
speed must always be visible.

Start-Stop operating display.
Updated information relating to the status is
displayed on the instrument panel

››› 

page 205

.

WARNING

Observe the safety warnings 

››› 

 in Control

and warning lamps on page 105

.

102

-------------------------------------------------------------------------------------------------------------------------------------------------------------

-------------------------------------------------------------------------------------------------------------------------------------------------------------

General instrument panel

WARNING

Even though outside temperatures are above
freezing, some roads and bridges may be icy.

At outside temperatures above +4°C

(+39°F), even when the “ice crystal symbol”
is not visible, there may still be patches of ice
on the road.

Do not rely on the outside temperature in-

dicator!

Note

Different versions of the instrument panel

are available and therefore the versions and
instructions on the display may vary. In the
case of displays without warning or informa-
tion texts, faults are indicated exclusively by
the warning lamps.

When several warnings are active at the

same time, the symbols are shown succes-
sively for a few seconds and will stay on until
the fault is rectified.

Compass*

Fig. 119 

Magnetic zones

The compass does not require calibration in
vehicles for which the navigation system was
mounted at the factory. The option 

compass

disappears.

The compass in vehicles in which the naviga-
tion system was not mounted at the factory,
is permanently and automatically calibrated.
If electronic or metal accessories (mobile
phone, television) are subsequently mounted
in the vehicle, the compass should be recali-
brated instructionly.

Adjusting the magnetic zone

Switch the ignition on.

Select the 

Settings

 menu followed by the

option 

Compass

 and 

Zone

.

Select the magnetic zone corresponding to

the position of the vehicle 

››› 

Fig. 119

.

Adjust and confirm the magnetic zone

(

1-15

).

Calibrating compass
To calibrate the compass you must be in one
of the valid magnetic zones with sufficient
space to be able to trace a circumference
with the vehicle.

Switch the ignition on.

Select the 

Settings

 menu followed by the

option 

Compass

 and 

Calibrate

.

Confirm the message 

Describe a com-

plete circumference to calibrate
the compass

 with 

OK

 and then trace a

complete circumference driving at approxi-
mately 10 km/h (6 mph).

When the corresponding cardinal point is dis-
played, the calibration is complete.

Service interval display

The service indication is shown on the dash
panel display 

››› 

Fig. 118


4

.

SEAT distinguishes between services with en-
gine oil change (Interval Service) and serv-
ices without engine oil change (Inspection
Service). The service interval display only
gives information for service dates which in-
volve an engine oil change. The dates for the

»

103

Tec

hnic

al

 d

at

a

Adv

ic

e

Oper

ation

Emer

genc

ie

s

Saf

ety

-------------------------------------------------------------------------------------------------------------------------------------------------------------

-------------------------------------------------------------------------------------------------------------------------------------------------------------

Operation

other services (e.g. the next Inspection Serv-
ice or change of brake fluid) are listed on the
label attached to the door strut, or in the
Maintenance Programme.

In vehicles with 

Services established by time

or mileage, the service intervals are already
pre-defined.

In vehicles with 

LongLife Service, the inter-

vals are determined individually. Technical
progress has made it possible to considera-
bly reduce servicing requirements. The tech-
nology used by SEAT ensures that your vehi-
cle only has an Interval Service when it is
necessary. To establish when the Interval
Service is due (max. 2 years), the vehicle's
conditions of use and individual driving
styles are considered. The service pre-warn-
ing first appears 20 days before the date es-
tablished for the corresponding service. The
kilometres (miles) remaining until the next
service are always rounded up to the nearest
100 km (miles) and the time is given in com-
plete days. The current service message can-
not be viewed until 500 km after the last
service. Prior to this only lines are visible on
the display.

Inspection reminder
When the Service date is approaching, when
the ignition is switched on a 

Service remind-

er is displayed.

In vehicles without text messages, a spanner
is displayed on the instrument panel  with
a figure given in 

km

. The number of kilome-

tres shown is the maximum number that may
be driven until the next service. After a few
seconds, the display mode changes. A clock
symbol appears and the number of days until
the next service appointment is due.

In vehicles with text messages

Service in

--- km (miles) or --- days

 is dis-

played on the instrument panel.

Service due
After 

the service date, an audible warning is

given when the ignition is switched on and
the spanner displayed on the screen flashes
for a few seconds . In vehicles with text
messages

Service in --- km or ---

days

 is displayed on the instrument panel.

Reading a service notification
With the ignition switched on, the engine off
and the vehicle at a standstill, the current
service notification can be read:

Press the button 

 on the instrument pan-

el several times until the spanner symbol is
displayed .

OR: select the 

Settings

 menu.

From the 

Service

 submenu, select the op-

tion 

Info

.

When the 

service date has past, a minus sign

is displayed in front of the number of kilome-
tres or days. In vehicles with text messages
the following is displayed: 

Service ---

km (miles) or --- days ago

.

Resetting service interval display
If the service was not carried out by a techni-
cal service centre, the display can be reset as
follows:

In vehicles with text messages:

Select the 

Settings

 menu.

In the submenu 

Service

, select the option 

Reset

.

Confirm with 

OK

 when requested to do so by the sys-

tem.

In vehicles without text messages:

Switch the ignition off.

Press and hold the 

0.0 / SET

 button.

Switch the ignition back on.

Release the 

0.0 / SET

 button and, press 

 for the next

20 seconds.

Do 

not reset the indicator to zero between

two intervals, otherwise the display will be
incorrect.

If you reset the display instructionly, the next
service interval will be indicated as in vehi-
cles with fixed service intervals. For this

104

-------------------------------------------------------------------------------------------------------------------------------------------------------------

-------------------------------------------------------------------------------------------------------------------------------------------------------------

General instrument panel

reason we recommend that the service inter-
val display be reset by a SEAT authorised
service 

››› 

Booklet Maintenance schedule

.

Note

The service message disappears after a few

seconds, when the engine is started or when

OK

 is pressed.

In vehicles with the LongLife system in

which the battery has been disconnected for
a long period of time, it is not possible to cal-
culate the date of the next service. Therefore
the service interval display may not be cor-
rect. In this case, bear in mind the maximum
service intervals permitted in the 

››› 

Book-

let Maintenance Programme

.

Control lamps

Control and warning lamps

Read the additional information carefully

››› 

page 32

The control and warning lamps are indicators
of warnings, 

››› 

, faults 

››› 

 or certain func-

tions. Some control and warning lamps come
on when the ignition is switched on, and
switch off when the engine starts running, or
while driving.

Depending on the model, additional text
messages may be viewed on the instrument

panel display. These may be purely informa-
tive or they may be advising of the need for
action 

››› 

page 100, Instruments

.

Depending upon the equipment fitted in the
vehicle, instead of a warning lamp, some-
times a symbol may be displayed on the in-
strument panel.

When certain control and warning lamps are
lit, an audible warning is also heard.

WARNING

If the warning lamps and messages are ignor-
ed, the vehicle may stall in traffic, or may
cause accidents and severe injuries.

Never ignore the warning lamps or text

messages.

Stop the vehicle safely as soon as possible.

Park the vehicle away from traffic and en-

sure that there are no highly flammable ma-
terials under the vehicle that could come into
contact with the exhaust system (e.g. dry
grass, fuel).

A faulty vehicle represents a risk of acci-

dent for the driver and for other road users. If
necessary, switch on the hazard warning
lamps and put out the warning triangle to ad-
vise other drivers.

Before opening the bonnet, switch off the

engine and allow it to cool.

In any vehicle, the engine compartment is a

hazardous area and could cause severe inju-
ries 

››› 

page 268

.

CAUTION

Failure to heed the control lamps and text
messages when they appear may result in
faults in the vehicle.

105

Tec

hnic

al

 d

at

a

Adv

ic

e

Oper

ation

Emer

genc

ie

s

Saf

ety

-------------------------------------------------------------------------------------------------------------------------------------------------------------

-------------------------------------------------------------------------------------------------------------------------------------------------------------

Operation

Communications and multimedia

Steering wheel controls*

Operating the audio system + telephone

Fig. 120 

Controls on the steering wheel.

The steering wheel includes a multifunction
module from where it is possible to control
the audio, telephone and radio/navigation

functions without needing to distract the
driver.

control of the available audio functions (ra-

dio, audio CD, MP3, iPod

®1)

, USB

1)

SD

1)

) and

the Bluetooth system from the steering
wheel.

Button

Radio

Media (except AUX)

AUX

Telephone

a)

Navigation

a)

A

Turn: Turn volume up/down

Press: Mute

Turn: Turn volume up/down

Press: Pause

Turn: Turn volume up/down

Press: Mute

Turn: Turn volume up/down

Press: Mute

Turn: Turn volume up/down

Press: Mute

1)

Depending on the vehicle equipment.

106

-------------------------------------------------------------------------------------------------------------------------------------------------------------

-------------------------------------------------------------------------------------------------------------------------------------------------------------

Communications and multimedia

Button

Radio

Media (except AUX)

AUX

Telephone

a)

Navigation

a)

B

Short press: access to the tele-

phone menu on the dash pan-

el

a)

.

Hold down: redial

a)

Short press: access to the tele-

phone menu on the dash pan-

el

a)

.

Hold down: redial

a)

Short press: access to the tele-

phone menu on the dash pan-

el

a)

.

Hold down: redial

a)

Short press: answer/hang up

calls, enable/open the tele-

phone menu.

Hold down: reject incoming

call/switch to private mode or
return to hands-free mode/re-

dial

Short press: access to the tele-

phone menu on the dash pan-

el

a)

.

Hold down: redial

a)

C

Search for last station

Short press: switch to the previ-

ous song

Hold down: quick rewind

No function

No function

b)

Radio/media functionality (ex-

cept AUX )

D

Search for the next station

Short press: switch to the next

song

Hold down: fast forward

No function

No function

b)

Radio/media functionality (ex-

cept AUX )

E

F

Change menu on instrument

panel

Change menu on instrument

panel

Change menu on instrument

panel

Change menu on instrument

panel

Change menu on instrument

panel

G

Enable/disable voice control

a)

Enable/disable voice control

a)

Enable/disable voice control

a)

No function

b)

Enable/disable voice control

H

Turn: Next/previous preset

c)

Press: Acts on the MFD or con-

firms the menu option of the

dash panel depending on the

menu option

Turn: Next/previous song

c)

Press: Acts on the MFD or con-

firms the menu option of the

dash panel depending on the

menu option

Turn: Acts upon the instrument

panel menu depending on posi-

tion

Press: Acts on the MFD or con-

firms the menu option of the

dash panel depending on the

menu option

Turn: Acts upon the instrument

panel menu depending on po-

sition

Press: Acts on the MFD or con-

firms the menu option of the

dash panel depending on the

menu option

Turn: Acts upon the instrument

panel menu depending on po-

sition

Press: Acts on the MFD or con-

firms the menu option of the

dash panel depending on the

menu option

a)

According to the vehicle's equipment package.

b)

When a call is being made, radio/media functionality (except AUX).

c)

Only if the dash panel is in audio menu.

107

Tec

hnic

al

 d

at

a

Adv

ic

e

Oper

ation

Emer

genc

ie

s

Saf

ety

-------------------------------------------------------------------------------------------------------------------------------------------------------------

-------------------------------------------------------------------------------------------------------------------------------------------------------------

Operation

Multimedia

USB/AUX-IN input

Fig. 121 

Front centre armrest: USB/AUX-IN in-

put.

Depending on the features and the country,
the vehicle may have a USB/AUX-IN connec-
tion.

The USB/AUX-IN input is in the front centre
armrest 

››› 

Fig. 121

.

The operating description is located in the re-
spective Instruction Manuals of the audio
system or the navigation system.

Comfort mobile phone

Fig. 122 

The phone holder used for connect-

ing the mobile phone to the car aerial is loca-
ted in the front centre armrest.

Depending on the special features and the
country, the vehicle may have the 

Comfort

mobile phone system, with a connection to
the vehicle's external aerial 

››› 

Booklet Media

System Plus

.

This system is located in the front centre arm-
rest compartment.

Three button unit in headliner

Three button unit*

Fig. 123 

Three button unit in headliner: con-

trols for the telephone management system.


Function

Press it briefly: to accept or end a call.
Press the button: to reject a call.

Press it briefly: to start or stop the voice con-
trol function, for example, to make a call.

a)

Press the button for more than 2 seconds: to
obtain information about the SEAT brand and
selected additional services related to traffic
and travel.

108

-------------------------------------------------------------------------------------------------------------------------------------------------------------

-------------------------------------------------------------------------------------------------------------------------------------------------------------

Communications and multimedia


Function

Press the button for more than 2 seconds: to
obtain help from the network of SEAT dealers
in the event of a breakdown.

a)

Not operational if a SEAT Media system 2.2 navigation system

with voice control is fitted.

Information and assistance calls

Communication with the SEAT Customer Care
Service is established using the  and  but-
tons of the three button unit

1)

. The system

will automatically connect you with the Assis-
tance Centre of the relevant country. You will
only be able to make calls if your mobile is
turned on and connected to the pre-installed
Bluetooth.

Information call
The 

Information call

  button offers in-

formation on the SEAT brand and selected
additional services related to traffic and your
travel.

To establish communication, press the  but-
ton for more than 2 seconds.

In countries where there is no information tel-
ephone number, an information call is made
after pressing the  button.

Assistance call
The 

assistance call

  button gives im-

mediate help in case of a breakdown. To this
end, the SEAT dealer network, with its mobile
assistance vehicles, is at your disposal.

To establish communication, press the 
button for more than 2 seconds.

Note

Calls made with the and buttons take pri-
ority over normal calls. If the 
 or  button is
pressed during a normal telephone call, this
call will be cut off and a connection will be
made to the information or assistance centre.

Note

Any call made to the information service will
be interrupted if the assistance button 
 is
pressed. The connection to the assistance
service will then be made (and vice versa).

Note

Mobile phone coverage must be available to
place a call to the information and assistance
services. This service might not be available
in some countries.

Activating and deactivating

Switching on the speech control system

Press the  button on the multi-function

steering wheel.

OR: press the button in the three button

unit in the headliner .

Wait for the acoustic signal.

Give the command.

Follow the dialogue instructions (extended

dialogue).

Ending voice control

Press the  button on the multi-function

steering wheel.

OR: press the button in the three button

unit in the headliner .

Interrupting the instructions

During the instructions, press the  button

on the multi-function steering wheel.

OR: press the button in the three button

unit in the headliner .

You will be able to give a command imme-

diately afterwards.

1)

Depending upon country.

109

Tec

hnic

al

 d

at

a

Adv

ic

e

Oper

ation

Emer

genc

ie

s

Saf

ety

-------------------------------------------------------------------------------------------------------------------------------------------------------------

-------------------------------------------------------------------------------------------------------------------------------------------------------------

Operation

Opening and closing

Vehicle key set

Vehicle key

Fig. 124 

Vehicle keys

Fig. 125 

Vehicle key for vehicles with electric

sliding doors

Vehicle keys
With the vehicle key 

››› 

Fig. 124

 or 

››› 

Fig. 125

the vehicle may be locked or unlocked re-
motely.

The vehicle key includes an emitter and bat-
teries. The receiver is in the interior of the ve-
hicle. The range of the vehicle key with re-
mote control and new batteries is several me-
tres around the vehicle.

If it is not possible to open or close the vehi-
cle using the remote control key, this should
be re-synchronised 

››› 

page 112

 or the bat-

tery changed 

››› 

page 111

.

Different keys belonging to the vehicle may
be used.

Folding the key shaft in and out
When the button is pressed 

A

, the key shaft

is released and unfolds.

To fold it press button 

A

 and fold the key

shaft in until it locks in place.

Spare key
To obtain a spare key and other vehicle keys,
the vehicle chassis number is required.

Each new key must contain a microchip and
be coded with the data from the vehicle elec-
tronic immobiliser. A vehicle key will not work
if it does not contain a microchip or the mi-
crochip has not been encoded. This is also
true for keys cut for the vehicle.

The vehicle keys or new spare keys can be
obtained from a technical service centre, a
specialised workshop or approved key serv-
ice qualified to provide this kind of key.

New keys or spare keys must be synchron-
ised before use 

››› 

page 112

.

WARNING

Careless or incorrect use of vehicle keys may
result in severe injury and accident.

Always take all the keys with you whenever

you leave the vehicle. Children and unauthor-
ised individuals could lock the doors or the
boot hatch, start the engine or turn on the ig-
nition, activating electrical systems, the elec-
tric windows, for example.

Never leave children or disabled people

alone in the car. They could be trapped in the
car in an emergency and will not be able to
get themselves to safety. For example, de-
pending on the time of the year, tempera-
tures inside a locked and closed vehicle can
be extremely high or extremely low resulting
in serious injuries and illness or even death,
particularly for young children.

Never remove the key from the ignition if

the vehicle is in motion. The steering may
lock and it will not be possible to turn the
steering wheel.

110

-------------------------------------------------------------------------------------------------------------------------------------------------------------

-------------------------------------------------------------------------------------------------------------------------------------------------------------

Opening and closing

CAUTION

All of the vehicle keys contain electronic com-
ponents. Protect them from damage, impacts
and humidity.

Note

Only use the key button when you require

the corresponding function. Pushing the but-
ton unnecessarily could accidentally unlock
the vehicle or trigger the alarm. It is also pos-
sible even when you are outside the radius of
action.

Key operation can be greatly influenced by

overlapping radio signals around the vehicle
working in the same range of frequencies
(e.g. radio transmitters, mobile telephones).

Obstacles between the remote control and

the vehicle, bad weather conditions and
draining batteries can considerably reduce
the range of the remote control.

Control lamp on the vehicle key

Fig. 126 

Control lamp on the vehicle key

When a button on the vehicle key is pressed,
the control lamp flashes 

››› 

Fig. 126

 (arrow)

once briefly. If the button is pressed and
held, the indicator blinks several times (e.g.
for the convenience opening function).

When the control lamp does not light upon
pushing a button, the batteries of the key
must be changed 

››› 

page 111

.

Replacing the battery

Fig. 127 

Vehicle key: battery compartment

cover

Fig. 128 

Vehicle key: removing the battery

SEAT recommend having the batteries
changed in a specialised workshop.

The battery is located to the rear of the vehi-
cle key, under a cover 

››› 

Fig. 127

.

When changing the battery, use another bat-
tery of the same model and observe the po-
larity when fitting it 

››› 

.

»

111

Tec

hnic

al

 d

at

a

Adv

ic

e

Oper

ation

Emer

genc

ie

s

Saf

ety

-------------------------------------------------------------------------------------------------------------------------------------------------------------

-------------------------------------------------------------------------------------------------------------------------------------------------------------

Operation

To change the battery

Unfold the vehicle key blade 

››› 

page 110

.

Remove the cover from the back of the ve-

hicle key 

››› 

Fig. 127

 in the direction of the ar-

row 

››› 

.

Extract the battery from the compartment

using a suitable thin object 

››› 

Fig. 128

.

Place the new battery in the compartment,

pressing in the direction of the arrow as
shown 

››› 

Fig. 128


››› 

.

Fit the battery compartment cover, pressing

in the direction of the arrow as shown

››› 

Fig. 127

 until it clicks into place.

CAUTION

If the battery is not changed correctly, the

vehicle key may be damaged.

Use of unsuitable batteries may damage

the vehicle key. For this reason, always re-
place the dead battery with another of the
same voltage, size and specifications.

For the sake of the environment

Please dispose of your used batteries cor-

rectly and with respect for the environment.

The vehicle key battery may contain per-

chlorate. Observe the legal requirements for
their disposal.

Synchronising the vehicle key

If the button 

 is pressed frequently outside

of the vehicle range, it is possible that the ve-
hicle can no longer be locked or unlocked us-
ing the key. In this case, the vehicle key must
be synchronised once more as follows:

Unfold the vehicle key blade 

››› 

page 110

.

Remove the cover from the driver door han-

dle 

››› 

page 89

.

Press the 

 button on the vehicle key. For

this, it must remain with the vehicle.

Open the vehicle within one minute using

the key shaft.

Turn on the ignition using the vehicle key.

The key has been synchronised.

Replace the driver door handle cover.

Central locking and locking
system

Introduction

Read the additional information carefully

››› 

page 8

Central locking functions correctly when all
the doors and the rear lid are correctly shut.
If the driver door is open, the vehicle cannot
be locked with the key.

If the vehicle has the Keyless Access closing
and ignition system, it may only be locked
with the ignition off and the driver's door
closed.

The battery of an unlocked vehicle parked for
a long period (e.g. in a private garage) may
run down and fail to start the motor.

WARNING

The incorrect use of the central locking sys-
tem may cause serious injuries.

The central locking system will lock all

doors. A vehicle locked from the inside can
prevent any non-authorised individual from
opening the doors and accessing the vehicle.
Nevertheless, in case of emergency or acci-
dent, locked doors will complicate access to
the vehicle interior to help the passengers.

Never leave children or disabled people

alone in the vehicle. The central locking but-
ton can be used to lock all the doors from
within. Therefore, passengers will be locked
inside the vehicle. Individuals locked in the
vehicle can be exposed to very high or very
low temperatures.

Depending on the time of the year, temper-

atures inside a locked and closed vehicle can
be extremely high or extremely low resulting
in serious injuries and illness or even death,
particularly for young children.

Never leave individuals locked in a closed

and locked vehicle. In case of emergency,
they may not be able to exit the vehicle by
themselves or get help.

112

-------------------------------------------------------------------------------------------------------------------------------------------------------------

-------------------------------------------------------------------------------------------------------------------------------------------------------------

Opening and closing

Description of the central locking sys-
tem

The central locking system allows all doors
and the rear lid to be locked and unlocked
centrally.

From outside, using the vehicle key.

From outside with the Keyless Access sys-

tem 

››› 

page 115

,

From inside, by pushing the central locking

button 

››› 

page 114

.

In the submenu 

Convenience

 in the 

Con-

figuration

 menu, or by visiting a special-

ised workshop, special functions of the cen-
tral locking system can be switched on or off

››› 

page 26

.

In case of a vehicle key fault or central lock-
ing system fault, all doors can be locked or
unlocked manually.

Automatic locking (Auto Lock)
In this instance, the vehicle locks automati-
cally when moving at speeds above approx.
15 km/h (10 mph) 

››› 

page 26

. When the

vehicle is locked, the control lamp  of the
central locking button 

››› 

Fig. 130

 lights up in

yellow.

Automatic unlocking (Auto Unlock)
When the key is removed from the ignition
slot, here the vehicle unlocks all doors and
the boot automatically 

››› 

page 26

.

Locking the vehicle after the airbags have
been deployed
If the airbags are deployed due to an acci-
dent, the vehicle will be automatically and
completely unlocked. Depending on the
amount of damage, it can be locked follow-
ing an accident in the following ways:

Function

Action

Lock the vehicle
by pushing the
central locking
button
:

– Switch off the ignition.
– Open a door of the vehicle and
close it again.
– Push the central locking button 

.

Lock the vehicle
with the vehicle
key
:

– Disconnect the ignition button.
OR: remove the key from the igni-
tion.
– Open a door once.
– Lock the vehicle with the key.

Note

If the vehicle key buttons are pressed

››› 

Fig. 129

 or one of the central locking but-

tons is pressed 

››› 

Fig. 130

 several times in

quick succession, the central locking feature
is disabled briefly to protect from overload-
ing. The vehicle will then remain unlocked for
around 30 seconds. If no door nor the boot is

opened during this time, the vehicle will then
automatically unlock.

Unlocking and locking the vehicle
from outside

Fig. 129 

Buttons on the vehicle key

Function

Handling the buttons on
the vehicle

Unlocking the vehicle.

Press button 

. Keep it

pushed for the convenience
opening.

Lock the vehicle.

Press button 

. Keep it push-

ed for the convenience lock-
ing function.

»

113

Tec

hnic

al

 d

at

a

Adv

ic

e

Oper

ation

Emer

genc

ie

s

Saf

ety

-------------------------------------------------------------------------------------------------------------------------------------------------------------

-------------------------------------------------------------------------------------------------------------------------------------------------------------

Operation

Function

Handling the buttons on
the vehicle

Unlocking the rear lid.

Press button 

.

Open the sliding door.

››› 

page 119

.

Please note: depending on the selected func-
tion in the central locking submenu 

Conven-

ience

, you may push the button twice 

››› 

page 26

 to unlock all doors and the

boot hatch.

The vehicle key only locks and unlocks the
vehicle if it is within range of the vehicle and
if the batteries have enough power. When
locking, the vehicle's turn signals will blink.

If the driver door is open, the vehicle cannot
be locked with the key. If you unlock the vehi-
cle without opening any doors or the rear lid,
it will lock again automatically after a few
seconds. This function prevents the vehicle
from remaining unlocked if the unlocking
button is pressed by mistake.

Convenience open/close function

See "Electric windows: functions"

››› 

page 125

.

See "Panoramic sliding sunroof: operation"

››› 

page 126

.

Unlocking and locking the vehicle
from inside

Fig. 130 

In the driver door: central locking

button

Push the 

››› 

Fig. 130

 button:

Unlocking the vehicle.

Locking the vehicle.

The central locking button is still operative
when the ignition is switched off.

The central locking button is only deactivated
if the deadlock is activated 

››› 

page 117

.

Please note the following when you use the
central locking button to lock your vehicle:

Do not turn on the deadlock 

››› 

page 117

.

Do not turn on the anti-theft alarm.

It will not be possible to open the doors or

the rear lid from the outside. This may offer

extra safety, for example when stopped at
traffic lights.

The doors can be opened and unlocked in-

dividually from the inside by pulling the in-
side door handle. If necessary, pull the door
release lever twice.

The driver door cannot be locked when

open. This avoids locking the vehicle key in-
side the vehicle when there is nobody inside.

114

-------------------------------------------------------------------------------------------------------------------------------------------------------------

-------------------------------------------------------------------------------------------------------------------------------------------------------------

Opening and closing

Locking and unlocking the vehicle
with Keyless Access

Fig. 131 

Keyless Access locking and ignition

system: in the proximity of the car.

Fig. 132 

Keyless Access locking and ignition

system: sensor surface 

A

 for unlocking in-

side the door handle and sensor surface 

B

for locking on the exterior of the handle.

Keyless Access is a key-free locking and igni-
tion system to unlock and lock the vehicle
without actively using its key. For this, only a

valid vehicle key is required to be in an area
near 

››› 

Fig. 131

 the vehicle and one of the

sensor surfaces to be touched on the door
handles 

››› 

Fig. 132

.

General information
If a valid key is located in the proximity of the
car 

››› 

Fig. 131

, the Keyless Access lock and

ignition system gives the key entry as soon
as one of the sensor surfaces on the door
handles is touched or the push button on the
boot hatch is operated. The following fea-
tures are then available without having to
use the vehicle key actively:

Keyless-Entry: unlocking of the vehicle with

the handles on the four doors or the button
located on the boot hatch.

Keyless-Go: engine ignition and driving. For

this to occur, there has to be a valid key in-
side the vehicle and the ignition push button
needs to be pressed 

››› 

page 182

.

Keyless-Exit: unlocking of the vehicle with

one of the four door handle.

The central locking and locking systems oper-
ate in the same way as a normal locking and
unlocking system. Only the controls change.

Unlocking the vehicle is confirmed with a
double flash of the indicator lights; locking
by a single flash.

The vehicle will lock again after a few sec-
onds if you unlock the vehicle but fail to open
any door or boot hatch.

Unlocking and opening the doors (Keyless-
Entry)

Grip the door handle. In doing this, the

sensor surface 

››› 

Fig. 132 

A

 (arrow) is

touched on the handle and the vehicle un-
locks.

Open the door.

On vehicles without a "safe" system: locking
and unlocking doors (Keyless-Exit)

Switch the ignition off.

Close the driver's door.

Touch the surface sensor 

B

 once (arrow)

on the door handle. The door being operated
must be closed.

On vehicles with a "safe" security system:
locking and unlocking doors (Keyless-Exit)

Switch the ignition off.

Close the driver's door.

Touch the surface sensor 

B

 once (arrow)

on the door handle. The vehicle locks with
the "safe" security system 

››› 

page 117

. The

door being operated must be closed.

Touch the sensor surface 

B

 twice (arrow)

on the door handle to lock the vehicle with-
out the "safe" security system 

››› 

page 117

.

»

115

Tec

hnic

al

 d

at

a

Adv

ic

e

Oper

ation

Emer

genc

ie

s

Saf

ety

-------------------------------------------------------------------------------------------------------------------------------------------------------------

-------------------------------------------------------------------------------------------------------------------------------------------------------------

Operation

Unlocking and locking the boot hatch
When the vehicle is locked, the hatch auto-
matically unlocks on opening if 

››› 

Fig. 131

there is a valid vehicle key in the proximity.

Open or close the hatch normally

››› 

page 122

.

After closing, the hatch locks automatically.
In the following instances, the rear lid does
not lock automatically after closing:

If the entire vehicle is unlocked.

If the key used last is inside the vehicle. All

vehicle indicator lights flash four times. The
vehicle will lock again after a few seconds if
no door or boot hatch are opened.

Locking the vehicle with a second key
If there is a vehicle key inside the vehicle and
it is locked from the outside with a second
vehicle key, the key inside the vehicle is
blocked for engine ignition 

››› 

page 182

. In

order to enable engine ignition, the button 

on the key inside the vehicle needs to be
pressed 

››› 

Fig. 129

.

Automatically disabling sensors
If the vehicle is not locked or unlocked for a
long period of time, the proximity sensor on
the passenger door is automatically disa-
bled.

If the exterior sensor on the door handle is
often activated unusually with the vehicle

locked (e.g. by the branches of a bush rub-
bing against it), all proximity sensors are dis-
abled for a time. If this only happens with the
exterior sensor on the driver's door, only this
sensor is disabled.

Sensors will again be enabled:

After a time.

OR: if the vehicle is unlocked with the but-

ton 

 on the key.

OR: if the boot is opened.

Convenience functions
To 

close all electric windows, the sun roof

and electric tilting panoramic roof with the
convenience feature, keep your finger for a
few seconds on the lock sensor surface

››› 

Fig. 132 

B

 located on the exterior part of

the driver or passenger door handle until the
windows and roof close.

Opening the doors by touching the sensor
surface on the handle takes places in accord-
ance with the settings activated on the menu

Configuration - Convenience

››› 

page 26

.

CAUTION

The sensor surfaces on the door handles
could engage if hit with a water jet or high
pressure steam if there is a valid vehicle key
in the nearby area. If at least one of the win-
dows is open and the sensor surface 

B

 on

one of the handle permanently activates, all
windows will close. If the water jet or steam
is briefly moved away from the sensor sur-
face 

A

 on one of the handles and then poin-

ted at it again, all the windows will probably
open 

››› 

page 116, Convenience functions

.

Note

If the vehicle battery has little or no charge,

or the vehicle key battery is almost or entire-
ly out of charge, it is likely that the vehicle
will not be able to be lock or unlocked with
the Keyless Access system. The vehicle can
be unlocked or locked manually 

››› 

page 89

.

If there is no valid key inside the vehicle or

the system fails to detect one, a warning will
display on the dash panel screen. This could
happen if any other radio frequency signal in-
terferes with the key signal (e.g. from a mo-
bile device accessory) or if the key is covered
by another object (e.g. an aluminium case).

If the sensors are very dirty, e.g. have a lay-

er of salt, how the sensors on the door han-
dles operate may be affected. If this is the
case, wash the vehicle 

››› 

page 250

.

If the vehicle is equipped with an automatic

gearbox, it may only be locked in the gear
stick is in position P.

116

-------------------------------------------------------------------------------------------------------------------------------------------------------------


Content      ..     5      6      7      8     ..