Lancia DELTA. Instruction - part 4
56
KNOWING YOUR CAR
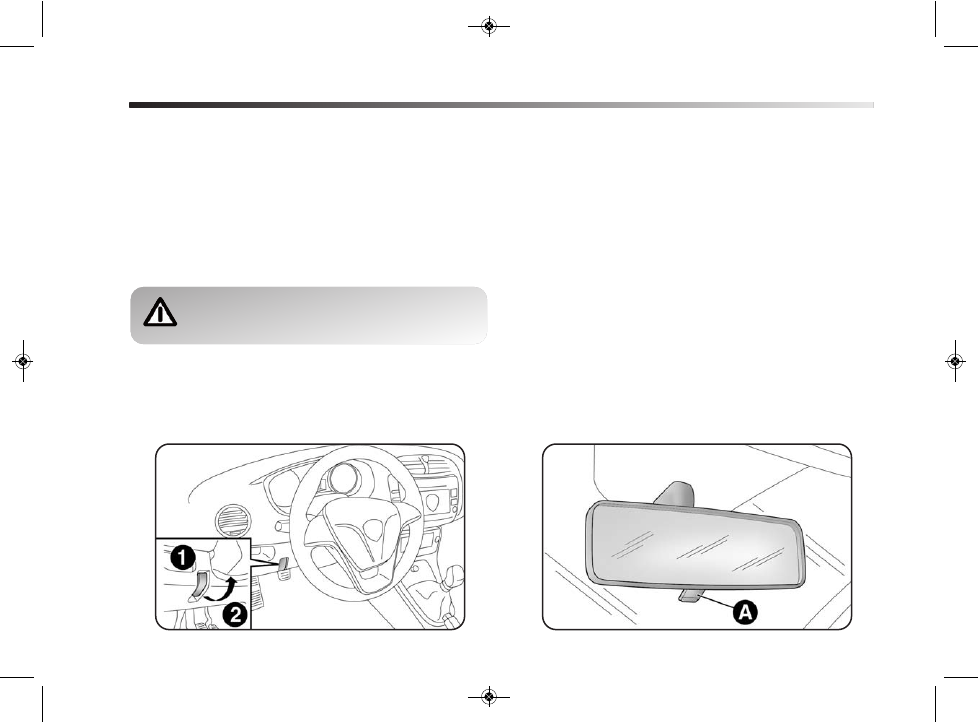
STEERING WHEEL
It can be adjusted vertically (and axially).
To adjust the steering wheel, move the lever fig. 25 up-
wards to position 1. Adjust the steering wheel into the most
suitable position and lock it in this position by moving the
lever to position 2.
REAR VIEW MIRRORS
INTERNAL REAR VIEW MIRROR fig. 26
The mirror is fitted with a safety device that causes its
release in the event of a violent impact with the passen-
ger.
Lever A can be used to move the mirror to two different
positions: normal or antiglare.
INTERNAL ELECTROCHROMIC REAR VIEW
MIRROR (for versions/markets, where provided)
Some versions have an electrochromic mirror with auto-
matic antiglare function.
When reverse gear is engaged, the mirror is automatical-
ly set for daytime use.
Any adjustments must be carried out only
with the car stationary and engine off.
fig. 26
L0E0013m
fig. 25
L0E0012m
001-154 Delta GB 1ed 03/03/14 10.00 Pagina 56