Pontiac Aztek (2005 year). Instruction - part 11


  Index      Pontiac     Pontiac Aztek (2005 year) - instruction in english


Search            copyright infringement  


Content      ..     9      10      11      12     ..


Pontiac Aztek (2005 year). Instruction - part 11


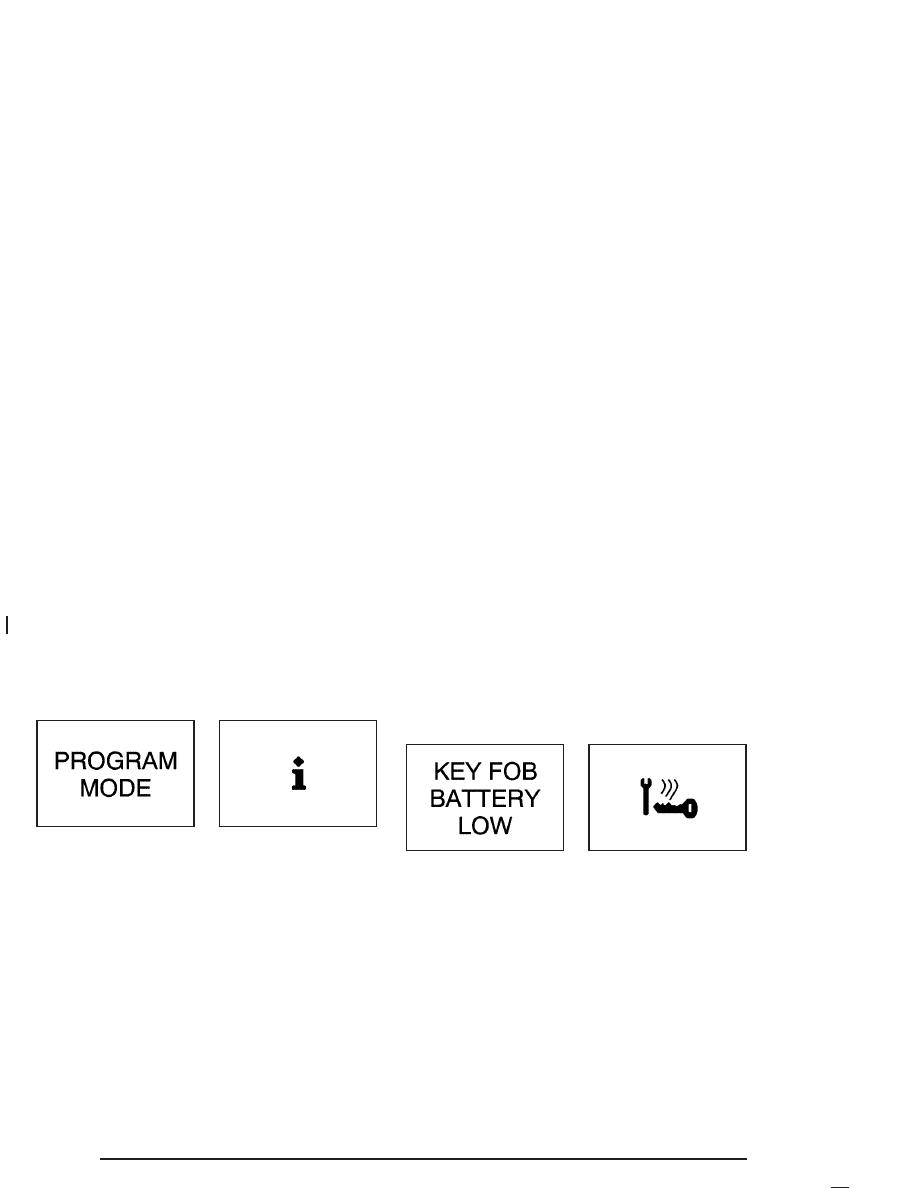
Program Mode Message

If you receive this message, your vehicle is in program
mode. If your vehicle is equipped with the Driver
Information Center (DIC), you are ready to begin
programming your vehicle’s customization features.
See DIC Vehicle Personalization on page 3-51 for more
information.

Remote Keyless Entry Transmitter
Battery Low Warning Message

If you receive this message, the battery in the remote
keyless entry needs to be replaced. See “Battery
Replacement” under Remote Keyless Entry System
Operation 
on page 2-4 for instructions.

United States

Canada

United States

Canada

3-46

-------------------------------------------------------------------------------------------------------------------------------------------------------------

Parking Lamp Warning Message

If you receive this message, one or both of the
vehicle’s parking lamp bulbs needs replacement.
See Bulb Replacement on page 5-46 for bulb
replacement instructions.

Driver Information Center (DIC)

If your vehicle is equipped with the Driver Information
Center (DIC), the display is located on the instrument
panel cluster directly above the steering column.
The DIC will show information about the vehicle and
the surroundings.

The DIC has a compass display to show you which
direction the vehicle is driving.

United States

Canada

United States shown, Canada similar

3-47

-------------------------------------------------------------------------------------------------------------------------------------------------------------

Compass Variance

Compass variance is the difference between magnetic
north and geographic north. In some areas of the
country, the difference is great enough to cause the
compass to give false readings. If this occurs, the
compass must be set.

Compass Calibration

If the calibration required symbol, or C, appears in the
compass, you must instructionly put the compass into
the calibration mode. To enter this mode, do the
following:

1. Turn the ignition on and press the MODE button

until CALIBRATE COMPASS displays.

2. Press and hold the SET button for longer than

three seconds.

ZONE - - PRESS & HOLD SET TO CHANGE: This
display mode will appear when you are instructionly
calibrating the system. When the compass is being
recalibrated for the first time, the zone symbol will be
displayed. When the compass is being recalibrated any
time after that, the current zone number for compass
variance will be displayed in place of the zone symbol.
Use the SET button to select the zone number from
the graphic shown to select the current area of the
country that you are driving in.

3-48

-------------------------------------------------------------------------------------------------------------------------------------------------------------

PRESS SET TO CALIBRATE COMPASS: After
selecting your zone, press the MODE button and this
will be displayed on the DIC. Press and hold the
SET button and complete three 360 degree turns in an
area free from large metal objects at a speed no
faster than 5 mph (8 km/h).

The following two messages will toggle in the display
until you calibrate the compass:

DRIVE VEHICLE IN CIRCLE

CALIBRATING COMPASS

When calibration is complete, the vehicle direction will
be displayed instead of the C symbol.

DIC Controls and Displays

When the ignition is turned to ON or START,
the DIC will display the following:

PONTIAC: PONTIAC will be displayed for
three seconds.

DRIVER #: This message will be displayed for
three seconds after PONTIAC appears in the display.
This message lets you know which remote keyless
entry transmitter and customization features the
vehicle is using.

The DIC controls are
located to the right of the
instrument panel cluster.

The DIC will be in the last mode displayed when the
engine was turned off. To select a different mode, press
MODE. The display will cycle through its options at
each press of MODE.

MODE: This button lets you cycle through the options
on the display.

3-49

-------------------------------------------------------------------------------------------------------------------------------------------------------------

SET: This button is used to select and set the options
to your preference.

The DIC will always display the compass reading and
the outside temperature. If the temperature is below
38°F (3°C), the temperature reading will toggle between
displaying the temperature and the word ICE for
two minutes.

AVG ECONOMY (Average Economy): Average fuel
economy is viewed as a long term approximation of your
overall driving conditions. To learn the average fuel
economy from a new starting point, press and hold the
SET button while the average fuel economy is
displayed on the DIC. The average fuel economy will
set to zero.

INST ECONOMY (Instant Economy): Instant fuel
economy reflects the fuel economy that the vehicle has
right now. Instant fuel economy varies with your
driving conditions, such as acceleration, braking and the
grade of the road being traveled. Unlike average fuel
economy, instant fuel economy cannot be reset.

FUEL RANGE: The fuel range is an estimated distance
that your vehicle can travel on the remaining fuel.
The fuel economy used to calculate the range is based
on your driving history since the last reset of the
average speed.

FUEL USED: The fuel used display will show you how
much fuel has been used since the last time it was
reset. To reset the fuel used to zero, press and hold the
SET button while the fuel used is displayed on the
DIC and until the display goes to zero.

AVG SPEED (Average Speed): The average speed
display will show your average speed from when
you first started your vehicle. To reset the average
speed, press and hold the SET button while the average
speed is displayed on the DIC and until the speed
resets to your current speed.

OIL LIFE LEFT HOLD SET TO RESET: This message
displays the current percentage of the oil life by the
engine oil life system. To reset the oil life, press
and hold the SET button while this message is
displayed. When the system is reset, 100% will be
displayed and the CHANGE ENGINE OIL message on
the message center will turn off. See Engine Oil Life
System 
on page 5-17 for more information.

3-50

-------------------------------------------------------------------------------------------------------------------------------------------------------------

In addition to the engine oil life system monitoring the oil
life, additional maintenance is recommended in the
Maintenance Schedule in this instruction. See Scheduled
Maintenance 
on page 6-4 and Engine Oil on page 5-14.

TIRE PRESSURE: The check tire pressure system can
alert you to a large change in the pressure of one
tire. If the tire pressure is normal, TIRE PRESSURE
NORMAL will display. If the tire pressure is low,
LOW TIRE PRESSURE will display. You must begin
driving before the system will detect a low tire pressure.
See Check Tire Pressure System on page 5-60.

USE SET TO SELECT ENGLISH METRIC: You can
use this display to select English or metric. Press
the SET button to toggle between English or metric. The
odometer, trip odometer, and head-up display (HUD),
if equipped, will also change. A Canadian odometer and
trip odometer will remain in metric units only.

OFF: No driver information will be displayed in this
mode. If the DIC is left in this mode for more than
three seconds, the display will turn off. Press the
MODE button to start the DIC.

DIC Vehicle Personalization

The DIC is used to program the choices of two drivers.
The drivers are recognized as DRIVER 1 or DRIVER 2
on the DIC display. You will let the DIC know which
driver you are by using your remote keyless entry
transmitter. Each remote keyless entry transmitter was
pre-programmed to belong to DRIVER 1 or DRIVER 2.
Each transmitter may be programmed differently for
each driver’s preferences (lights, doors, horn or activate
the programmed radio stations for driver 1 or driver 2)
using your remote keyless entry transmitter.

After you press the LOCK button on your transmitter
and the ignition key is in ON, the DIC will display
the identified driver number. The vehicle will also recall
the vehicle customization features that were last
programmed to correspond to your transmitter.

If you unlock your vehicle using your key instead of your
transmitter, the DIC will not change drivers and your
vehicle will recall the information from the last transmitter
used. If your vehicle does not have a DIC, you do not
have available the vehicle customization features
using the remote keyless entry transmitter.

3-51

-------------------------------------------------------------------------------------------------------------------------------------------------------------

Entering Programming Mode

To program features, your vehicle must be in the
programming mode. To enter this mode, do the
following:

1. Turn the ignition key to ON with the vehicle in

PARK (P).

2. Press and release the MODE button, then scroll

through the DIC messages until PRESS SET TO
BEGIN PERSONALIZATION is displayed.

3. Press the SET button and TO SELECT DRIVER

PRESS REMOTE LOCK will appear. Press the
LOCK button on the remote keyless entry
transmitter. This identifies which remote keyless
entry transmitter is being programmed by displaying
PERSONALIZATION FOR DRIVER 1 or DRIVER 2.

4. The program mode message will appear in the

message center as an indication that your vehicle
is ready to begin programming.

5. Follow the instructions given by the DIC.

Headlamp Exit Delay

This feature allows you to customize the headlamps
and parking lamps.

OFF: The headlamps and parking lamps will not turn
on at the same instant that the ignition is turned to OFF.

15: The headlamps and parking lamps will stay on
for 15 seconds when the ignition is turned to OFF.

30: The headlamps and parking lamps will stay on for
30 seconds when the ignition is turned to OFF.

60: The headlamps and parking lamps will stay on for
60 seconds when the ignition is turned to OFF.

United States

Canada

3-52

-------------------------------------------------------------------------------------------------------------------------------------------------------------

Your vehicle was originally programmed to the
30 second mode. The mode may have been changed
since then. To determine the current mode, or to change
the mode, do the following:

1. Follow the instructions for “Entering Programming

Mode” listed previously.

2. Press the MODE button until HEADLMP EXIT

DELAY appears in the DIC.

3. Press the SET button until the arrow is before the

mode you prefer.

The mode you selected is now set. You can either
exit programming mode by following the instructions
later in this section or program the next feature available
on your vehicle.

Interior Lighting Delay

The interior lighting delay feature can be programmed to
one of the following modes:

OFF: This feature will not illuminate the interior of your
vehicle when all of the doors are closed.

ON: This feature will continue to illuminate the interior
lamps for 25 seconds after all doors have been
closed so that you can find your ignition and buckle
your safety belt at night.

Interior lighting delay will not occur while the ignition is
in ON. After 25 seconds, the interior lamps will fade
out. The lamps will fade out before the 25 seconds if
one of the following occurs:

The ignition is turned to ON.

All doors are locked using the remote keyless
entry transmitter.

The interior lamp override is turned on.

There is no occupant activity detected for an
illumination period of 25 seconds.

Your vehicle was originally programmed to ON. The
mode may have been changed since then. To determine
the current mode, or to change the mode, do the
following:

1. Follow the instructions for “Entering Programming

Mode” listed previously.

2. Press the MODE button until INTERIOR LIGHTING

DELAY appears on the DIC.

3. Press the SET button until the arrow is before

ON or OFF.

The mode you selected is now set. You can either
exit programming mode by following the instructions
later in this section or program the next feature available
on your vehicle.

3-53

-------------------------------------------------------------------------------------------------------------------------------------------------------------

Interior Lighting On

The interior lighting on feature can be programmed to
one of the following modes:

KEY OUT: The interior lamps will come on for about
25 seconds whenever you remove the key from
the ignition.

DOOR: The interior lamps will come on for about
25 seconds when any door is opened.

Interior lighting on will not occur while the ignition is
in ON. After 25 seconds, the interior lamps will fade out.
The lamps will fade out before the 25 seconds if one
of the following occurs:

The ignition is turned to ON.

LOCK is pressed on the remote keyless
entry transmitter.

The interior lamp override is turned on.

There is no occupant activity detected for an
illumination period of 25 seconds.

Your vehicle was originally programmed to DOOR.
The mode may have been changed since then.
To determine the current mode, or to change the mode,
do the following:

1. Follow the instructions for “Entering Programming

Mode” listed previously.

2. Press the MODE button until INTERIOR LIGHTING

ON appears on the DIC.

3. Press the SET button until the arrow is before KEY

OUT or DOOR.

The mode you selected is now set. You can either
exit programming mode by following the instructions
later in this section or program the next feature available
on your vehicle.

Auto Door Lock/Unlock

The doors will automatically lock when the vehicle is
shifted out of PARK (P). For automatic unlocking, you can
program your vehicle to one of the following modes:

OFF: When the shift lever is put in PARK (P), your
doors will not unlock automatically.

DRIVER: When the shift lever is put in PARK (P),
only your driver’s door will unlock.

ALL: When the shift lever is put in PARK (P), all doors
will unlock.

3-54

-------------------------------------------------------------------------------------------------------------------------------------------------------------

Your vehicle was originally programmed to ALL. The
mode may have been changed since then. To determine
the current mode, or to change the mode, do the
following:

1. Follow the instructions for “Entering Programming

Mode” listed previously.

2. Make sure that the AUTO DOOR LOCK feature is

programmed to ON.

3. Press the MODE button until AUTO DOOR

UNLOCK appears on the DIC.

4. Press the SET button until the arrow is before OFF,

DRIVER, or ALL.

If the auto door unlock feature has been programmed to
DRIVER or ALL, the automatic door unlock feature
can also be programmed to one of the following modes:

PARK: All doors will unlock when the shift lever is
put in PARK (P).

KEY OUT: All doors will unlock when the ignition key
is removed.

Your vehicle was originally programmed to PARK.
The mode may have been changed since then.
To determine the current mode, or to change the mode,
do the following:

1. Follow the instructions for “Entering Programming

Mode” listed previously.

2. Follow the instructions for programming AUTO

DOOR UNLOCK to DRIVER or ALL listed
previously.

3. Press the MODE button until AUTO DOOR

UNLOCK/PARK KEYOUT appears on the DIC.

4. Press the SET button until the arrow is before

PARK or KEY OUT.

The mode you selected is now set. You can either
exit programming mode by following the instructions
later in this section or program the next feature available
on your vehicle.

3-55

-------------------------------------------------------------------------------------------------------------------------------------------------------------

Delayed Locking

The delayed locking feature can be programmed to one
of the following modes:

ON: Lock your vehicle using the power door lock switch
or the remote keyless transmitter while any door is
opened. You will hear three chimes and the doors will
not lock. Five seconds after the last door is closed,
all doors will lock.

Once delayed locking is programmed to ON, you can
do the following:

Cancel the delayed locking by pressing unlock
using the power door lock switch, or by fully
inserting the key in the ignition.

Override the delayed locking feature by pressing
lock immediately using the power door lock
switch.

Let the delayed locking feature complete the locking
of the vehicle.

OFF: The doors will always lock immediately when you
lock the doors using the power door lock switch or
press LOCK on the remote keyless entry transmitter.

Your vehicle was originally programmed to ON. The
mode may have been changed since then. To determine
the current mode, or to change the mode, do the
following:

1. Follow the instructions for “Entering Programming

Mode” listed previously.

2. Press the MODE button until DELAYED LOCKING

appears on the DIC.

3. Press the SET button until the arrow is before

ON or OFF.

The mode you selected is now set. You can either
exit programming mode by following the instructions
later in this section or program the next feature available
on your vehicle.

Remote Door Unlock

The remote door unlock feature can be programmed to
one of the following modes:

DRIVER/ALL: With the first press of UNLOCK on the
remote keyless entry transmitter, the driver’s door
will unlock, and with the second press of UNLOCK,
within five seconds of the first press, all passenger’s
doors will unlock.

3-56

-------------------------------------------------------------------------------------------------------------------------------------------------------------

ALL: All doors will unlock with every press of UNLOCK
on the remote entry transmitter.

Your vehicle was originally programmed to ALL. The
mode may have been changed since then. To determine
the current mode, or to change the mode, do the
following:

1. Follow the instructions for “Entering Programming

Mode” listed previously.

2. Press the MODE button until REMOTE DOOR

UNLOCK appears on the DIC.

3. Press the SET button until the arrow is before

DRIVER/ALL or ALL.

The mode you selected is now set. You can either
exit programming mode by following the instructions
later in this section or program the next feature available
on your vehicle.

Unlock Feedback

The unlock feedback feature can be programmed to
one of the following modes:

LIGHTS: This mode does the following:

During the day, when the ignition is in OFF and
UNLOCK on the remote keyless entry transmitter
is pressed, the headlamps and parking lamps
will flash.

During the night, when the ignition is in OFF, the
headlamps and parking lamps will be activated
for 30 seconds when UNLOCK is pressed on the
remote keyless entry transmitter. If you would like to
change the amount of time the lamps stay on,
change the headlamp exit delay feature.

OFF: The headlamps and parking lamps will not flash
when UNLOCK is pressed on the remote keyless
entry transmitter.

Your vehicle was originally programmed to LIGHTS.
The mode may have been changed since then.
To determine the current mode, or to change the mode,
do the following:

1. Follow the instructions for “Entering Programming

Mode” listed previously.

2. Follow the instructions for programming HEADLMP

EXIT DELAY earlier in this section, to make sure
which mode it is programmed to.

3. Press the MODE button until UNLOCK FEEDBACK

appears on the DIC.

4. Press the SET button until the arrow is before

LIGHTS or OFF.

5. Press the MODE button until you have determined

which mode you prefer, to follow with the
personalization.

3-57

-------------------------------------------------------------------------------------------------------------------------------------------------------------

The mode you selected is now set. You can either exit
programming mode by following the instructions later in
this section or program the next feature available on
your vehicle.

Lock Feedback

The lock feedback feature can be programmed to one
of the following modes:

OFF: When LOCK is pressed on the remote keyless
entry transmitter, the headlamps and parking lamps will
not flash and the horn will not sound.

LIGHTS: When LOCK is pressed on the remote
keyless entry transmitter, the headlamps and parking
lamps will flash briefly.

HORN: When LOCK is pressed on the remote keyless
entry transmitter, the headlamps and parking lamps
will flash briefly and the horn will sound.

Your vehicle was originally programmed to HORN. The
mode may have been changed since then. To determine
the current mode, or to change the mode, do the
following:

1. Follow the instructions for “Entering Programming

Mode” listed previously.

2. Press the MODE button until LOCK FEEDBACK

appears on the DIC.

3. Press the SET button until the arrow is before OFF,

LIGHTS, or HORN.

The mode you selected is now set. You can now exit
programming mode by following the instructions next in
this section.

Exiting Programming Mode

To exit programming mode, do one of the following:

Shift out of PARK (P).

Turn the ignition key out of ON.

Do not program any commands for one minute
while in the programming mode.

The programming mode message will turn off to let you
know that you are no longer in the programming mode.

Once you have reached the end of the personalization
features, PERSONALIZATION SELECTION IS
DONE will appear briefly. Then PRESS SET TO EXIT
MODE TO CONTINUE will appear. Pressing SET
will exit you out of the DIC. Pressing MODE will take
you to the beginning of personalization.

3-58

-------------------------------------------------------------------------------------------------------------------------------------------------------------

Audio System(s)

Notice: Before adding any sound equipment to
your vehicle, like a tape player, CB radio, mobile
telephone, or two-way radio, make sure that it
can be added by checking with your dealer.
Also, check federal rules covering mobile radio
and telephone units. If sound equipment can
be added, it is very important to do it properly.
Added sound equipment may interfere with
the operation of your vehicle’s engine, radio, or
other systems, and even damage them. Your
vehicle’s systems may interfere with the operation
of sound equipment that has been added
improperly.

Figure out which audio system is in your vehicle, find
out what your audio system can do, and how to operate
all of its controls.

Your vehicle has a feature called Retained Accessory
Power (RAP). With RAP, the audio system can be
played even after the ignition is turned off. See Retained
Accessory Power (RAP) 
on page 2-20 for more
information.

Setting the Time

The radio may have a button marked with an H or HR
to represent hours and an M or MIN to represent
minutes.

Press and hold the hour button until the correct hour
appears on the display. AM will appear for morning
hours. Press and hold the minute button until the correct
minute appears on the display. The time can be set
with the ignition on or off.

To synchronize the time with an FM station broadcasting
Radio Data System (RDS) information, press and
hold the hour and minute buttons at the same time until
UPDATED appears on the display. If the time is not
available from the station, NO UPDATE will appear on
the display.

RDS time is broadcast once a minute. After tuning to an
RDS broadcast station, it may take a few minutes for
the time to update.

3-59

-------------------------------------------------------------------------------------------------------------------------------------------------------------

Radio with CD (Base Level)

Radio Data System (RDS)

The audio system has a Radio Data System (RDS).
RDS features are available for use only on FM stations
that broadcast RDS information.

With RDS, the radio can do the following:

Seek to stations broadcasting the selected type
of programming

Receive announcements concerning local and
national emergencies

Display messages from radio stations

Seek to stations with traffic announcements

This system relies upon receiving specific information
from these stations and will only work when the
information is available. In rare cases, a radio station
may broadcast incorrect information that will cause
the radio features to work improperly. If this happens,
contact the radio station.

While the radio is tuned to an RDS station, the station
name or call letters will appear on the display instead
of the frequency. RDS stations may also provide
the time of day, a program type (PTY) for current
programming, and the name of the program being
broadcast.

XM™ Satellite Radio Service

XM™ is a satellite radio service that is based in the
48 contiguous United States. XM™ offers 100 coast to
coast channels including music, news, sports, talk,
and children’s programming. XM™ provides digital
quality audio and text information that includes song
title and artist name. A service fee is required in order
to receive the XM™ service. For more information,
contact XM™ at www.xmradio.com or call
1-800-852-XMXM (9696).

3-60

-------------------------------------------------------------------------------------------------------------------------------------------------------------

Playing the Radio

PWR (Power): Push this knob to turn the system
on and off.

VOL (Volume): Turn this knob to increase or to
decrease the volume.

RCL (Recall): Push this knob to switch the display
between the radio station frequency and the time.
Push this knob to display the time with the ignition off.

For RDS, push the RCL knob to change what appears
on the display while using RDS. The display options
are station, RDS station frequency, PTY, and the name
of the program (if available).

For XM™ (if equipped), push the RCL knob while in XM™
mode to retrieve four different categories of information
related to the current song or channel: Artist, Song Title,
Category or PTY, Channel Number/Channel Name.

To change the default on the display, push the RCL knob
until you see the display you want, then hold the knob
until the display flashes. The selected display will now be
the default.

SCV (Speed-Compensated Volume): With SCV, the
audio system adjusts automatically to make up for
road and wind noise as you drive.

Set the volume at the desired level. Press this button to
select MIN, MED, or MAX. Each higher setting allows
for more volume compensation at faster vehicle speeds.
Then, as you drive, SCV automatically increases the
volume, as necessary, to overcome noise at any speed.
The volume level should always sound the same to
you as you drive. If you do not want to use SCV,
select OFF.

Finding a Station

BAND: Press this button to switch between FM1, FM2,
AM, or XM1 or XM2 (if equipped). The display will
show the selection.

TUNE: Turn this knob to select radio stations.

w

SEEK

x

Press the up or the down arrow to go to

the next or to the previous station and stay there.

The radio will only seek stations with a strong signal
that are in the selected band.

w

SCAN

x

Press and hold either SCAN arrow for

two seconds until SCAN appears on the display and you
hear a beep. The radio will go to a station, play for a
few seconds, then go on to the next station. Press either
SCAN arrow again to stop scanning.

3-61

-------------------------------------------------------------------------------------------------------------------------------------------------------------


Content      ..     9      10      11      12     ..