Suzki Burgman AN400. Manual - part 62
CHASSIS 7-51
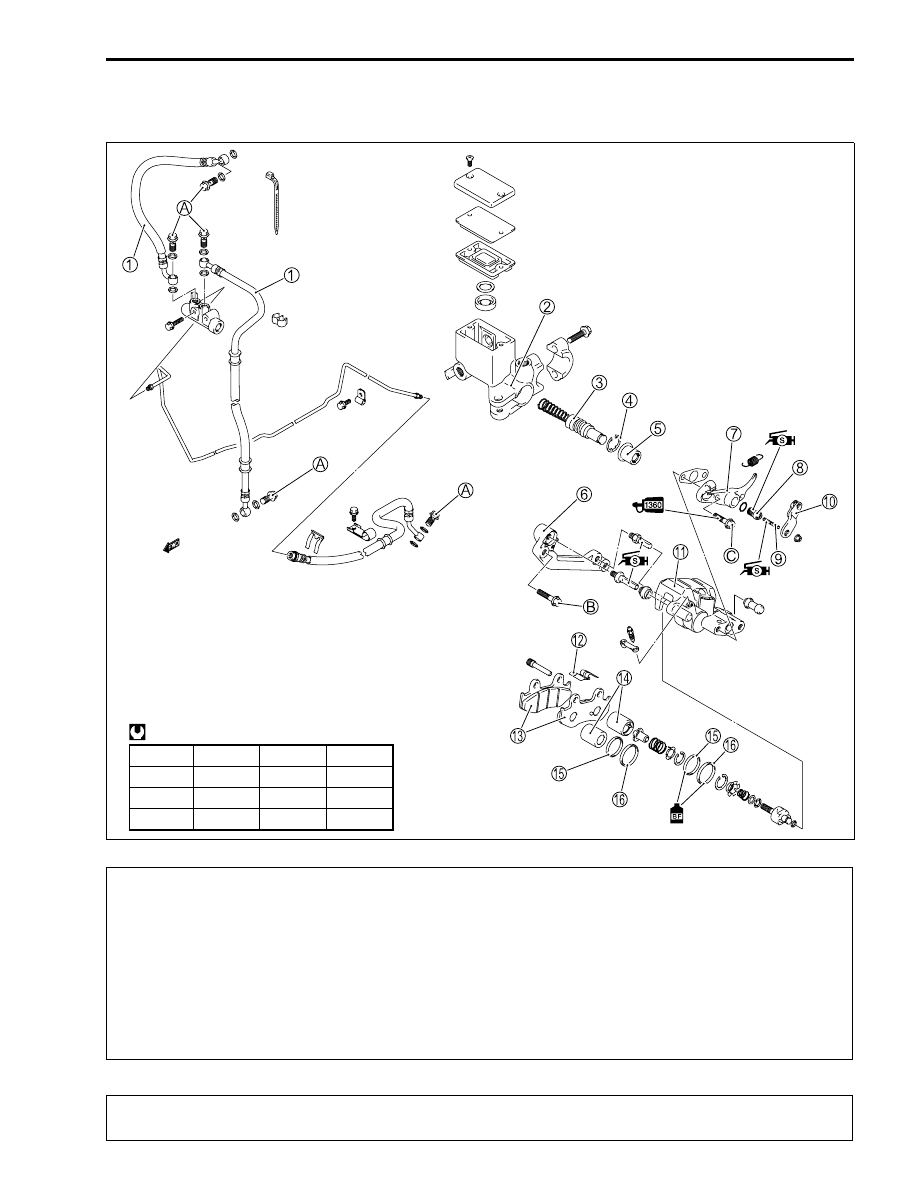
REAR BRAKE
)
$
* This brake system is filled with an ethylene glycol-based DOT 4 brake fluid. Do not use mix
different types of fluid such as silicone-based or petroleum-based.
* Do not use any brake fluid taken from old, used or unsealed containers. Never reuse brake
fluid left over from the last servicing or stored for long periods.
* When storing the brake fluid, seal the container completely and keep away from children.
* When replenishing brake fluid, take care not to get dust into fluid.
* When washing brake components, use fresh brake fluid. Never use cleaning solvent.
* A contaminated brake disc or brake pad reduces braking performance. Discard contaminated
pads and clean the disc with high quality brake cleaner or neutral detergent.
Handle brake fluid with care: the fluid reacts chemically with paint, plastics, rubber materials
etc. and will damage then severly.
1
Brake hose
2
Master cylinder
3
Piston/cup set
4
Snap ring
5
Boot
6
Caliper bracket
7
Brake-lock housing
8
Brake-lock shaft
9
Brake-lock adjuster
0
Brake-lock arm
A
Brake caliper
B
Pad spring
C
Brake pad
D
Piston
E
Piston seal
F
Dust seal
A
Union bolt
B
Caliper mounting bolt
C
Brake-lock housing bolt
ITEM
N·m
kgf-m Ib-ft
A
28
2.8 20.5
B
28
2.8 20.5
C
22
2.2 16.0