Volvo XC90 Twin Engine (2019 year). Manual - part 38
MAINTENANCE AND SERVICE
638
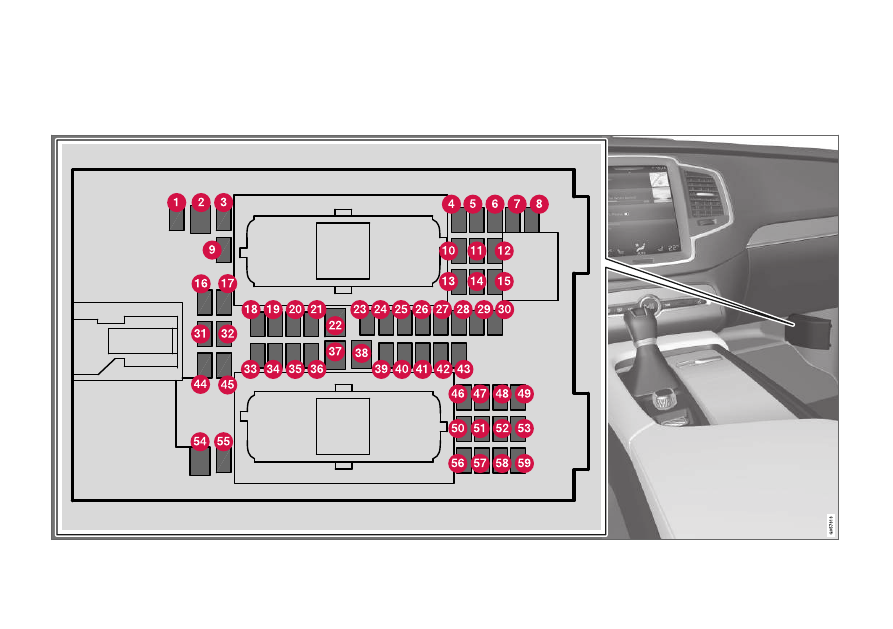
Fuses under the glove compartment
Fuses under the glove compartment provide pro-
tection for e.g. electrical outlets, displays and
door modules.
|
|
|
MAINTENANCE AND SERVICE 638 Fuses under the glove compartment Fuses under the glove compartment provide pro- |