Volvo V60 (2019 year). Manual - part 7
DISPLAYS AND VOICE CONTROL
}}
* Option/accessory.
133
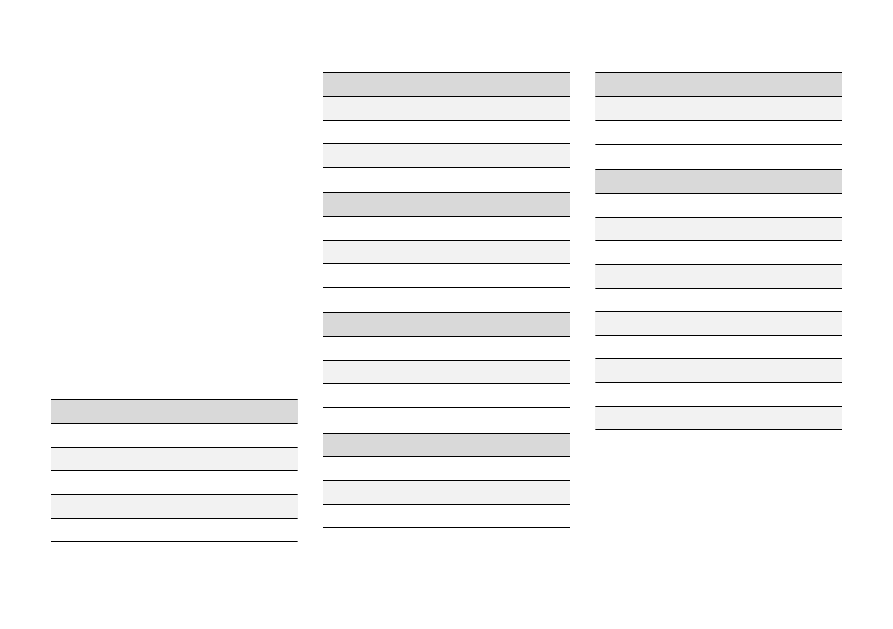
Table of settings in the center
display
The center display's Settings menu has a num-
ber of main categories and sub-categories that
contain settings and information for many of the
vehicle's features and functions.
There are seven main categories:
My Car
,
Sound
,
Navigation
,
Media
,
Communication
,
Climate
and
System
.
Each category, in turn, contains a number of sub-
categories and possible settings. The table below
shows the first level of sub-categories. The possi-
ble settings for a function or an area are descri-
bed in more detail in their respective sections of
the Owner's Manual.
Some settings are personal, which means that
they can be saved to a
Driver Profiles
. Others
are global, which means that they are not linked
to a driver profile.
My Car
Sub-categories
Displays
IntelliSafe
Drive Preferences
/
Individual Drive Mode
*
Lights and Lighting
Mirrors and Convenience
Sub-categories
Locking
Parking Brake and Suspension
Wipers
Sound
Sub-categories
Tone
Balance
System Volumes
Navigation
Sub-categories
Map
Route and Guidance
Traffic
Media
Sub-categories
AM/FM Radio
SiriusXM
SiriusXM Travel Link
Sub-categories
Gracenote®
Video
Communication
Sub-categories
Phone
Text Messages
Android Auto
*
Apple CarPlay
*
Bluetooth Devices
Wi-Fi
Vehicle Wi-Fi Hotspot
Vehicle Modem Internet
Volvo On Call
Volvo Service Networks
Climate
The
Climate
main category does not have any
sub-categories.