Volkswagen Golf Variant / Jetta. Manual - part 808
 

  Index      Volkswagen     Volkswagen Golf Variant (2007), Jetta (2005) - service repair manual


Search            


Content   ..  806  807  808  809   ..


Volkswagen Golf Variant / Jetta. Manual - part 808


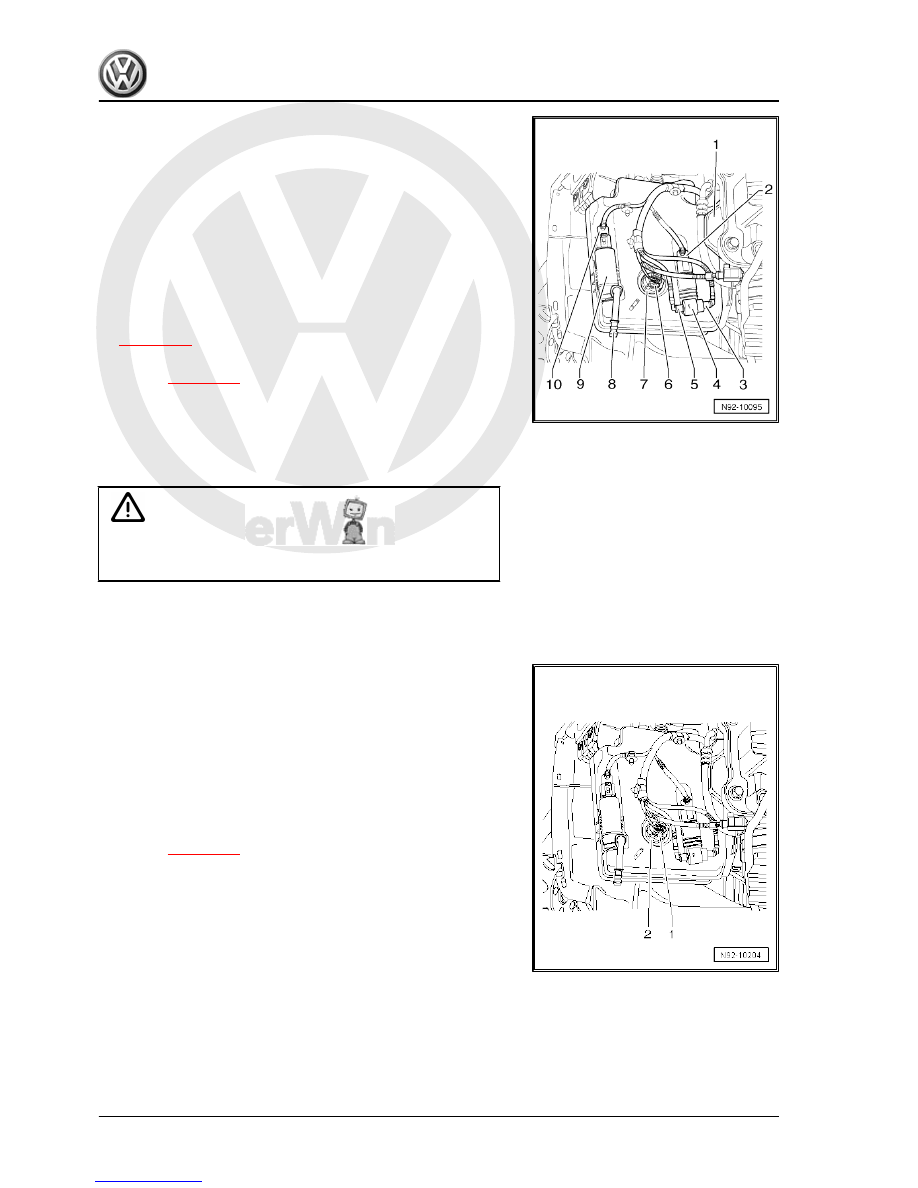
pump -V59- -4-.

– Drain any escaping fluid in a suitable container.
– Pull windscreen and rear window washer pump -V59- -4- up‐

wards out of reservoir.

– Disconnect connector -2-.
Installing
Install in the reverse order of removal. When doing this, note the

following:
– Tighten all threaded connections to specified torques

⇒ page 194

 .

– On completion of installation work, bleed headlight washer

system 

⇒ page 210

 .

2.4

Removing and installing windscreen

washer fluid level sender -G33-

Caution

♦ Switch off ignition and all electrical consumers.
♦ Remove the ignition key.

Removing
– Remove front bumper cover ⇒  General body repairs, exterior;

Rep. gr.  63 .

– Disconnect connector -1- on windscreen washer fluid level

sender -G33- -2-.

– Pull windscreen washer fluid level sender -G33- -2- out of its

rubber seal.

– Drain any escaping fluid in a suitable container.
Installing
Install in the reverse order of removal. When doing this, note the

following:
– On completion of installation work, bleed headlight washer

system 

⇒ page 210

 .

198


washer system spray jets

Removing
– Push spray jet upwards -arrow A- and pull it out of bonnet from

rear -arrow B-.

– Pull hose -1- off spray jet and disconnect connector -2-.
Installing
– Fit connector -2- and hose -1- on spray jet.
– Push spray jet in installation hole until it is heard to lock in

place.

– Adjust spray jets 

⇒ page 199

 .

2.6

Adjusting windscreen washer system

spray jets

Note

If impurities in the spray jet cause an uneven spray field, remove

the spray jet and flush through with water against the spraying

direction. Purging with compressed air against the spraying di‐

rection is then permitted. Do not use objects to clean the spray

jets!

⇒ Maintenance ; Booklet  20.1 ; Descriptions of work

2. Windscreen washer system    

199


Note

Additional information:

⇒  Operating instructions

3.1

Assembly overview - rear window wiper system

1 - Cover cap
2 - Nut

❑ 12 Nm

3 - Wiper arm

❑ Removing and installing

⇒ page 200

❑ Adjusting park position

⇒ page 202

4 - Seal
5 - Spray jet

❑ Renewing 

⇒ page 206

❑ Adjusting 

⇒ page 206

6 - Seal
7 - Rear window wiper motor -

V12-

❑ Removing and installing

⇒ page 201

8 - Nut

❑ 8 Nm

9 - Rubber ring
10 - Spacer
11 - Wiper blade

❑ Removing and installing

aerodynamic wipers

⇒ page 203

 .

3.2

Removing rear window wiper

3.2.1

Removing and installing wiper arm

Removing
– To place wiper motor in its park position, switch rear window

wiper on and off with ignition on.

– Lift up and unclip cap -1- of rear window wiper.

200


Aerodynamic wipers are very flexible. To lift the wiper blade off

the rear window, grasp it only in the area in which the wiper blade

is attached to the wiper.

– Lift up wiper arm and free off from taper by rocking from side

to side.

– Unscrew nut -arrow- and remove from wiper arm.
Installing
– With ignition switched on, switch rear window wiper on and off

to run rear window wiper motor -V12- to its rest position.

– Fit wiper arm in approximate park position on wiper arm shaft

and tighten nut -arrow- by hand.

– Adjust rear window wiper park position 

⇒ page 202

 .

3.2.2

Removing and installing rear window

wiper motor -V12-

Caution

When battery -A- is disconnected and reconnected, the pro‐

cedure  described  in  the  workshop  manual  must  be  strictly

observed 

⇒ page 4

 .

Removing
Remove wiper arm before removing rear window wiper motor -

V12- 

⇒ page 200

 .

– Disconnect battery -A- 

⇒ page 4

 .

– Removing lower trim of rear lid ⇒  General body repairs, inte‐

rior; Rep. gr.  70 .

3. Rear window wiper system    

201


Content   ..  806  807  808  809   ..