Volkswagen Golf Variant / Jetta. Manual - part 734
♦ Switch off ignition and all electrical consumers.
♦ Remove the ignition key.
♦ When removing and installing components that are in view
(switches, covers, trim), mask off areas where tools ( re‐
moval wedge -VAS 3409- , screwdriver) are used to lever
out those components using commercially available
masking tape.
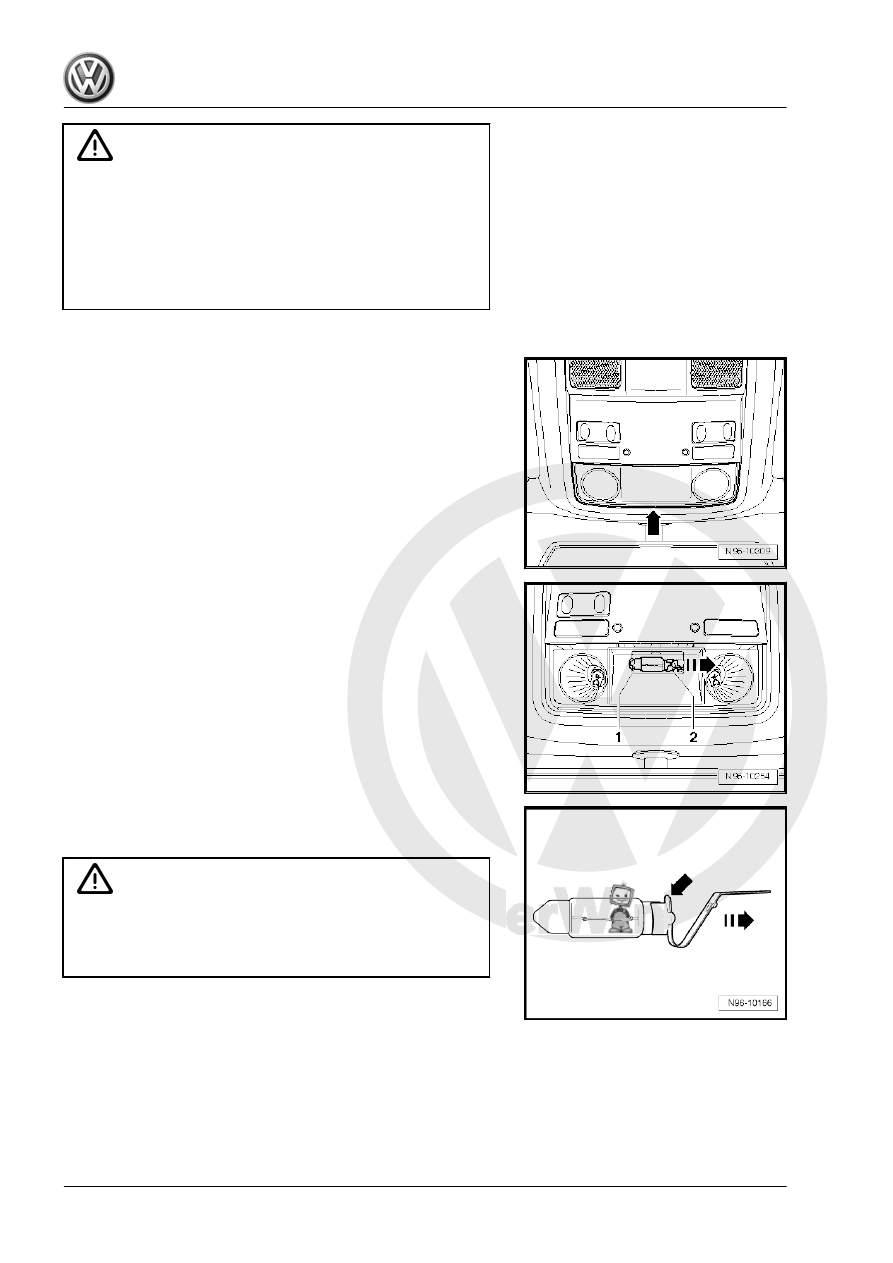
Removing
– Use removal wedge -VAS 3409- to carefully prise lens out of
front interior light -W1- -arrow-.
– Press contact plate -1- of front interior light -W1- to side
-arrow- and remove festoon bulb -2-, together with contact
plate, from front interior light -W1- .
– Pull contact plate -arrow- off defective festoon bulb.
– Fit contact plate onto new festoon bulb (12 V/10 W).
Caution
♦ Do not touch glass envelope when fitting bulb. Fingers
leave traces of grease on the glass envelope, which evap‐
orate when the bulb is switched on and cause the glass
envelope to cloud over.
Installing
Installation is carried out in reverse order of removal.
6.1.3
Removing and installing centre reading
lights
Left centre reading light -W39- / right centre reading light -W40-
are removed and installed in same way and description is only
given for one.
406