Volkswagen Golf Variant / Jetta. Manual - part 501
of the clutch pedal -2-.
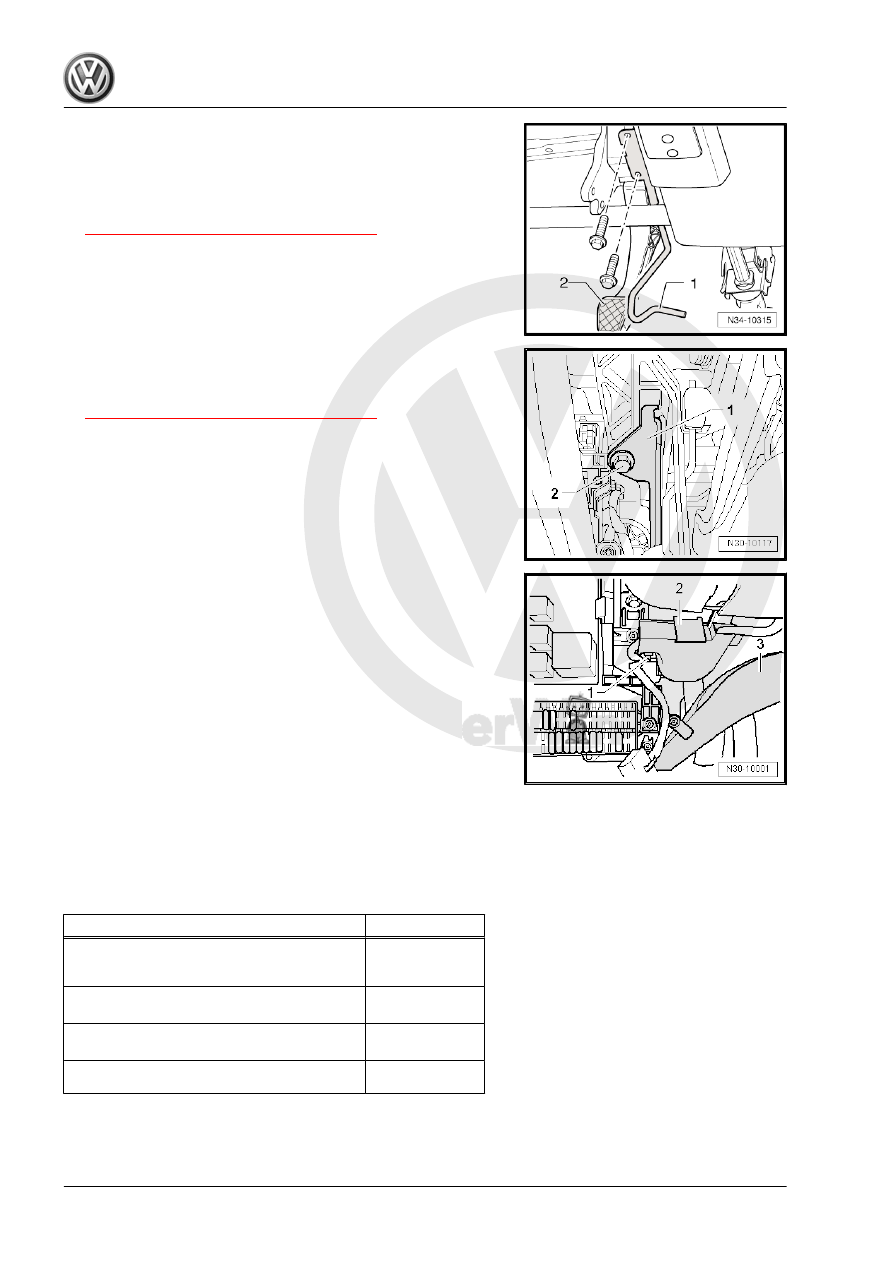
Securing with two bolts
– Install the crash bolster -1- and tighten the 2 bolts to the tight‐
ening specification. Refer to
⇒ “2.3.3 Tightening Specifications”, page 20
Securing with one bolt
– Install the crash bolster -1- and tighten the bolt -2- to the tight‐
ening specification. Refer to
⇒ “2.3.3 Tightening Specifications”, page 20
Continuation for All
– Attach the cable guide -2- to the steering column.
– Install the footwell vents -3-. Refer to ⇒ Heating, Ventilation
Removing, Jetta from MY 2011 .
Vehicles with Knee Airbag
– Install the knee airbag bracket and the crash bolster. Refer to
⇒ Body Interior; Rep. Gr. 69 .
Continuation for All
– Install the trim and the cover under the trim on the driver side.
and Covers; Steering Column Trim Panel, Removing and In‐
stalling .
– If disconnected, connect the battery. Refer to ⇒ Electrical
Connecting .
2.3.3
Tightening Specifications
Component
Nm
Clutch pedal to mounting bracket
♦ Replace the self-locking nuts.
25
Impact bolster to mounting bracket/steering
column (secured with two bolts)
10
Impact bolster to mounting bracket/steering
column (secured with one bolt)
20
♦ Replace the impact bolster bolts
20