Volkswagen Golf Variant / Jetta. Manual - part 173
Subframe Mount
⇒ “4.1 Overview - Subframe Mount”, page 154
4.1
Overview - Subframe Mount
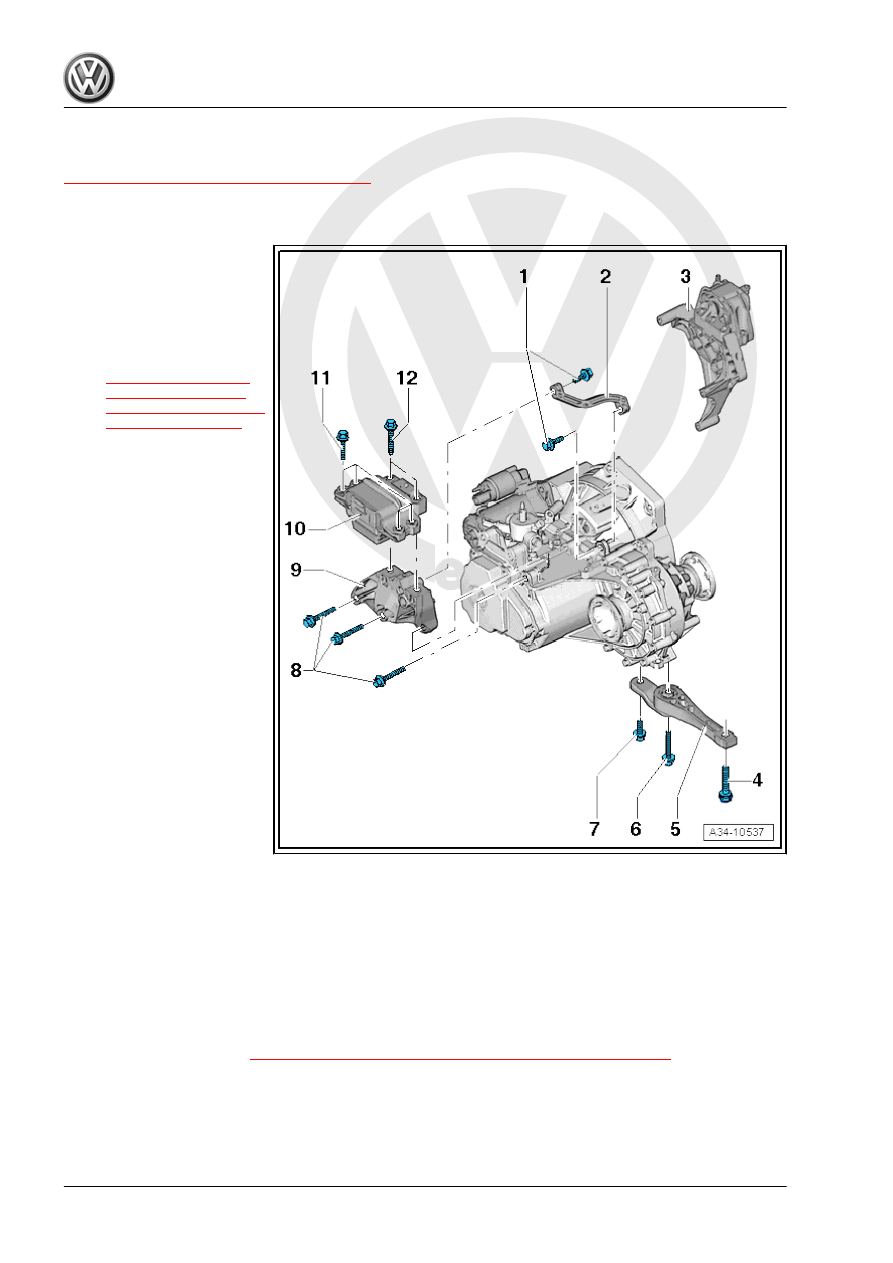
1 - Bolt
❑ 20 Nm +90°
❑ Transmission support to
transmission bracket
and transmission
❑ Tightening sequence.
Refer to
❑ Replace after removing
2 - Transmission Support
❑ To the transmission
bracket and transmis‐
sion
3 - Engine Mount with Engine
Support
Subframe Mount .
4 - Bolt
❑ Pendulum support to
subframe
❑ Refer to ⇒ Suspension,
Wheels, Steering; Rep.
Gr. 40 ; Subframe;
Overview - Subframe .
5 - Pendulum Support
❑ Refer to ⇒ Suspension,
Wheels, Steering; Rep.
Gr. 40 ; Subframe;
Overview - Subframe .
6 - Bolt
❑ Pendulum support to
transmission
❑ Refer to ⇒ Suspension, Wheels, Steering; Rep. Gr. 40 ; Subframe; Overview - Subframe .
7 - Bolt
❑ Pendulum support to transmission
❑ Refer to ⇒ Suspension, Wheels, Steering; Rep. Gr. 40 ; Subframe; Overview - Subframe .
8 - Bolt
❑ 40 Nm +90°
❑ Transmission bracket to transmission.
❑ Tightening sequence
⇒ Fig. ““Transmission Bracket -A- to Transmission.”“ , page 155
❑ Replace after removing
9 - Transmission Bracket
10 - Transmission Mount
154