Volkswagen Golf Variant / Jetta. Manual - part 57
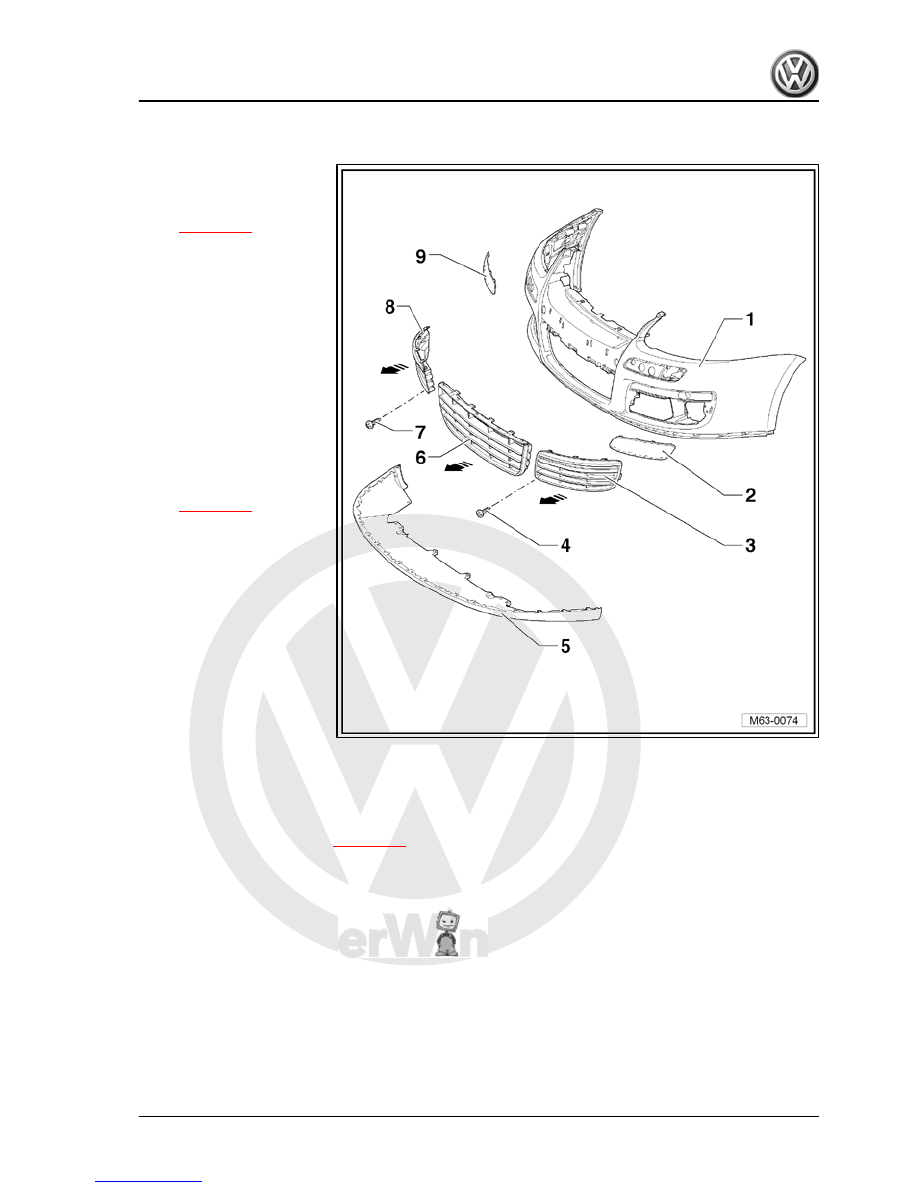
1 - Bumper cover
❑ Material PP/EPDM
❑ Removing and installing
⇒ page 223
2 - Left bumper strip
❑ Material PP/EPDM
❑ Different versions for
vehicles with headlight
washer system.
❑ Engaged in bumper
cover
❑ Can be levered out of
latches carefully from
outside using a plastic
wedge and removed
3 - Left air intake grille
❑ Different versions for
vehicles with fog lights.
❑ Removing and installing
⇒ page 226
4 - Bolt
❑ 1.5 Nm
5 - Spoiler
❑ Material PC/ABS
❑ Engages in cover.
❑ Only remove when
bumper cover is re‐
moved
6 - Centre air intake grille
❑ Pull forward out of fas‐
tenings in
-direction of arrow-.
7 - Bolt
❑ 1.5 Nm
8 - Right air intake grille
❑ Different versions for vehicles with fog lights.
❑ Removing and installing
⇒ page 226
9 - Right bumper strip
❑ Material PP/EPDM
❑ Different versions for vehicles with headlight washer system.
❑ Engaged in bumper cover
❑ Can be levered out of latches carefully from outside using a plastic wedge and removed.
1. Front bumper
225