Volkswagen Golf Variant / Jetta. Manual - part 12


  Index      Volkswagen     Volkswagen Golf Variant (2007), Jetta (2005) - service repair manual


Search            


Content   ..  10  11  12  13   ..


Volkswagen Golf Variant / Jetta. Manual - part 12


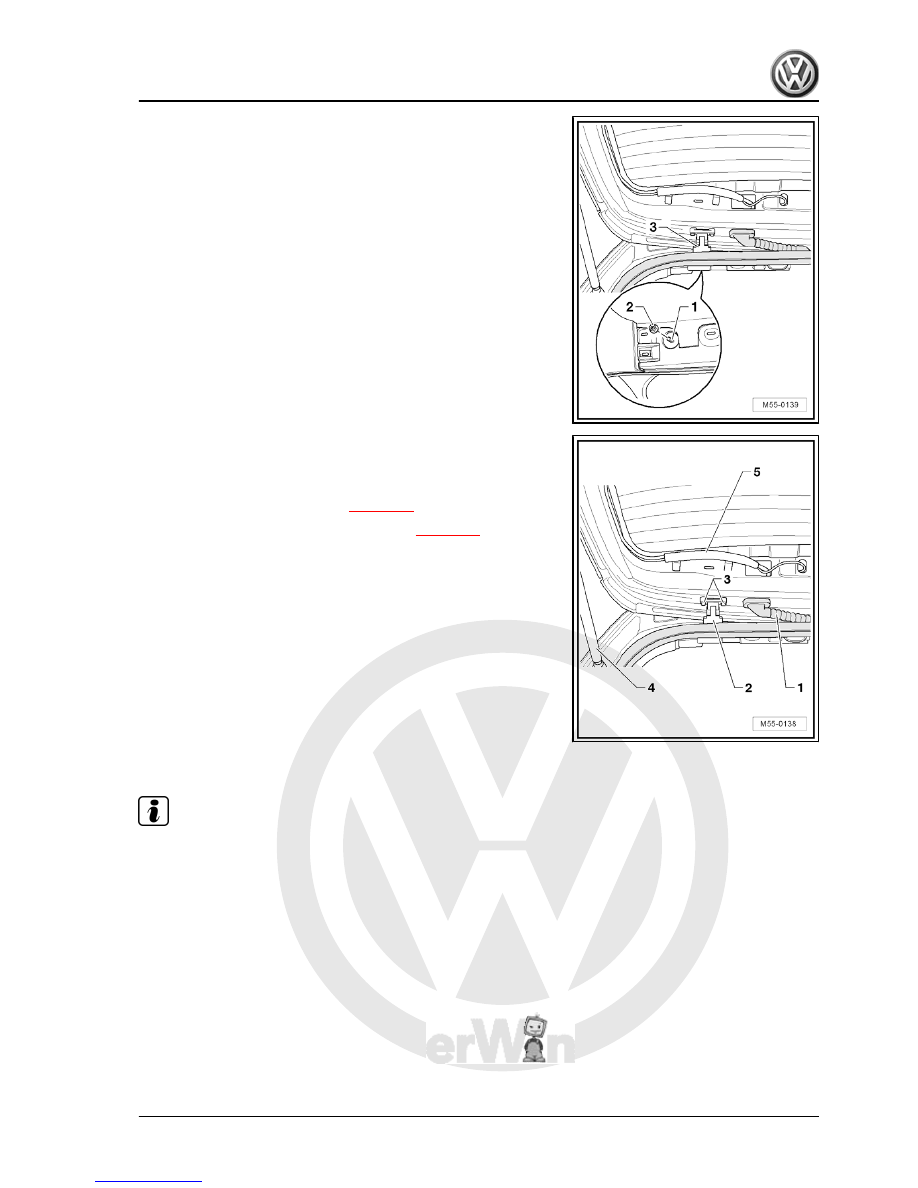
– Rear lid can be adjusted slightly at bolts -3-.
– After completing adjustments, perform corrosion protection

measures on hinge and bolts.

– Adjusting rear lid at striker pin 

⇒ page 45

 .

– Adjusting left and right adjustment buffer 

⇒ page 46

 .

3.7.1

Adjusting striker pin

Note

Loosen bolts to slide striker pin in over-sized holes.

Adjust striker pin so that recess of rear lid lock engages with

rotary catch centrally to striker pin.

– Remove lock carrier cover ⇒  General body repairs, interior;

Rep. Gr.  70 ; Luggage and load compartment trim .

3. Rear lid (Variant)    

45


all contours align when the rear lid is closed.
– Specified torque for bolts -1-: 23 Nm

3.7.2

Adjusting adjustment buffer

– Tighten stop buffer -2-, specified torque for bolt -3-: 10 Nm.
– Pull cover -4- off adjustment buffer.
– Loosen bolt -5- on adjustment buffer -6- slightly until adjust‐

ment buffer can be moved onto stop in direction of -arrow-.

– Close rear lid -1- to first detent position by applying light pres‐

sure to centre area.

– Open rear lid again.
– Tighten bolt -5-, specified torque: 10 Nm.

46


Removing and installing release button

3.8.1

Removing

– Remove rear lid trim ⇒  General body repairs, interior; Rep.

Gr.  70 ; Rear lid trim .

3. Rear lid (Variant)    

47


– Unscrew the two nuts -2- from studs for release button and

take cover -4- off upwards.

– Remove release button -1- from rear lid.
In case of electrical malfunction, rear lid can be opened using lock

emergency release 

⇒ page 48

 . Emergency release is acces‐

sible through an aperture in rear lid trim.

3.8.2

Installing

Install in reverse order of removal.
Specified torque for nuts: 8 Nm.
Before closing rear lid, check function of lid release components.

3.9

Removing and installing lid lock

3.9.1

Removing

– Remove rear lid trim ⇒  General body repairs, interior; Rep.

Gr.  70 ; Trim, insulation .

– Disconnect connector -3- on back of lock.
– Remove bolts -2- and take off lock -1- from rear lid.

48


Content   ..  10  11  12  13   ..