Toyota Tundra (2019 year). Manual - part 37
 

  Index      Toyota     Toyota Tundra - service manual 2019 year in english


Search            copyright infringement  


Content   ..  35  36  37  38   ..


Toyota Tundra (2019 year). Manual - part 37


577

8-2. Steps to take in an emergency

8

W

hen
 troub

le arises

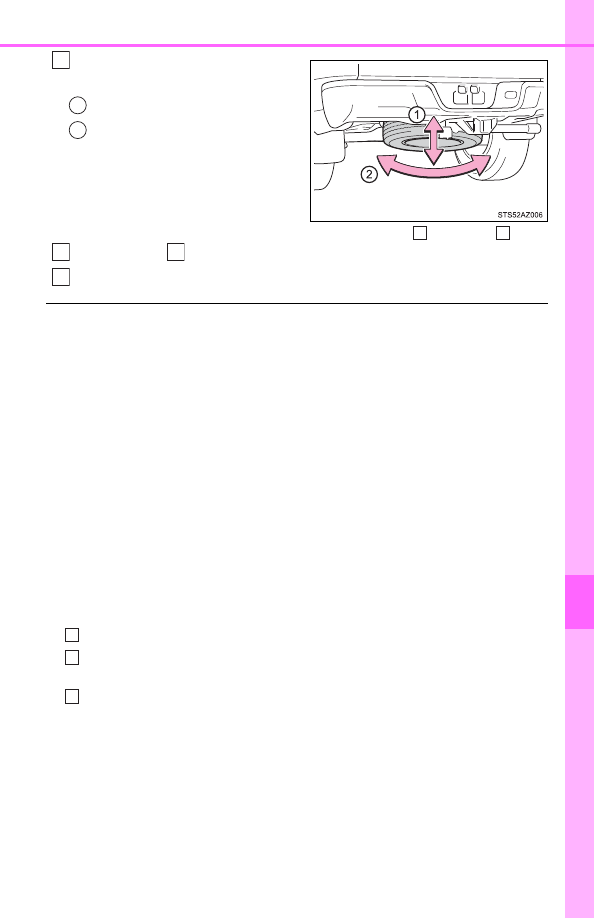
Confirm  it  is  not  loose  after
tightening:

Push and pull the tire
Try rotating

Visually check to ensure tire is

not hung on surrounding parts.

If looseness or misassembly exists, repeat step 

 and step 

.

Repeat step 

, any time the tire is lowered or disturbed.

Stow the tools and jack securely.

The temporary spare tire

The temporary spare tire is identified by the “TEMPORARY USE ONLY”

marking on the disc wheel and/or tire sidewall.

Use the temporary spare tire temporarily, and only in an emergency.

Make  sure  to  check  the  tire  inflation  pressure  of  the  temporary  spare

tire. (

P. 606)

When reinstalling the wheel ornament (on some models)
P. 511

When using the temporary spare tire
As the temporary spare tire is not equipped with the tire pressure warning

valve and transmitter, low inflation pressure of the spare tire will not be

indicated  by  the  tire  pressure  warning  system. Also,  if  you  replace  the

temporary spare tire after the tire pressure warning light comes on, the

light remains on.

If you have a flat rear tire on a road covered with snow or ice
Install the temporary spare tire on one of the front wheels of the vehicle.

Perform the following steps and fit tire chains to the rear tires:

Replace a front tire with the temporary spare tire.
Replace the  flat rear tire with the tire removed from the front  of  the

vehicle.
Fit tire chains to the rear tires.

3

1

2

2

3

4

3

5

1

2

3

578

8-2. Steps to take in an emergency

WARNING

When using the temporary spare tire

Remember  that  the  temporary  spare  tire  provided  is  specifically

designed for use with your vehicle. Do not use your temporary spare

tire on another vehicle.

Do not use more than one temporary spare tires simultaneously.

Replace the temporary spare tire with a standard tire as soon as possi-

ble.

Avoid sudden acceleration, abrupt steering, sudden braking and shift-

ing operations that cause sudden engine braking.

When the spare tire is attached
The vehicle speed may not be correctly detected, and the following sys-

tems may not operate correctly:

Also, not only can the following system not be utilized fully, but it may

even negatively affect the drive-train components:

• 4WD system

Speed limit when using the temporary spare tire
Do not drive at speeds in excess of 50 mph (80 km/h) when a temporary

spare tire is installed on the vehicle.
The temporary spare tire is not designed for driving at high speeds. Fail-

ure to observe this precaution may lead to an accident causing death or

serious injury.

• ABS & Brake assist

• VSC

• TRAC

• AUTO LSD

• Pre-Collision System*

*

: If equipped

• Automatic High Beam*

• LDA (Lane Departure Alert)*

• Dynamic radar cruise control*

• Cruise control*

• Navigation system*

579

8-2. Steps to take in an emergency

8

W

hen
 troub

le arises

NOTICE

Do not drive the vehicle with a flat tire
Do not continue driving with a flat tire.

Driving even a short distance with a flat tire can damage the tire and the

wheel beyond repair.

Driving with tire chains and the temporary spare tire
Do not fit tire chains to the temporary spare tire.

Tire chains may damage the vehicle body and adversely affect driving

performance.

When replacing the tires
When removing or fitting the wheels, tires or the tire pressure warning

valve  and  transmitter,  contact  your Toyota  dealer  as  the  tire  pressure

warning valve and transmitter may be damaged if not handled correctly.

To avoid damage to the tire pressure warning valves and transmit-

ters
When  a  tire  is  repaired  with  liquid  sealants,  the  tire  pressure  warning

valve  and  transmitter  may  not  operate  properly.  If  a  liquid  sealant  is

used, contact your Toyota dealer or other qualified service shop as soon

as possible. Make sure to replace the tire pressure warning valve and

transmitter when replacing the tire. (

P. 496)

580

8-2. Steps to take in an emergency

If the engine will not start

One of the following may be the cause of the problem:
● There may not be sufficient fuel in the vehicle’s tank.

Refuel the vehicle.
Flex-fuel vehicles: The type of fuel may be different. When refuel-
ing, add the same type of fuel, if available.
After adding a different type of fuel, the engine may run roughly and
driving performance may be reduced for a while when the engine is
first started. In this case, wait until the engine runs normally.

● The engine may be flooded.

Try to restart the engine again following correct starting procedures.
(

P. 194)

● There may be a malfunction in the engine immobilizer system. 

 (

P. 76)

If  the  engine  will  not  start  even  though  correct  starting  proce-
dures are being followed (

P. 194), consider each of the follow-

ing points.

The engine will not start even though the starter motor operates
normally.

581

8-2. Steps to take in an emergency

8

W

hen
 troub

le arises

One of the following may be the cause of the problem:
● The battery may be discharged. (P. 582)
● The battery terminal connections may be loose or corroded.

One of the following may be the cause of the problem:
● One or both of the battery terminals may be disconnected.
● The battery may be discharged. (P. 582)

Contact your Toyota dealer if the problem cannot be repaired, or if repair
procedures are unknown.

The starter motor turns over slowly, the interior lights and head-
lights  are  dim,  or  the  horn  does  not  sound  or  sounds  at  a  low
volume.

The starter motor does not turn over, the interior lights and head-
lights do not turn on, or the horn does not sound.

582

8-2. Steps to take in an emergency

If the vehicle battery is discharged

If you have a set of jumper (or booster) cables and a second vehicle
with a 12-volt battery, you can jump start your vehicle by following the
steps below.

Confirm  that  the  key  and  wire-
less 

remote 

control 

(if

equipped) are being carried.

When  connecting  the  jumper  (or
booster) cables, depending on the
situation,  the  alarm  may  activate
and the doors may lock. (

P. 87)

Open the hood. (

P. 484)

Connect the jumper cables according to the following procedure:

Connect a positive jumper cable clamp to the positive (+) battery
terminal on your vehicle.
Connect the clamp on the other end of the positive cable to the
positive (+) battery terminal on the second vehicle.

The following procedures may be used to start the engine if the
vehicle’s battery is discharged.
You can also call your Toyota dealer or a qualified repair shop.

1

2

3

1

2

583

8-2. Steps to take in an emergency

8

W

hen
 troub

le arises

Connect a negative cable clamp to the negative (-) battery termi-
nal on the second vehicle.
Connect  the  clamp  at  the  other  end  of  the  negative  cable  to  a
solid, stationary, unpainted metallic point away from the battery
and any moving parts, as shown in the illustration.

Start the engine of the second vehicle. Increase the engine speed
slightly  and  maintain  at  that  level  for  approximately  5  minutes  to
recharge the battery of your vehicle.
Maintain  the  engine  speed  of  the  second  vehicle  and  start  the
engine of your vehicle.
Once the vehicle’s engine has started, remove the jumper cables in
the exact reverse order from which they were connected.

Once  the  engine  starts,  have  the  vehicle  inspected  at  your  Toyota
dealer as soon as possible.

Starting the engine when the battery is discharged 
The engine cannot be started by push-starting.

To prevent battery discharge

Turn off the headlights and the audio system while the engine is off.

Turn off any unnecessary electrical components when the vehicle is running
at a low speed for an extended period, such as in heavy traffic.

When the battery is removed or discharged
The moon roof must be initialized. (

P. 156)

Charging the battery
The  electricity  stored  in  the  battery  will  discharge  gradually  even  when  the
vehicle is not in use, due to natural discharge and the draining effects of cer-
tain electrical appliances. If the vehicle is left for a long time, the battery may
discharge,  and  the  engine  may  be  unable  to  start.  (The  battery  recharges
automatically during driving.)

3

4

4

5

6

584

8-2. Steps to take in an emergency

WARNING

Avoiding battery fires or explosions
Observe the following precautions to prevent accidentally igniting the flam-
mable gas that may be emitted from the battery:

Make sure each jumper cable is connected to the correct terminal and that
it is not unintentionally in contact with any other than the intended terminal.

Do not allow the + and - clamps of the jumper cables to come into contact
with each other.

Do  not smoke,  use matches, cigarette lighters  or  allow  open flame near
the battery.

Battery precautions
The  battery  contains  poisonous  and  corrosive  acidic  electrolyte,  while
related parts contain lead and lead compounds. Observe the following pre-
cautions when handling the battery:

When working with the battery, always wear safety glasses and take care
not to allow any battery fluids (acid) to come into contact with skin, clothing
or the vehicle body.

Do not lean over the battery.

In  the  event  that  battery  fluid  comes  into  contact  with  the  skin  or  eyes,
immediately wash the affected area with water and seek medical attention.
Place a wet sponge or cloth over the affected area until medical attention
can be received.

Always wash your hands after handling the battery support, terminals, and
other battery-related parts.

Do not allow children near the battery.

NOTICE

When handling jumper cables
When connecting the jumper cables, ensure that they do not become entan-
gled in the cooling fan or belt.

585

8

W

hen
 troub

le arises

8-2. Steps to take in an emergency

If your vehicle overheats

● The  needle  of  the  engine  coolant  temperature  gauge  (P.  95)

enters the red zone or a loss of engine power is experienced. (For
example, the vehicle speed does not increase.)

● “ENGINE COOLANT OVERTEMP” is shown on the multi-informa-

tion display.

● Steam comes out from under the hood.

Stop the vehicle in a safe place and turn off the air conditioning sys-
tem, and then stop the engine.
If you see steam: 
Carefully lift the hood after the steam subsides.
If you do not see steam:
Carefully lift the hood.
After  the  engine  has  cooled
down  sufficiently,  inspect  the
hoses and radiator core (radia-
tor) for any leaks.

Radiator
Cooling fan

If a large amount of coolant leaks,
immediately  contact  your  Toyota
dealer.

The following may indicate that your vehicle is overheating:

Correction procedures

1

2

3

1

2

586

8-2. Steps to take in an emergency

The coolant level is satisfactory
if  it  is  between  the  “FULL”  and
“LOW” lines on the reservoir.

Reservoir
“FULL”
“LOW”
Radiator cap

Add coolant if necessary.

Water  can  be  used  in  an  emer-
gency if coolant is unavailable.

Start the engine to check that the radiator cooling fan operates and
to check for coolant leaks from the radiator or hoses.
If the fan is not operating: 
Stop the engine immediately and contact your Toyota dealer.
If the fan is operating:
Have the vehicle inspected at the nearest Toyota dealer.

4

1

2

3

4

5

6

7

587

8-2. Steps to take in an emergency

8

W

hen
 troub

le arises

WARNING

When inspecting under the hood of your vehicle
Observe the following precautions. 
Failure to do so may result in serious injury such as burns.

If steam is seen coming from under the hood, do not open the hood until
the steam has subsided. The engine compartment may be very hot.

Keep hands and clothing away from the fans, etc., while the engine is run-
ning.

Do  not  loosen  the  radiator  cap  and  the  coolant  reservoir  cap  while  the
engine and radiator are hot.
High temperature steam or coolant could spray out.

NOTICE

When adding engine coolant
Add  coolant  slowly  after  the  engine  has  cooled  down  sufficiently. Adding
cool coolant to a hot engine too quickly can cause damage to the engine.

To prevent damage to the cooling system
Observe the following precautions:

Avoid contaminating the coolant with foreign matter (such as sand or dust,
etc.).

Do not use any coolant additives.

588

8-2. Steps to take in an emergency

If the vehicle becomes stuck

Stop the engine. Set the parking brake and shift the shift lever to P.
Remove the mud, snow or sand from around the rear wheels.
Place wood, stones or some other material to help provide traction
under the rear wheels.
Restart the engine.
Shift the shift lever to D or R and release the parking brake. Then,
while exercising caution, depress the accelerator pedal.

When it is difficult to free the vehicle

Press 

 to turn off TRAC.

Turn off TRAC and/or VSC if these functions are hampering your attempts to
free the vehicle. (

P. 301, 303)

Carry out the following procedures if the tires spin or the vehicle
becomes stuck in mud, dirt or snow:

WARNING

When attempting to free a stuck vehicle
If you choose to push the vehicle back and forth to free it, make sure the
surrounding area is clear to avoid striking other vehicles, objects or people.
The vehicle may also lunge forward or lunge back suddenly as it becomes
free. Use extreme caution.

When shifting the shift lever
Be careful not to shift the shift lever with the accelerator pedal depressed.
This  may  lead  to  unexpected  rapid  acceleration  of  the  vehicle  that  may
cause an accident resulting in death or serious injury.

1

2

3

4

5

589

8-2. Steps to take in an emergency

8

W

hen
 troub

le arises

NOTICE

To avoid damage to the transmission and other components

Avoid spinning the rear wheels and depressing the accelerator pedal more
than necessary.

If  the  vehicle  remains  stuck even  after  these procedures  are  performed,
the vehicle may require towing to be freed.

When a warning message for the automatic transmission fluid temperature
is displayed while attempting to free a stuck vehicle, immediately remove
your foot from the accelerator pedal and wait until the warning message
disappears. Otherwise, the transmission may become damaged. 
(

P. 555)

591

9

Vehicle specifications

9-1. Specifications

Maintenance data 

(fuel, oil level, etc.).......... 592

Fuel information ................ 609
Tire information ................. 613

9-2. Customization

Customizable features ...... 623

9-3. Items to initialize

Items to initialize ............... 631

592

9-1. Specifications

Maintenance data (fuel, oil level, etc.)

2WD models

*

1

: Unladen vehicle

*

2

: P255/70R18 tires

*

3

: P275/65R18 tires

*

4

: P275/55R20 tires

Dimensions

Cab type

Double Cab

CrewMax

Bed type

Standard

Long

Short

Overall length

228.9 in. (5815 

mm)

247.8 in. 

(6295 mm)

228.9 in. 

(5815 mm)

Overall width

79.9 in. (2030 mm)

Overall
height

*

1

75.9 in. 

(1930 mm)

*

2

75.7 in. 

(1925 mm)

*

2

75.7 in. 

(1925mm)

*

3,

*

4

75.5 in. 

(1920mm)

*

3,

*

4

Wheelbase

145.6 in. (3700 

mm)

164.5 in. 

(4180 mm)

145.6 in. 

(3700 mm)

Front tread

67.9 in. (1725 mm)

Rear tread

67.9 in. (1725 mm)


Content   ..  35  36  37  38   ..