Toyota Tundra (2019 year). Manual - part 33
513
7-3. Do-it-yourself maintenance
7
Mai
ntenan
Air conditioning filter
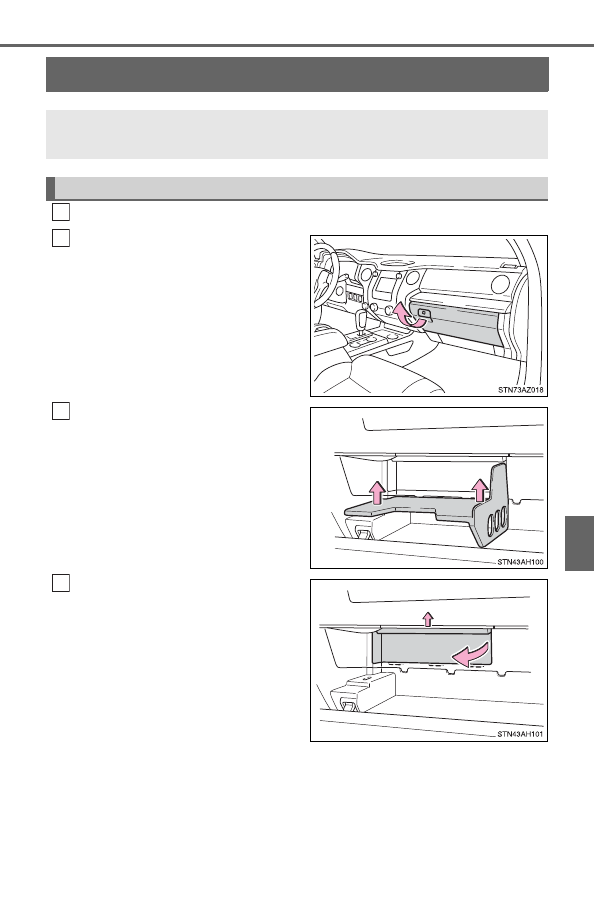
Turn the engine switch off.
Open the glove box.
Remove the tray.
Remove the cover by sliding up
while pulling toward you.
The air conditioning filter must be changed regularly to maintain
air conditioning efficiency.
Removal method
1
2
3
4