Toyota FJ Cruiser (GSJ 10, 15 series). Manual - part 260


  Index      Toyota     Toyota FJ Cruiser (model GSJ 10, 15 series) - service repair manual 2007 year


Search            


Content   ..  258  259  260  261   ..


Toyota FJ Cruiser (GSJ 10, 15 series). Manual - part 260


INTERIOR  –  ROOF HEADLINING

IR–43

IR

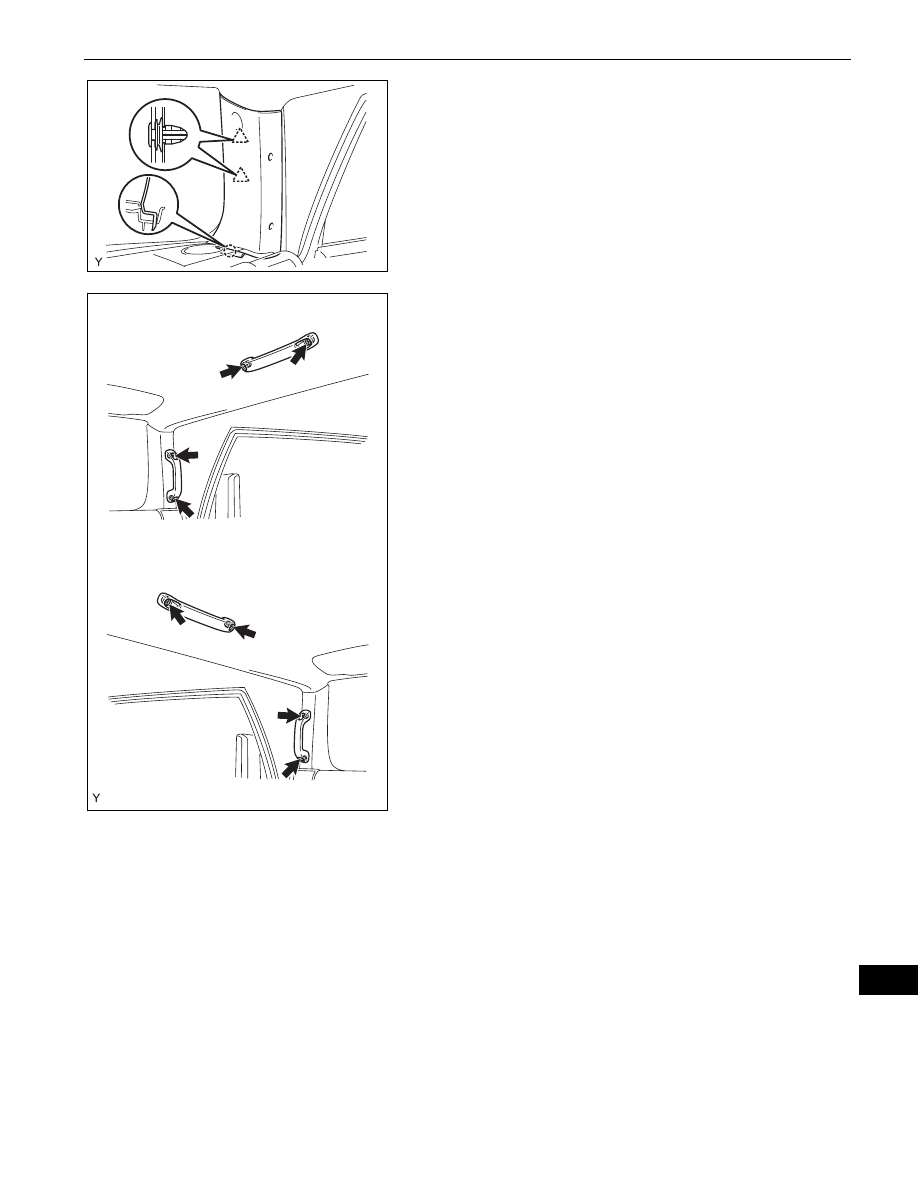
28. INSTALL FRONT PILLAR GARNISH RH

(a) Engage the claw and the 2 clips and install the front 

pillar garnish.

29. INSTALL FRONT PILLAR GARNISH LH

HINT:
Use the same procedure as for the RH side.

30. INSTALL ASSIST GRIP ASSEMBLY

HINT:
Use the same procedure to install all the assist grips.
(a) Install the assist grip with the 2 bolts.

B130608

for LH Side:

for RH Side:

B134995E01

IR–44

INTERIOR  –  ROOF HEADLINING

IR

31. INSTALL ASSIST GRIP PLUG

HINT:
Use the same procedure to install all the assist grip 
plugs.
(a) Engage the 2 claws and install the assist grip plug.

32. INSTALL FRONT DOOR OPENING TRIM 

WEATHERSTRIP RH
(a) Align the locating marks with the paint marks first, 

and install the front door opening trim weatherstrip, 
as shown in the illustration.
Paint mark

33. INSTALL FRONT DOOR OPENING TRIM 

WEATHERSTRIP LH
HINT:
Use the same procedure as for the RH side.

34. INSTALL ROOF SIDE RAIL GARNISH RH

(a) Engage the 2 claws and install the roof side rail 

garnish.

(b) Tighten the 2 bolts.

35. INSTALL ROOF SIDE RAIL GARNISH LH

HINT:
Use the same procedure as for the RH side.

for LH side :

for RH side :

B138407E01

Paint Mark

Locating Mark

B130604E01

Area

Color

RH side

White

LH side

Red

B130602

INTERIOR  –  ROOF HEADLINING

IR–45

IR

36. INSTALL ROOF SIDE INNER GARNISH COVER RH

HINT:
Use the same procedure for both sides.
(a) Engage the 2 claws and install the roof side inner 

garnish cover.

37. INSTALL ROOF SIDE INNER GARNISH COVER LH

HINT:
Use the same procedure as for the RH side.

38. INSTALL COWL SIDE TRIM BOARD RH

(a) Engage the 2 claws and install the cowl side trim 

board.

(b) Install the clip.

39. INSTALL COWL SIDE TRIM BOARD LH

HINT:
Use the same procedure as for the RH side.

40. INSTALL FOOTREST CLIP (See page 

IR-2

)

41. INSTALL FRONT FLOOR FOOTREST (See page 

IR-2

)

42. INSTALL ACCESS DOOR SCUFF PLATE RH

(a) Engage the 6 claws and install the access door scuff 

plate.

43. INSTALL ACCESS DOOR SCUFF PLATE LH

HINT:
Use the same procedure as for the RH side.

44. INSTALL FRONT DOOR SCUFF PLATE RH

(a) Engage the 14 claws and install the door scuff plate.

45. INSTALL FRONT DOOR SCUFF PLATE LH

HINT:
Use the same procedure as for the RH side.

B130601

B130599

B130598

B130597

IR–46

INTERIOR  –  ROOF HEADLINING

IR

46. INSTALL REAR FLOOR MAT ASSEMBLY

(a) Install the rear floor mat with the 2 clips.

47. INSTALL LUGGAGE HOLD BELT STRIKER 

ASSEMBLY
HINT:
Use the same procedure for both sides.
(a) Install the luggage hold belt striker with the bolt.

48. INSTALL REAR FLOOR MAT SUPPORT PLATE

(a) Engage the 11claws and install the rear floor mat 

support plate.

B130594

for RH Side:

for LH Side:

B130595E01

B130593


Content   ..  258  259  260  261   ..