Dacia Pick-Up 1304/1305/1307. Service manual - part 21


  Index      Dacia     Dacia Pick-Up 1304/1305/1307 (Engine F8Q) - service and repair manual 2004 year


Search            


Content   ..  19  20  21  22   ..


Dacia Pick-Up 1304/1305/1307. Service manual - part 21


10

10 - 50

ENGINE AND LOWER ENGINE UNITS

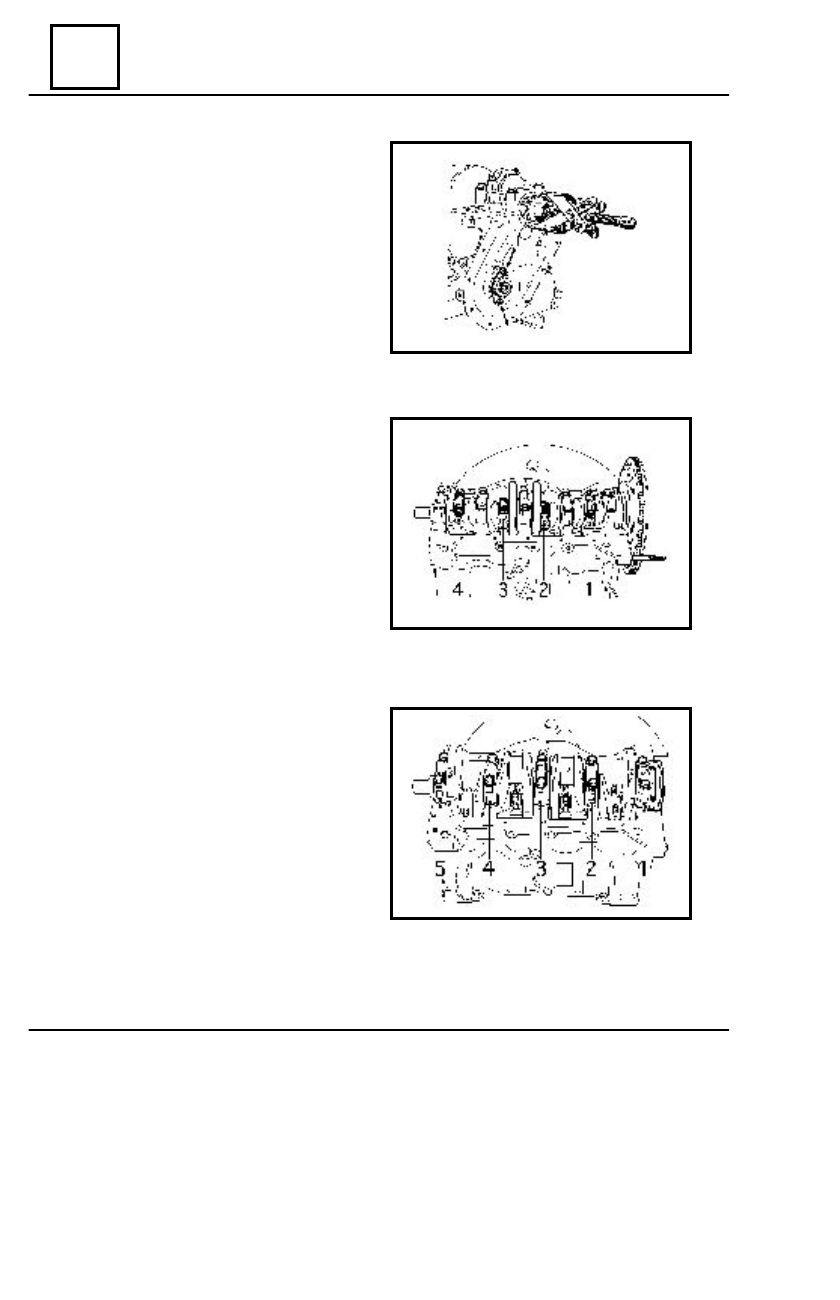
Take out the crankshaft pinion by means of

the MOT 49 device.

Dismount  the engine flywhhe.
Check the marking of the connecting rods:

- no.1 towards the flywheel and opposite

to the camshaft.

Unscrew the connecting rod caps nuts.
Dismount the connecting rods cas and the half

bushings and  place them in  order.

Dismount the crankshaft.
Dismount the connecting bearing and the half

bushings and  place them in  order.

Dismount  the crankshaft.

DISMOUNTING - MOUNTING

10

10 - 51

ENGINE AND LOWER ENGINE UNITS

Remove the half bushings from the

connecting rod and from the block and put them
in order.

Dismount the washer thrusts  for the axial

clearance adjustment.

Remove the annular oil seal from the bearing.

R

EMOUNTING

Wash and air blow the new crankshaft; check the existence of the lubricatin holes in the shaft.
Clean the contact surface of the gasket to the block and oil sump.
Mount the half bushings on the connecting rods.
Mount the half bushings of the bearings in the blck ( the half bushings with lubricating holes).

NOTE:

The half bushings of bearings 1  and 3 on one hand and the ones for bearings 2 , 4

and 5 on the other hand,are identical.

In case crankshaft is replaced, it is obligatory to change also the connecting rod

bearings, crankshaft bearings and the distribution and bearing annular oil seals.

Mount the crankshaft pinion on the shaft.
Lubricate with fresh oil the followings:

- the bushing of the bearings;
- the bearings of the crankshaft;

Mount the crankshaft.
Lubricate with oil the axial half  bushings and

mount them in their  respective seats.


DISMOUNTING – MOUNTING

10

10 - 52

ENGINE AND LOWER ENGINE UNITS

Mount the half bushings on the bearing

heads ( the half bushings for caps do not have
lubricating holes).

Lubricate the half bushings with fresh oil and

mount the bearing caps at their place
according to the marking.

It is obligatory to degrease the contact

surfaces of the no.1 bearing cap and then to apply
a layer of LOCTITE 518 in order to ensure the
sealing.

Tighten the attachment screws of the caps at

5,5 – 6,5 daNm moment using.

Check the free rotation of the crankshaft.

Mount a support with magnetic  bottom and

by means of a comparator check the axial clear-
ance  of the crankshaft which must be within 0,05
and 0,23 mm.

If the clearance is not as required,replace the

axial half bushings.

The axial half bushings have various thickneses

such as: 2,28 ; 2,38 ; 2,43 mm.

Mount the bearing annular oil seal on the

MOT 259-01 chuck.

Lubricate the outside of the annular oil seal

with oil and mount it in its seat by slightly tapping
the head of the chuck until the latter comes into
contact with the crankshaft.

DISMOUNTING - MOUNTING

10

10 - 53

ENGINE AND LOWER ENGINE UNITS

NOTE:

 In case the old crankshaft is to be mounted, displace the annular oil seal position by

inserting a 2 mm thick washer between the chuck and the crankshaft end so that the
annular oil seal does not work in its initial position.

Mount the flywheel using new screws.Before

mounting lubricate with  FIXAMED M 28 the
screws.

Tighten the screws at a 5 daNm moment

using.

Mount the support with magnetic bottom  and

by means of a comparator check the axial runout
of the flywheel. The maximum admitted runout:
0,06 mm.

Mount the half bushings in the connecting rods

caps.

Lubricate the half bushings and the bearings

with oil and mount the connecting rod
caps.Tighten the screws  at a  4.5 daNm
moment using.

Check the free rotation of the mobile

assembly.

DISMOUNTING – MOUNTING


Content   ..  19  20  21  22   ..