Peugeot 307 CC (2007.5). Manual - part 3
!
31
MULTIFUNCTION DISPLAYS
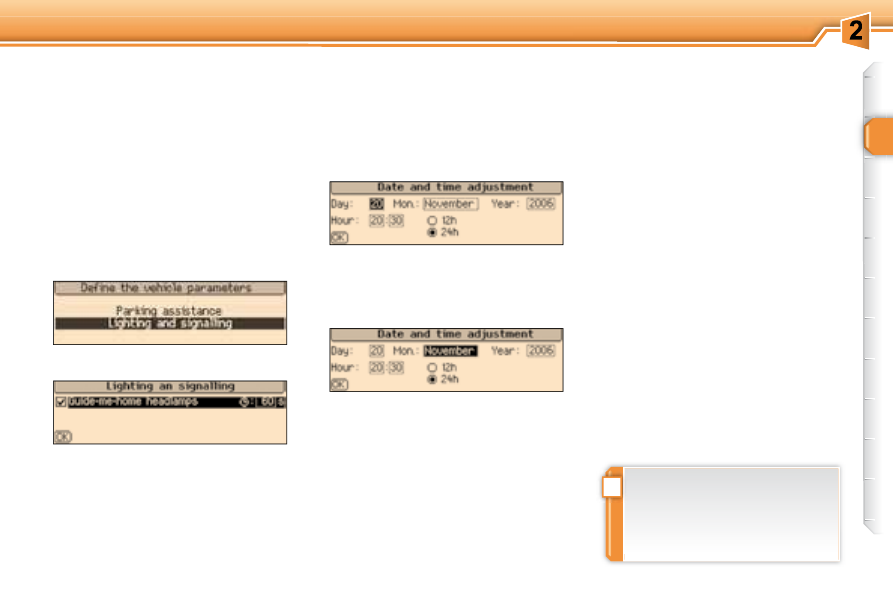
Dei ne the vehicle parameters
Once this menu has been selected,
you can activate or deactivate the fol-
lowing equipment:
- "follow-me-home" lighting and
duration (refer to the "Visibility"
section),
- parking assistance (refer to the
"Driving" section).
Selection of the language
Once this menu has been selected,
you can change the language used
on the display (Deutsch, English,
Espanol, Français, Italiano, Neder-
lands, Portugues, Portugues-Brasil).
Display coni guration
Once this menu has been selected,
you can access the following settings:
- brightness-video setting,
- date and time setting,
-
selection of the units.
Once you have selected a setting,
press the navigator.
Turn the navigator to change the val-
ue of the setting selected.
Press the navigator to record the
change and move on to the next set-
ting or press the "ESC" key to cancel.
Example:
"Duration of the "follow-
me-home" lighting"
For safety reasons, coni gura-
tion of the multifunction displays
by the driver must take place
when stationary.