Nissan Rogue Sport (2018 year). Manual - part 10
3-10
Pre-driving checks and adjustments
.
Any of the buttons on the key fob is
pushed. (Note: the PANIC button
must be pushed for more than 1
second.)
Battery indicator light
The battery indicator light
illuminates
when you push any button. If the light
does not illuminate, the battery is weak or
needs replacement. For information re-
garding replacement of a battery, see
“Key fob battery replacement” (P.8-21).
Setting hazard indicator and horn
mode
This vehicle is set in hazard indicator and
horn mode when you first receive the
vehicle.
In hazard indicator and horn mode, when
the LOCK
button
is pushed, the
hazard indicator flashes twice and the
horn chirps once. When the UNLOCK
button
is pushed, the hazard indicator
flashes once.
If the horn chirp is not necessary, you can
switch to hazard indicator only mode by
following the switching procedure.
In hazard indicator only mode, when the
LOCK
button is pushed, the hazard
indicator flashes twice. When the UNLOCK
button is pushed, neither the hazard
indicator nor the horn operates.
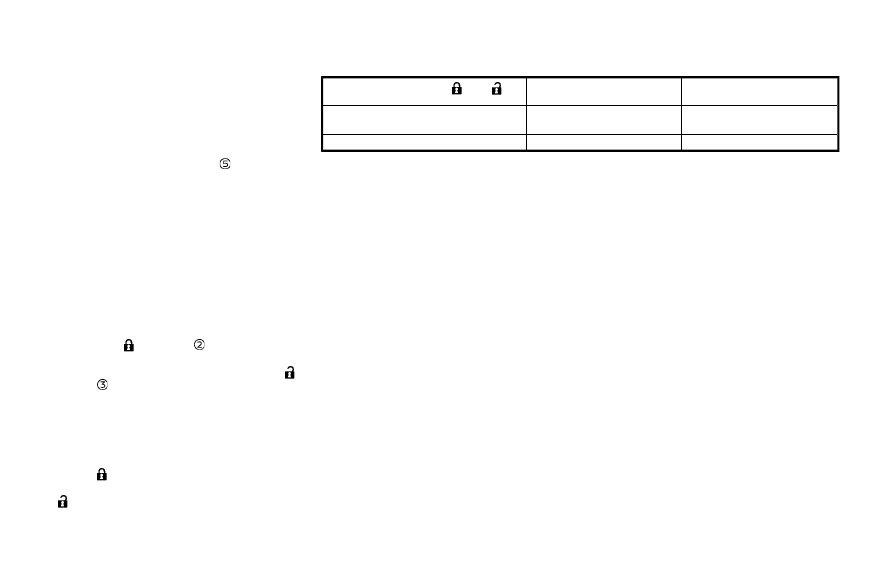
Mode (Pushing the
or
button)
DOOR LOCK
DOOR UNLOCK
Hazard indicator and horn mode
HAZARD - twice
HORN - once
HAZARD - once
HORN - none
Hazard indicator mode
HAZARD - twice
HAZARD - none