Content .. 1366 1367 1368 1369 ..
Nissan Qashqai (2007-2010). Manual - part 1368
LIGHTING & TURN SIGNAL SWITCH
EXL-177
< ON-VEHICLE REPAIR >
[XENON TYPE]
C
D
E
F
G
H
I
J
K
M
A
B
EXL
N
O
P
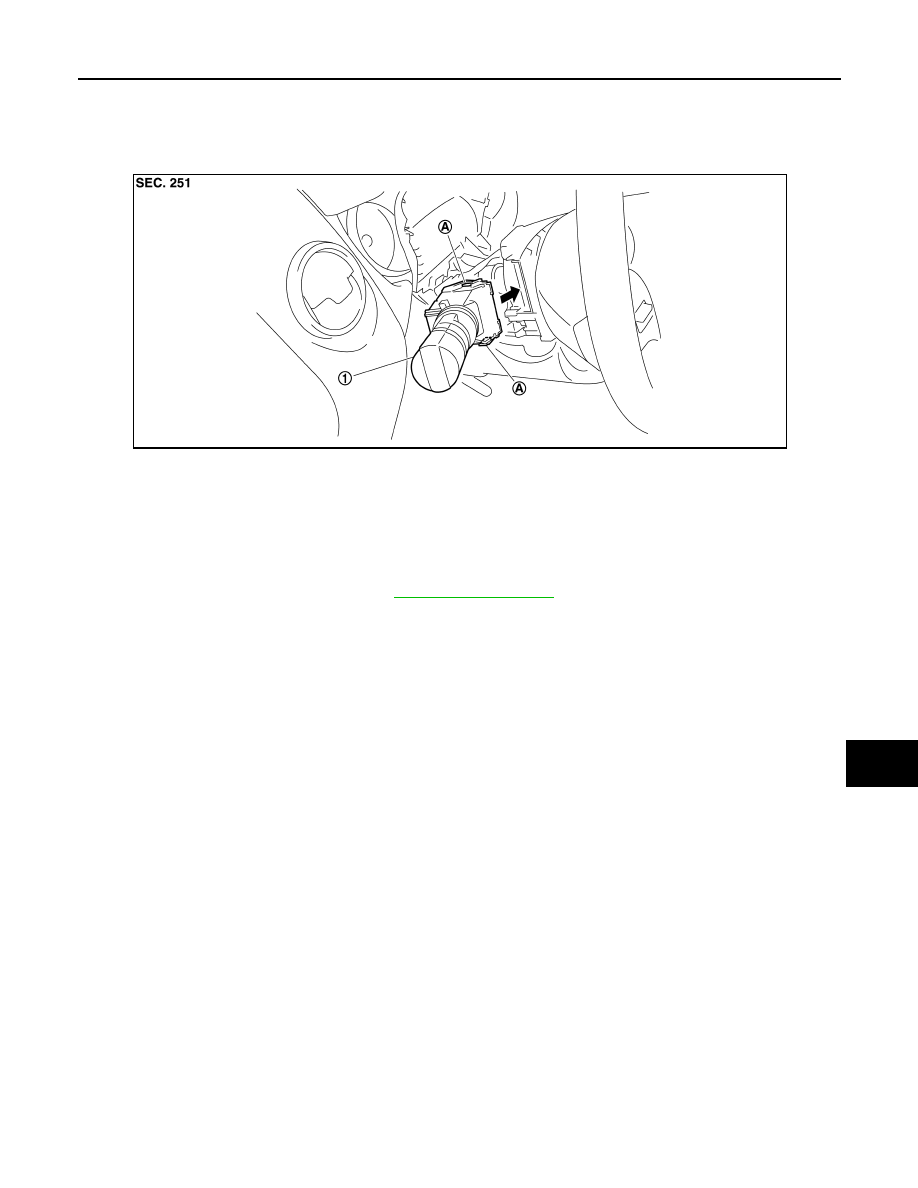
LIGHTING & TURN SIGNAL SWITCH
Exploded View
INFOID:0000000000955513
Removal and Installation
INFOID:0000000001082266
REMOVAL
1.
Remove steering column cover. Refer to
.
2.
While pressing pawls, pull the light & turn signal switch. And disconnect from the switch base.
INSTALLATION
Installation is the reverse order of removal.
1.
Light & turn signal switch
A.
Pawl
JSLIA0092ZZ