Nissan Qashqai (2007-2010). Manual - part 1155


  Index      Nissan     Nissan Qashqai - service and repair manual 2007 - 2010 year


Search            copyright infringement  


Content   ..  1153  1154  1155  1156   ..


Nissan Qashqai (2007-2010). Manual - part 1155


FRONT DOOR LOCK

DLK-699

< ON-VEHICLE REPAIR >

[WITHOUT I-KEY & SUPER LOCK]

C

D

E

F

G

H

I

J

L

M

A

B

DLK

N

O

P

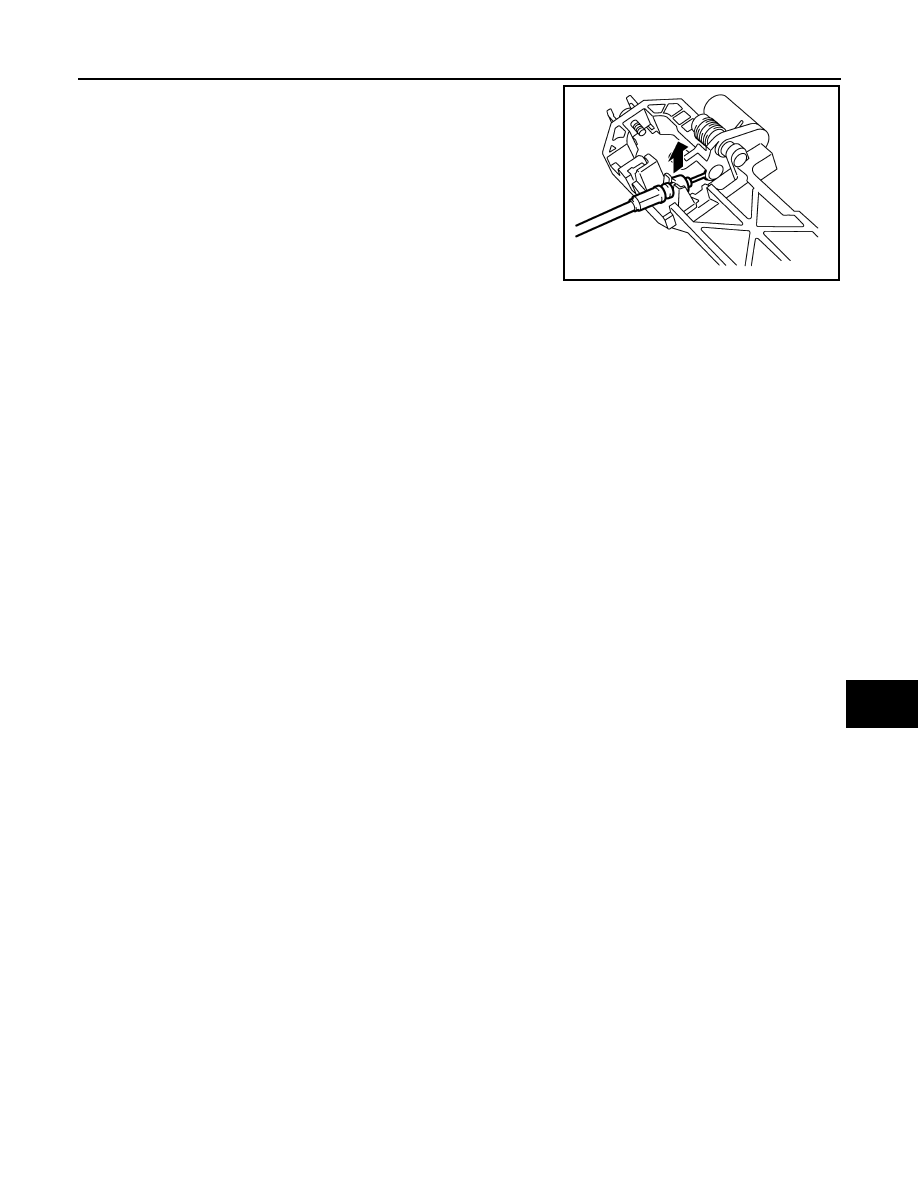
15. Reach in to separate the outside handle cable connection.

INSTALLATION

Install in the reverse order of removal.

CAUTION:

• To install each rod, rotate the rod holder until a click is felt.
• Check the door lock/unlock operation after installation.
• Check the door open/close operation after installation.

PIIB5815E

DLK-700

< ON-VEHICLE REPAIR >

[WITHOUT I-KEY & SUPER LOCK]

REAR DOOR LOCK

REAR DOOR LOCK

DOOR LOCK

DOOR LOCK : Exploded View

INFOID:0000000001098672

DOOR LOCK : Removal and Installation

INFOID:0000000001098673

REMOVAL

1.

Remove the rear door finisher. Refer to 

INT-13, "REAR DOOR FINISHER : Removal and Installation"

.

2.

Fully close the front door window.

3.

Remove the door sealing screen.

4.

Remove the inside handle mounting bolt, and then disconnect the inside handle knob cable and the lock
knob cable.

5.

Remove the door side grommet, and remove the door key cylin-
der assembly (driver side) and the outside handle escutcheon
(passenger side) mounting bolts from the grommet hole.

CAUTION:

Do not forcibly remove the bolts (TORX: T10).

1.

Outside handle

2.

Outside handle escutcheon

3.

Front gasket

4.

Rear gasket

5.

Outside handle bracket

6.

Inside handle

7.

Door lock assembly

Refer to 

GI-4, "Components"

 for symbols in the figure.

JMKIA0189GB

JMKIA0020ZZ

REAR DOOR LOCK

DLK-701

< ON-VEHICLE REPAIR >

[WITHOUT I-KEY & SUPER LOCK]

C

D

E

F

G

H

I

J

L

M

A

B

DLK

N

O

P

6.

While pulling the outside handle, remove the door key cylinder
assembly.

7.

While pulling the outside handle, slide toward rear of vehicle to
remove the outside handle.

8.

Remove the front gasket and the rear gasket.

9.

Remove the door lock assembly mounting bolts (TORX: T30).

10. Disconnect the door lock actuator connector, and then remove

the door lock assembly.

11. While pulling the outside handle bracket, slide toward rear of

vehicle to remove the outside handle bracket.

PIIB5809E

PIIB5810E

PIIB5811E

MIIB0633E

PIIB5814E

DLK-702

< ON-VEHICLE REPAIR >

[WITHOUT I-KEY & SUPER LOCK]

REAR DOOR LOCK

12. Reach in to separate the outside handle cable connection.

INSTALLATION

Install in the reverse order of removal.

CAUTION:

• To install each rod, rotate the rod holder until a click is felt.
• Check the door lock/unlock operation after installation. 
• Check the door open/close operation after installation. 

INSIDE HANDLE

INSIDE HANDLE : Exploded View

INFOID:0000000001098676

INSIDE HANDLE : Removal and Installation

INFOID:0000000001098677

REMOVAL

1.

Remove the rear door finisher. Refer to 

INT-13, "REAR DOOR FINISHER : Removal and Installation"

.

2.

Remove the door sealing screen.

PIIB5815E

1.

Outside handle

2.

Outside handle escutcheon

3.

Front gasket

4.

Rear gasket

5.

Outside handle bracket

6.

Inside handle

7.

Door lock assembly

Refer to 

GI-4, "Components"

 for symbols in the figure.

JMKIA0189GB


Content   ..  1153  1154  1155  1156   ..