Jaguar X-Type Sedan and Estate (Wagon). Service manual - part 474


  Index      Jaguar     Jaguar X-Type Sedan and Estate (Wagon) (2.0 L, 2.5 L and 3.0 L Gasoline; 2.0 L and 2.2 L, Diesel) - manual service 2001-2009 year


Search            


Content   ..  472  473  474  475   ..


Jaguar X-Type Sedan and Estate (Wagon). Service manual - part 474


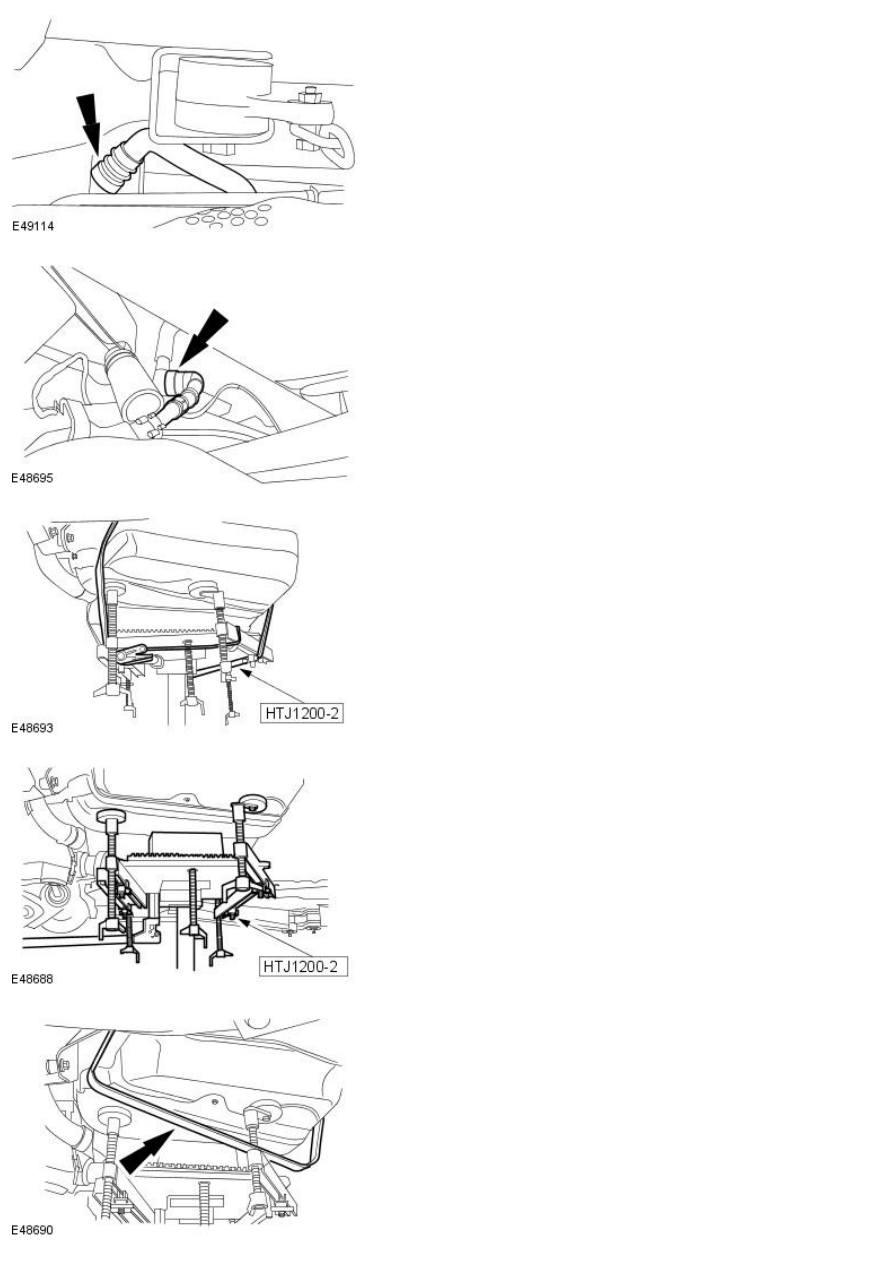
3. NOTE: Non federal market vehicles only.

Connect the evaporative emission canister hose to the evaporative
emission canister.

4. NOTE: Federal market vehicles only.

Connect the evaporative emission canister hose to the evaporative
emission canister.

5. NOTE: All vehicles

Remove the securing strap from the fuel tank and the special tool.

6. NOTE: Remove the blanking plugs from the fuel tank and fuel filler pipe
hose.

• NOTE: Make sure the fuel filler pipe hose is connected to the fuel tank
as it is installed.

Using the special tool, install the fuel tank.

7. NOTE: Right-hand shown, left-hand similar.

Install the fuel tank support straps.

8. Install the fuel tank support straps retaining bolts.

Tighten to 25 Nm.

9. Remove the special tool.

10. NOTE: Federal market vehicles only.

Attach the evaporative emission canister purge hose to the fuel tank
retaining clips.

11. NOTE: Federal market vehicles only.

Connect the evaporative emission canister close valve electrical
connector.

12. NOTE: All vehicles

• NOTE: Remove the blanking plugs.

Connect the fuel filter line quick release coupling.
For additional information, refer to: 

Quick Release Coupling - Push

Connect

 (310-00 Fuel System - General Information, General

Procedures).

13. Connect the evaporative emission canister purge hose quick release

coupling.
For additional information, refer to: 

Quick Release Coupling - Push

Connect

 (310-00 Fuel System - General Information, General

Procedures).

14. NOTE: Make sure the fuel tank filler pipe to fuel tank hose retaining
clip is correctly orientated.

Tighten the fuel tank filler pipe to fuel tank hose retaining clip.

Tighten to 3 Nm.

15. Using the special tool, support the axle assembly.

16. Detach the securing strap from the rear towing eye thread.

17. Remove the securing strap from the axle assembly.

Discard the axle assembly rear retaining bolt.

18. Remove and discard the axle assembly washer.

19. Install a new axle assembly washer.

20. Remove the chain from the axle assembly front support bracket.

21. Using the special tool, install the axle assembly.

22. Loosely install the axle assembly front retaining bolts.


Content   ..  472  473  474  475   ..