Jaguar X-Type Sedan and Estate (Wagon). Service manual - part 255


  Index      Jaguar     Jaguar X-Type Sedan and Estate (Wagon) (2.0 L, 2.5 L and 3.0 L Gasoline; 2.0 L and 2.2 L, Diesel) - manual service 2001-2009 year


Search            


Content   ..  253  254  255  256   ..


Jaguar X-Type Sedan and Estate (Wagon). Service manual - part 255


Published: 11-May-2011

Engine Cooling - 2.0L Duratorq-TDCi/2.2L Duratorq-TDCi (110kW/150PS) - Puma -
Cooling System Draining and Vacuum Filling

General Procedures

WARNING: To avoid having scalding hot coolant or steam blowing out of the cooling system, use extreme care when removing the

coolant pressure cap from a hot cooling system. Wait until the engine has cooled, then wrap a thick cloth around the coolant pressure cap
and turn it slowly until the pressure begins to release. Step back while the pressure is released from the system. When certain all the
pressure has been released (still with a cloth) turn and remove the coolant pressure cap from the coolant expansion tank. Failure to follow
these instructions may result in personal injury.

• CAUTIONS:

 The engine cooling system must be maintained with the correct concentration and type of anti-freeze solution to prevent corrosion

and frost damage. Failure to follow this instruction may result in damage to the vehicle.

 Engine coolant will damage the paint finished surfaces. If spilt, immediately remove the coolant and clean the area with water.

 Do not run the engine without first making sure the engine cooling fans operate. Start the engine, set air conditioning (A/C) to

maximum cold, set the blower motor to maximum and observe that the engine cooling fan operates. Failure to follow this instruction may
cause damage to the engine.

1. Set the heater controls to maximum HOT.

2. 

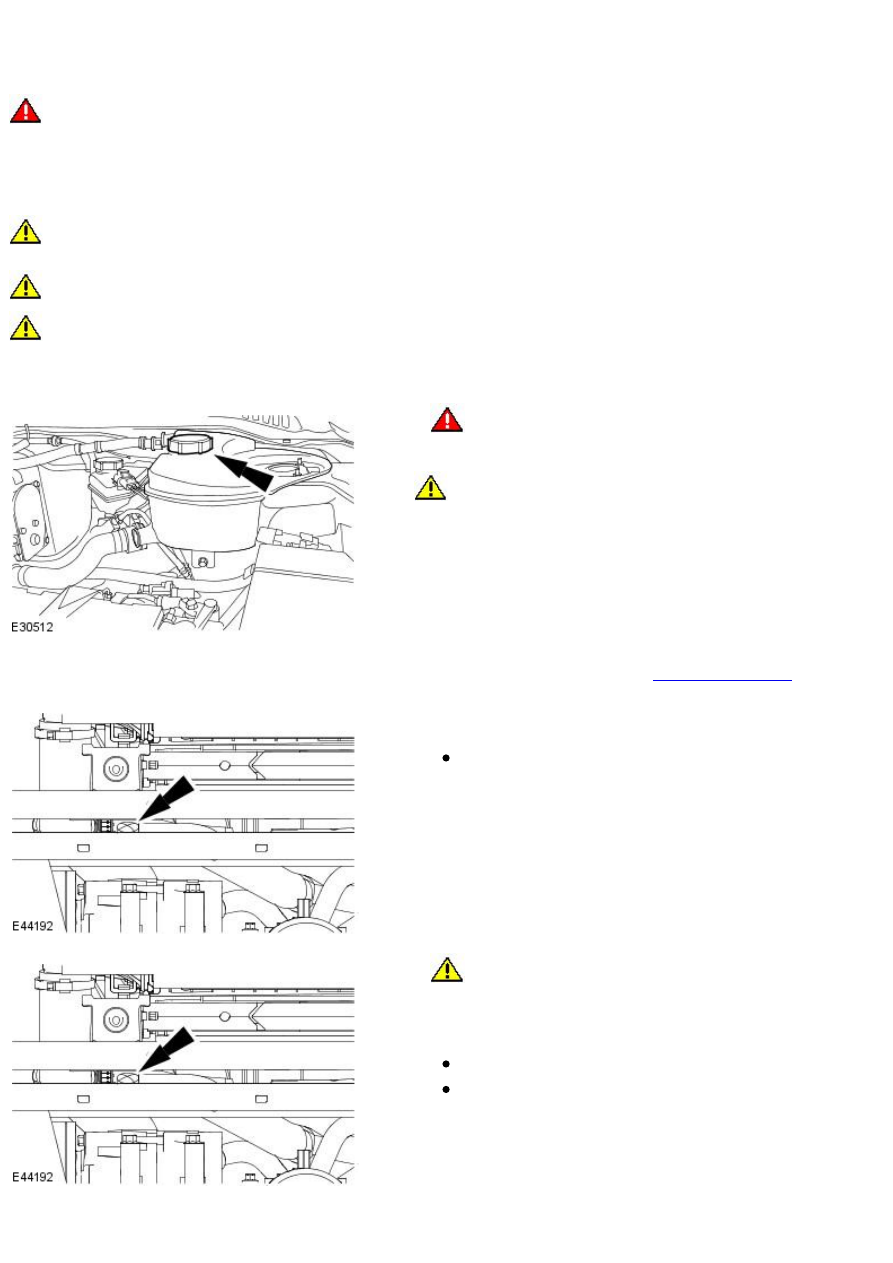
W ARNING: Relieve the cooling system pressure by unscrewing the

coolant pressure cap. Failure to follow this instruction may result in
personal injury.

CAUTION: Do not RUN the engine with the coolant pressure cap

removed. Failure to follow this instruction may cause damage to the
engine.

Remove the coolant expansion tank pressure cap.

3. Remove the radiator splash shield.

For additional information, refer to: 

Radiator Splash Shield

 (501-02 Front

End Body Panels, Removal and Installation).

4. NOTE: Remove and discard the radiator drain plug O-ring seal.

Remove the coolant drain plug.

Drain the coolant into a suitable container.

5. 

CAUTION: Do not over tighten the drain plug. Failure to follow this

instruction may result in damage to the vehicle.

• NOTE: Install a new O-ring seal.

Install the coolant drain plug.

Tighten to 1 Nm.

Remove the drain tray.

6. Lower the vehicle.

7. Install the cooling system vacuum refill adaptor to the expansion tank.

8. Install the vacuum filler gauge to the cooling system vacuum refill

adaptor.

9. Install the venturi tube assembly to the vacuum filler gauge.

10. NOTE: Make sure that both valves are in the closed position on the
vacuum filler gauge assembly.

• NOTE: The coolant vacuum fill tool needs an air pressure of 6 to 8 bar
(87 to 116 psi) to operate correctly.

• NOTE: Small diameter or long airlines may restrict airflow to the coolant
vacuum fill tool.

Connect a regulated compressed air supply to the venturi tube
assembly.

11. Open the air supply valve.

12. NOTE: Make sure the coolant supply hose is positioned into a
container of fifty percent mixture of Jaguar Premium Cooling System Fluid
or equivalent, meeting Jaguar specification WSS M97B44-D and fifty
percent water. Make sure no air can enter the coolant supply hose.

Open the coolant supply valve for 2 seconds to prime the coolant supply
hose.

13. Apply air pressure progressively until the arrow on the vacuum filler

gauge reaches the green segment.

14. Close the air supply valve.

15. Allow one minute to check the vacuum is held.

Disconnect the air supply.

16. NOTE: Close the coolant supply valve when the coolant expansion tank
MAX mark is reached or coolant movement has ceased.

Open the coolant supply valve and allow the coolant to be drawn into
the system.

17. Remove the vacuum filler gauge and cooling system vacuum refill

adaptor assembly.

18. Install the coolant expansion tank pressure cap.

19. Set the heating system to the COLD position.

20. Start the engine, allow the engine to idle for a two minutes.

21. NOTE: During this procedure the thermostat should open.

Raise the engine speed to 3000 RPM and maintain until the engine
cooling fan operates.

22. Allow the engine to idle for a further five minutes.

23. Switch the engine OFF and allow to cool.

24. 

W ARNING: To avoid having scalding hot coolant or steam blow

out of the cooling system, use extreme care when removing the coolant
pressure cap from a hot cooling system. Wait until the engine has cooled,
then wrap a thick cloth around the coolant pressure cap and turn it slowly
until the pressure begins to release. Step back while the pressure is
released from the system. W hen certain all the pressure has been
released (still with a cloth) turn and remove the coolant pressure cap from
the coolant expansion tank. Failure to follow these instructions may result
in personal injury.

After two minutes, release the cooling system pressure.

Remove the coolant expansion tank pressure cap.

25. Check and top-up the coolant if required.

26. Raise the vehicle.

27. Check for coolant leaks.

28. Install the radiator splash shield.

For additional information, refer to: 

Radiator Splash Shield

 (501-02 Front

End Body Panels, Removal and Installation).


Content   ..  253  254  255  256   ..