Honda Ridgeline (2019 year). Manual - part 13
192
uu
Climate Control System
*
u
Rear Climate Control System
Co
ntrols
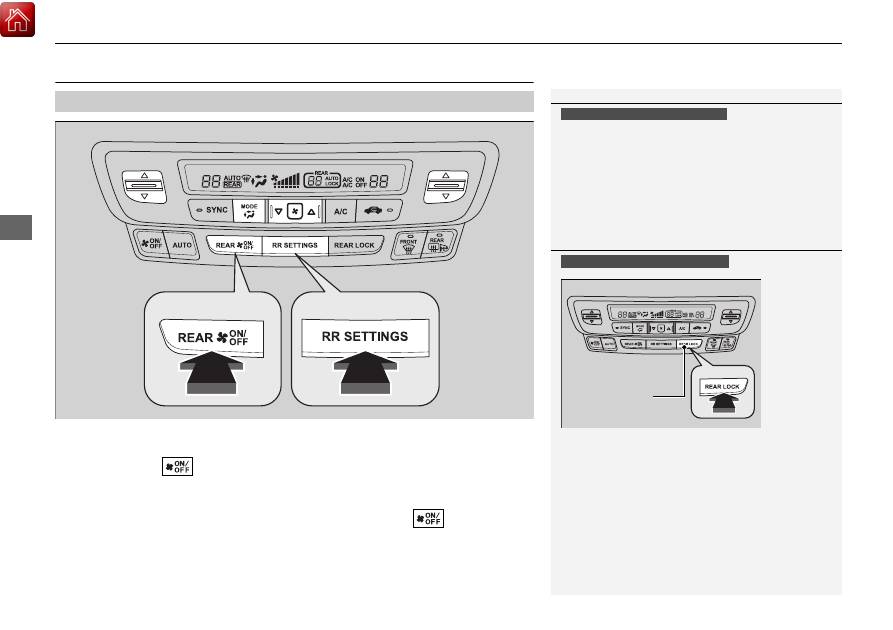
Rear Climate Control System
Use the system when the engine is running and the climate control system is
operating.
1. Press the REAR
(Rear On/Off) button.
2. Press the RR SETTINGS button.
u
The system adjusts the rear climate control system.
3. To turn off the rear climate control system, press the REAR
(Rear
On/Off)
button.
■
Using the Rear Climate Control System From the Front Panel
1
LOCK appears on the rear control panel while the
rear lock is on.
If the rear lock is on while in SYNC mode, the rear
control panel is disabled. LOCK SYNC appears on the
rear control panel.
Models with REAR LOCK button
1
Using the Rear Climate Control System From the Front Panel
Press the REAR LOCK button to turn the rear lock
mode on and off.
While the rear lock mode is on, the rear control panel
is disabled.
u
REAR LOCK appears on the display.
Models with REAR LOCK button
REAR LOCK
Button
(Rear On/Off) Button
RR SETTINGS Button