Ford E-150 (2011 year). Manual - part 13


  Index      Ford     Ford E-150 - service manual 2011 year in english


Search            


Content   ..  11  12  13  14   ..


Ford E-150 (2011 year). Manual - part 13


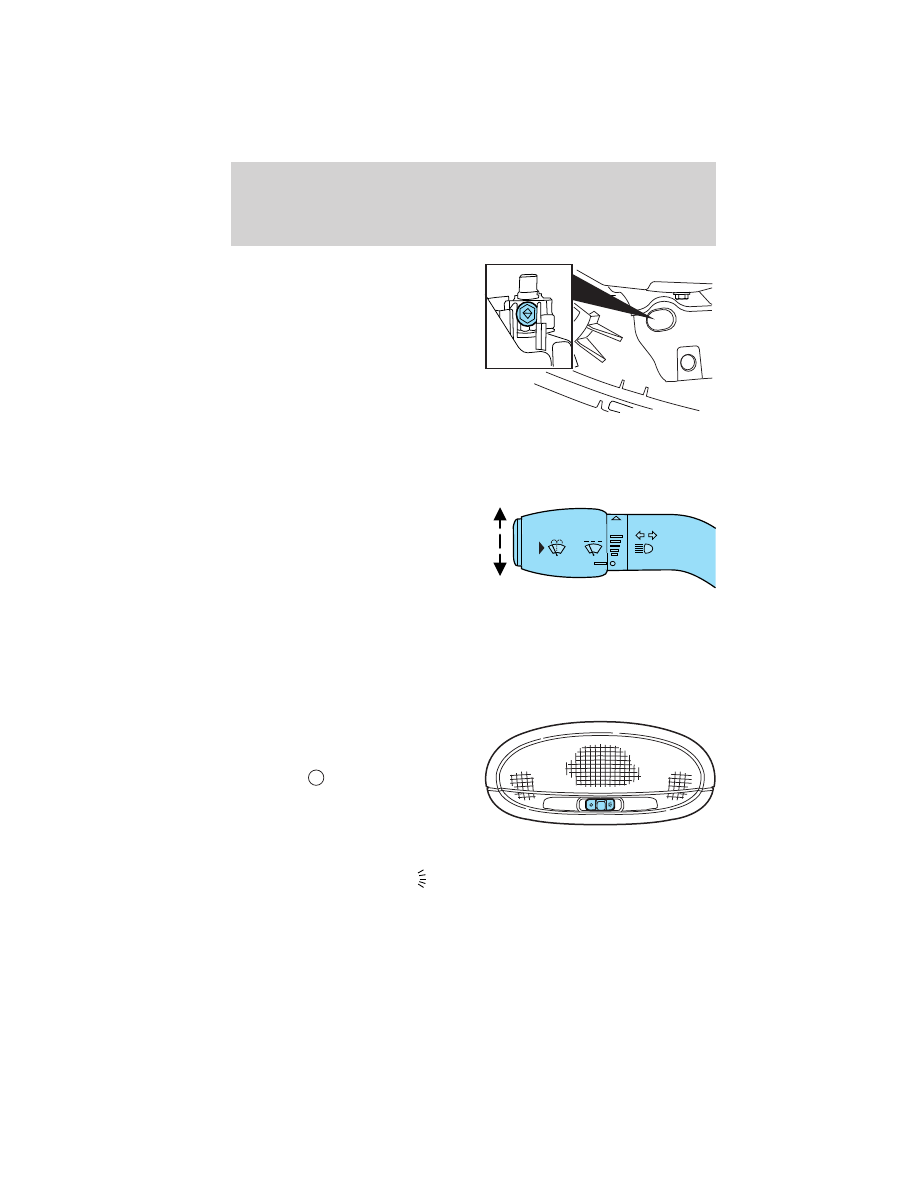
5. Locate the vertical adjuster on
the back of each headlamp, then use
a long Phillips #2 screwdriver to
turn the adjuster either
counterclockwise (to adjust down)
or clockwise (to adjust up) aligning
the upper edge of the light pattern
up to the horizontal line.

6. Repeat step 3–5 for the other
headlamp.

7. Close the hood and turn off the lamps.

TURN SIGNAL CONTROL
• Push down to activate the left

turn signal.

• Push up to activate the right turn

signal.

INTERIOR LAMPS

Dome lamps with rear headliner (if equipped)

Dome lamps equipped with an on/off
control will light when:
• doors are closed and the control

is in the

position

• control is in the middle position

and any door is open

• headlamp control is rotated fully

counterclockwise

When the control is in the

D

position, it will not illuminate when you

open the doors or fully rotate the headlamp control.

Lights

54

Cargo lamps

The dome portion of the cargo
lamp, the center light, can be turned
on when the headlamp control is
rotated fully counterclockwise or
when any door is opened.

With the ignition key in the accessory or on position, the rear lamp can
be turned on or off by sliding the control.

Front and rear courtesy/reading
lamps (if equipped)

The dome portion of the lamp, the
center light, can be turned on when
the headlamp control is rotated fully
counterclockwise or when any door
is opened.

The reading lamp portion, the two outer lights, can only be toggled on
and off at the lamp.

BULB REPLACEMENT

Lamp assembly condensation

Exterior lamps are vented to accommodate normal changes in pressure.
Condensation can be a natural by-product of this design. When moist air
enters the lamp assembly through the vents, there is a possibility that
condensation can occur when the temperature is cold. When normal
condensation occurs, a thin film of mist can form on the interior of the
lens. The thin mist eventually clears and exits through the vents during
normal operation. Clearing time may take as long as 48 hours under dry
weather conditions.

Examples of acceptable condensation are:
• Presence of thin mist (no streaks, drip marks or droplets)
• Fine mist covers less than 50% of the lens

Lights

55

Examples of unacceptable moisture (usually caused by a lamp water
leak) are:
• Water puddle inside the lamp
• Large water droplets, drip marks or streaks present on the interior of

the lens

Take your vehicle to a dealer for service if any of the above conditions of
unacceptable moisture are present.

Using the right bulbs

Replacement bulbs are specified in the chart below. Headlamp bulbs
must be marked with an authorized “D.O.T.” for North America and an
“E” for Europe to ensure lamp performance, light brightness and pattern
and safe visibility. The correct bulbs will not damage the lamp assembly
or void the lamp assembly warranty and will provide quality bulb burn
time.

Function

Number

of bulbs

Trade number

Headlamps (aerodynamic)

2

H13/9008

Headlamps (sealed beam)

2

H6054

Park lamp with aerodynamic

2

3157A or 3157AK

Park lamp with sealed beam

2

3157K

Side marker with aerodynamic

2

168

Side marker with sealed beam

2

194

Back-up lamps

2

3156K or 3156

License plate lamp

1

168

Stop/tail/turn/side marker lamp

2

3157K

High-mount brake lamp

2

912

Cargo lamp

1

211-2

Dome lamp (standard)

1

912

Map/reading lamp

2

211-2

All replacement bulbs are clear in color except where noted.

To replace all instrument panel lights - see your authorized dealer

Lights

56

Replacing exterior bulbs

Check the operation of all bulbs frequently.

Replacing headlamp bulbs (aerodynamic)

1. Make sure the headlamp switch is in the off position, then open the
hood.

2. Remove the three screws from
the headlamp assembly and pull the
assembly straight out.

3. Disconnect the electrical
connector by squeezing the release
tab and pushing the connector
forward, then pulling it rearward.

4. Remove the bulb assembly by
turning it counterclockwise and
pulling it straight out.

WARNING: Handle a halogen headlamp bulb carefully and keep
out of children’s reach. Grasp the bulb only by its plastic base

and do not touch the glass. The oil from your hand could cause the
bulb to break the next time the headlamps are operated.

Note: If the bulb is accidentally touched, it should be cleaned with
alcohol before being used.

To install the new bulb, follow the removal procedures in reverse order.

Replacing headlamps (sealed beam)

1. Make sure the headlamp switch is in the off position, then open the
hood.

Lights

57


Content   ..  11  12  13  14   ..