Daewoo Nubira. Service manual - part 204


  Index      Daewoo     Daewoo Nubira - service and repair manual


Search            


Content   ..  202  203  204  205   ..


Daewoo Nubira. Service manual - part 204


INTERIOR TRIM  9G – 17

DAEWOO V–121 BL4

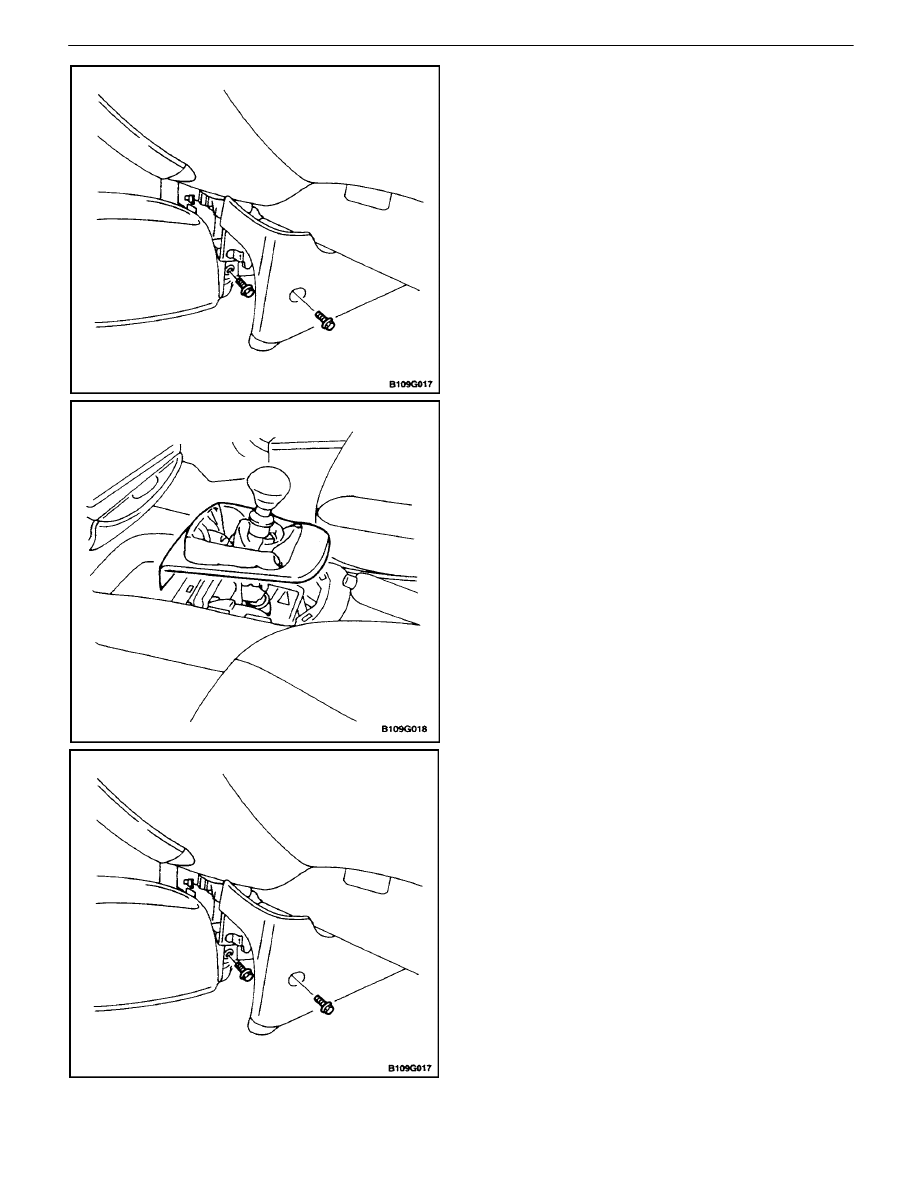
3.  Remove the bolts and the floor console forward trim

panels.

4.  Remove the bolts securing the front portion of the

floor console.

5.  Remove the shift lever boot, (if equipped).
6.  Disconnect the power mirror control electrical con-

nector, if equipped.

7.  Remove the the floor console.

Installation Procedure

1.  Install the floor console.
2.  Connect the power mirror control electrical connec-

tor, if equipped.

Notice : Dissimilar metals in direct contact with each other
may corrode rapidly. Make sure to use the correct fasten-
ers to prevent premature corrosion.

3.  Install the bolts to secure the front portion of the

floor console.

Tighten

Tighten the floor console bolts to 4 N

S

m (35 lb–in).

4.  Install the floor console forward trim panels with the

bolts.

Tighten

Tighten the floor console forward trim panel bolts to
4 N

S

m (35 lb–in).

9G – 18

I

INTERIOR TRIM

DAEWOO V–121 BL4

5.  Install the gear shift lever boot, (if equipped).

6.  Install the bolts to secure the rear portion of the

floor console.

Tighten

Tighten the floor console bolts to 4 N

S

m (35 lb–in).

7.  Connect the negative battery cable.

A–PILLAR TRIM PANEL

Removal Procedure

1.  Pry off the A–pillar trim panel.

INTERIOR TRIM  9G – 19

DAEWOO V–121 BL4

Installation Procedure

1.  Install the A–pillar trim panel.

C–PILLAR TRIM PANEL
(NOTCHBACK)

(Notchback Shown, Wagon Similar)

Removal Procedure

1.  Reposition the plastic cap to reveal the C–pillar

seat belt anchor bolt.

2.  Remove the bolt and the C–pillar seat belt anchor.

3.  Remove the C–pillar trim panel from the body.

9G – 20

I

INTERIOR TRIM

DAEWOO V–121 BL4

Installation Procedure

1.  Install the C–pillar seat belt anchor with the bolt.

Notice : Dissimilar metals in direct contact with each other
may corrode rapidly. Make sure to use the correct fasten-
ers to prevent premature corrosion.

2.  Install the C–pillar seat belt anchor with the bolt.

Tighten

Tighten the seat belt anchor bolt to 35 N

S

m (26 lb–ft).

3.  Install the plastic cap to its original position.

C–PILLAR TRIM PANEL
(HATCHBACK)

Removal Procedure

1.  Reposition the plastic cap to reveal the C–pillar

seat belt anchor bolt.

2.  Remove the bolt and the C–pillar seat belt anchor.
3.  Remove the rear speaker access cover.
4.  Remove the screws and the C–pillar trim panel.

Installation Procedure

Notice :  Dissimilar metals in direct contact with each other
may corrode rapidly. Make sure to use the correct fasten-
ers to prevent premature corrosion.

1.  Install the C–pillar trim panel with the screws.

Tighten

Tighten the trim panel screws to 2 N

S

m (18 lb–in).

2.  Install the rear speaker access cover.
3.  Install the C–pillar seat belt anchor with the bolt.

Tighten

Tighten the seat belt anchor bolt to 35 N

S

m (26 lb–ft).

4.  Install the plastic cap to its original position.


Content   ..  202  203  204  205   ..