Snowmobile Arctic Cat (2002 year). Instruction - part 122
8-46
6. Compress the brake lever repeatedly to ensure
correct positioning of the brake pads; then release.
NOTE: When new brake pads are installed, a bur-
nishing process is required. Drive the snowmobile
slowly and compress the brake lever repeatedly
until the pads just start to heat up; then allow them
to cool down. This process stabilizes the pad
material and extends the life of the pads.
REMOVING CALIPER
1. Slide a piece of flexible tubing over the ball of the
bleeder valve and direct the other end into a
container.
0730-434
2. Open the bleeder valve and compress the brake
lever several times to drain the reservoir of fluid.
3. Remove the brake hose from the caliper. Use an
absorbent towel to collect any remaining brake
fluid.
AF262D
4. Remove the retaining pin securing the brake pads
to the caliper assembly; then remove the brake
pads.
AF255D
5. Loosen the upper cap screws securing the caliper
halves; then remove the two cap screws, lock
washers, and flat washers securing the brake
caliper to the chain case.
AF261D
6. Remove the caliper assembly from the engine
compartment.
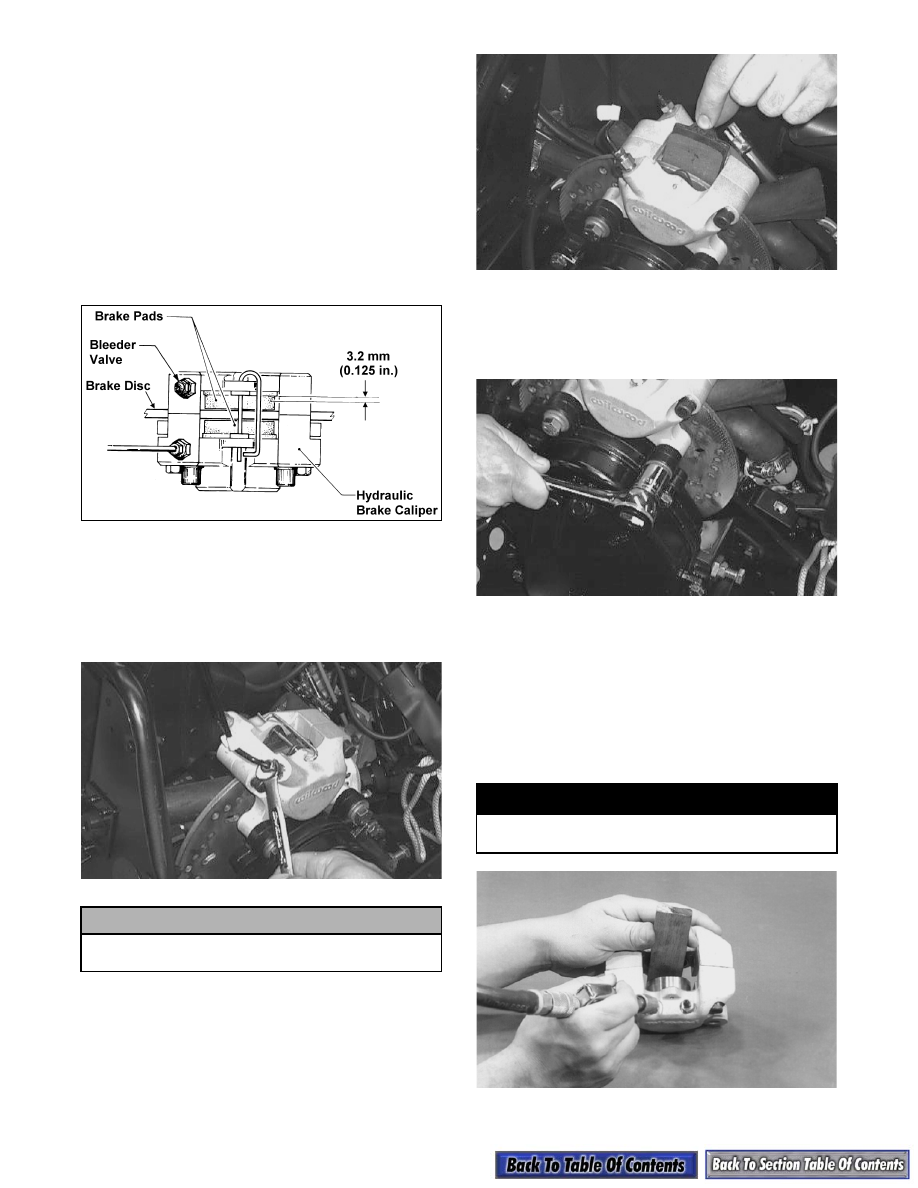
DISASSEMBLING
1. Position a piece of wood between the pistons.
Using low-pressure compressed air, blow into the
caliper brake hose fitting to remove the brake
pistons.
AF248
! CAUTION
Brake fluid is highly corrosive. Do not spill brake
fluid on any surface of the snowmobile.
! WARNING
Always wear safety glasses when using com-
pressed air.