Snowmobile Polaris 600 IQ Racer (2015 year). Instruction - part 21
87
MAINTENANCE
Track Maintenance
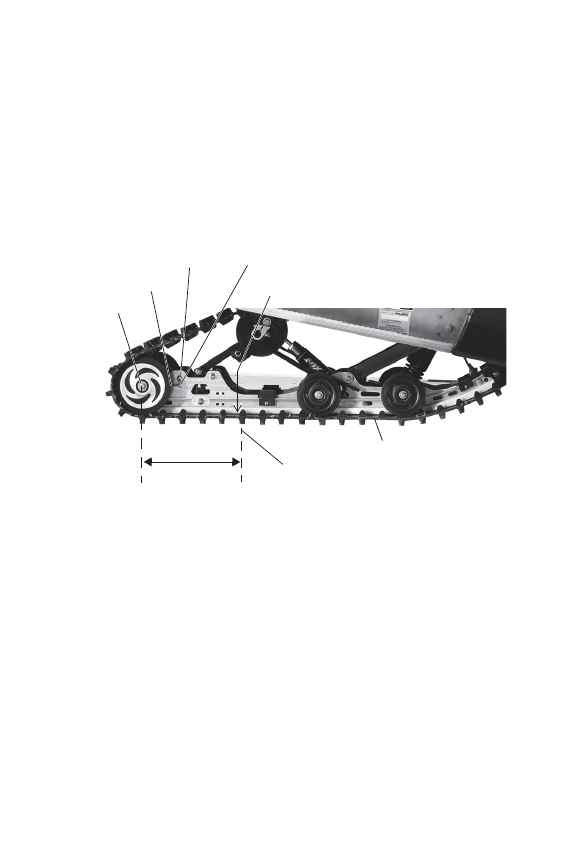
Track Tension
5. Check for specified slack between the wear surface of the track clip
and the plastic slider. Refer to the Track Tension Data Chart on page
86.
If the track needs adjustment:
6. Loosen the rear idler shaft bolt.
7. Loosen the locknuts.
8. Tighten or loosen the track adjusting screws to provide equal
adjustment on both sides of the track.
NOTICE: Make sure the idler wheels do not contact the cross shaft.
9. Repeat the measurement on the other side of the track.
TIP: Check more frequently when the machine is new.
10. Start the machine and slowly rotate the track at least five
revolutions. Let the track come to a stop (do not apply brakes).
11. Check track alignment (see page 88) and adjust as necessary.
12. Tighten the locknuts.
13. Tighten the idler shaft bolts.
14. Torque idler shaft bolts to 35 ft. lbs. (47.5 Nm).
p
Measure Slack
Lock Nut
Adjusting
Screw
Track
10 lbs. (4.54 kg)
Shaft Bolt
16 inches
(40 cm)
Cross
Shaft