Snowmobile Polaris 600 IQ Racer (2015 year). Instruction - part 8
35
THE PERFECT FIT
Rear Suspension Adjustments
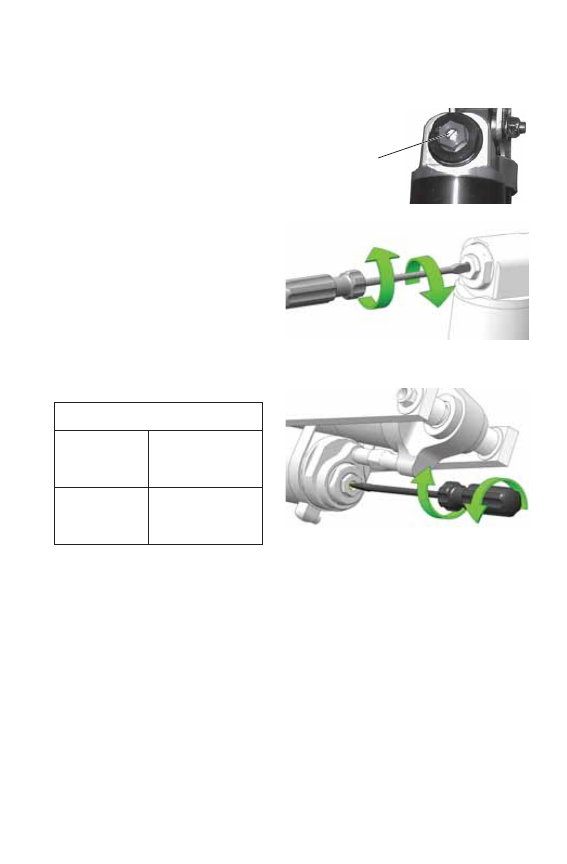
Compression Damping
Low Compression Damping
Force Adjustment
Increase the low compression
damping force by turning the
adjuster clockwise to increase the
stiffness.
Decrease the low compression
damping force by turning the
adjuster counter-clockwise to
increase the softness.
The maximum adjustment for this
adjuster is the fully turned in
position. The minimum
adjustment is 28 clicks out from
the maximum position.
CAUTION! Do not turn the adjuster
past the minimum or maximum
adjustment. The adjuster may be
damaged.
Standard Position
Front Track
suspension
low speed
adjuster
14 clicks out
from fully turned
in position
Rear Track
suspension
low speed
adjuster
10 clicks out
from fully turned
in position
Stiffer
Softer
Front Track Suspension
Rear Track Suspension
Softer
Stiffer
Adjuster